9 Magical DIY Fairy Garden Ideas For Your Outdoor Wonderland
A survey by the National Gardening Association found that more than 35 million American households engage in some form of container or specialty gardening each year, and fairy gardens have quietly become one of the fastest-growing segments of that trend. There is something deeply satisfying about building a world in miniature, one where every pebble is a cobblestone and every sprig of moss is a forest. If you have been looking for a creative outdoor project that blends gardening, storytelling, and hands-on craft, these 9 Magical DIY Fairy Garden Ideas For Your Outdoor Wonderland will give you everything you need to get started.
Disclosure: This post contains affiliate links. As an Amazon Associate, we earn from qualifying purchases, and at no extra cost to you.
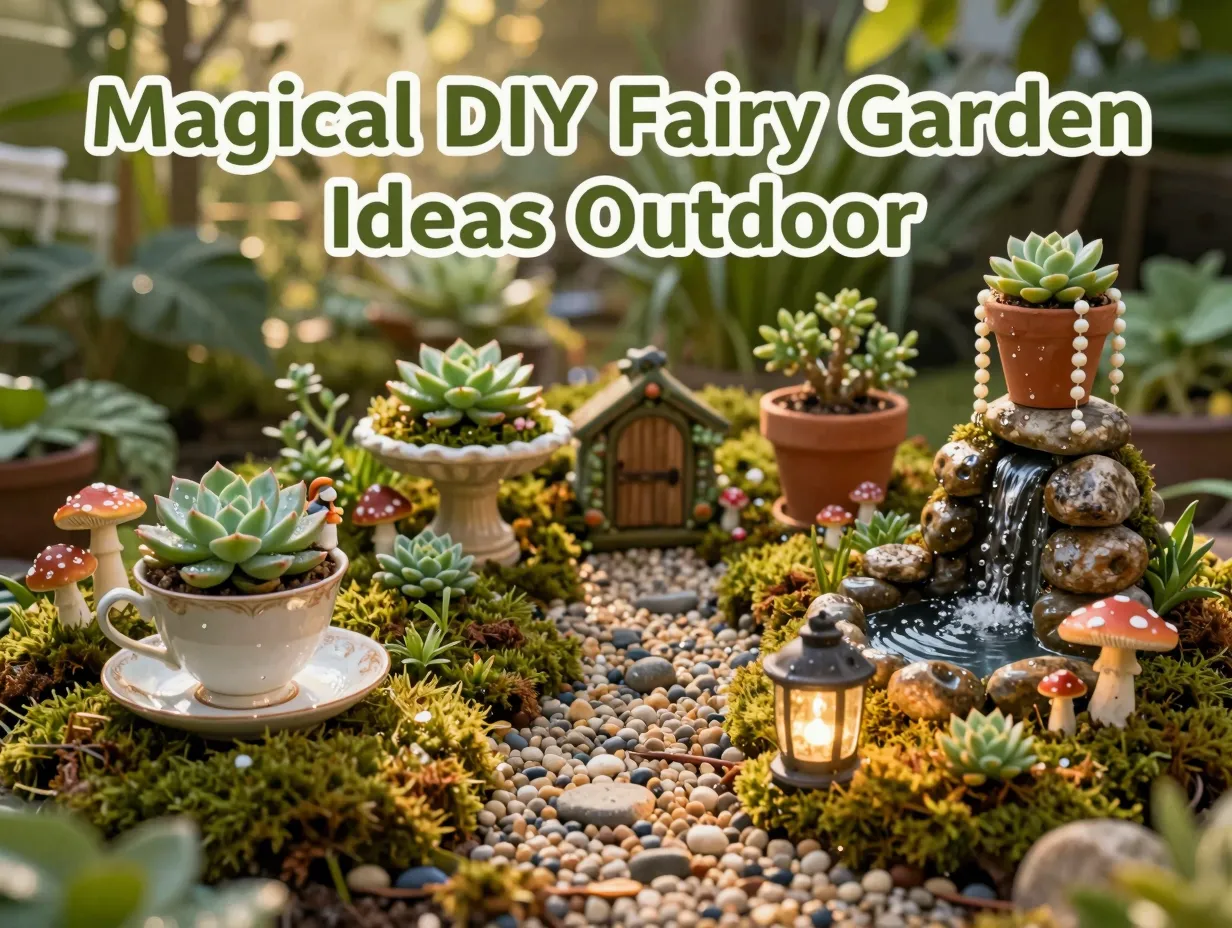
Whether you have a sprawling backyard or a modest balcony, the ideas in this guide are designed to fit real spaces and real budgets. I have tested several of these myself, and I can tell you from experience that the process is just as rewarding as the finished result.
Key Takeaways
- Fairy gardens can be built from repurposed household items like teacups, lanterns, and old wheelbarrows, keeping costs low.
- Choosing the right plants, especially low-maintenance succulents and moss, is the single biggest factor in long-term success.
- Scale and proportion matter: mixing oversized and undersized elements breaks the illusion, so plan your miniature scenes carefully.
- Water features and lighting elevate a basic fairy garden into a truly immersive outdoor experience.
- These 9 Magical DIY Fairy Garden Ideas For Your Outdoor Wonderland work for gardeners at every skill level, from complete beginners to seasoned horticulturists.
What Makes a Fairy Garden Truly Magical
Before diving into the individual ideas, it helps to understand what separates a forgettable cluster of plastic figurines from a genuinely enchanting miniature landscape. The best fairy gardens share three qualities: a clear sense of place, living plant material that evolves over time, and thoughtful use of texture and scale.
Sense of place means your garden tells a story. Is this a woodland cottage? A coastal castle? A high-rise terracotta tower? Every element should support that narrative.
Living plants are non-negotiable. Artificial greenery looks flat and lifeless within a few seasons. Succulents, moss, creeping thyme, and dwarf varieties of common herbs all thrive in miniature environments and reward you with genuine growth.
Scale discipline is the most commonly overlooked principle. A figurine that is two inches tall should not stand next to a flower that is twelve inches tall. Spend time sourcing true miniature plant varieties and appropriately sized accessories before you begin building.
With those principles in mind, let us walk through each of the 9 Magical DIY Fairy Garden Ideas For Your Outdoor Wonderland.
The 9 Magical DIY Fairy Garden Ideas For Your Outdoor Wonderland, Explored
1. Teacup Fairy Garden
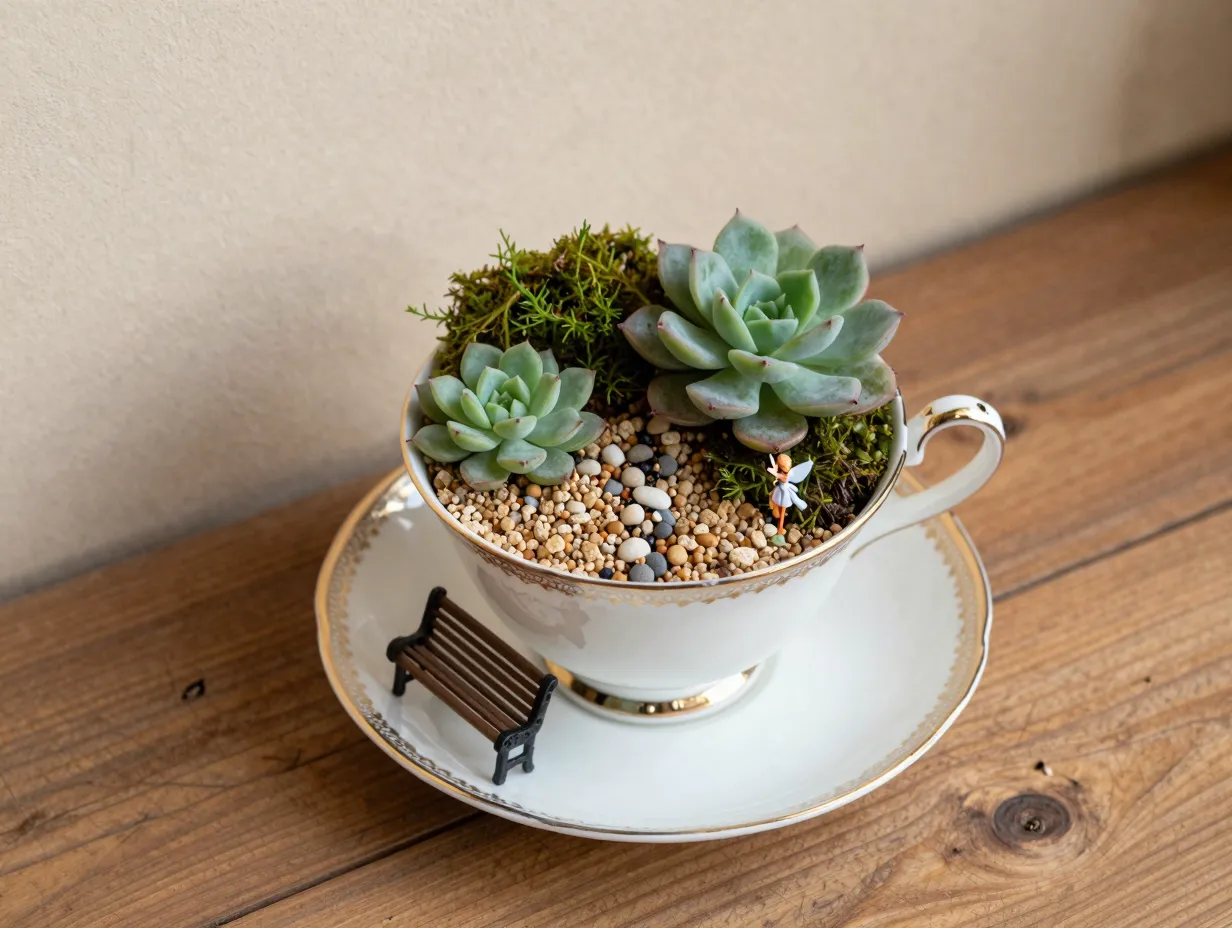
The teacup fairy garden is the perfect entry point for anyone new to the craft. Find a vintage teacup and saucer at a thrift store, the older and more ornate, the better. Fill the cup with a thin layer of gravel for drainage, then add a well-draining potting mix [1].
Plant one or two small succulents, a pinch of sheet moss, and tuck in a single tiny fairy figurine. The saucer becomes the garden’s “yard,” where you can arrange a pebble path or a miniature bench.
Why it works: The teacup’s curved walls create a natural frame that draws the eye inward, making even the simplest arrangement look intentional and curated. This design also works beautifully as an indoor centerpiece during winter months.
Pro tip: Seal any drainage holes in the saucer with waterproof silicone if you plan to keep this outdoors, so the saucer holds a thin layer of water that the succulents can draw from during dry spells.
2. Wheelbarrow Fairy Village
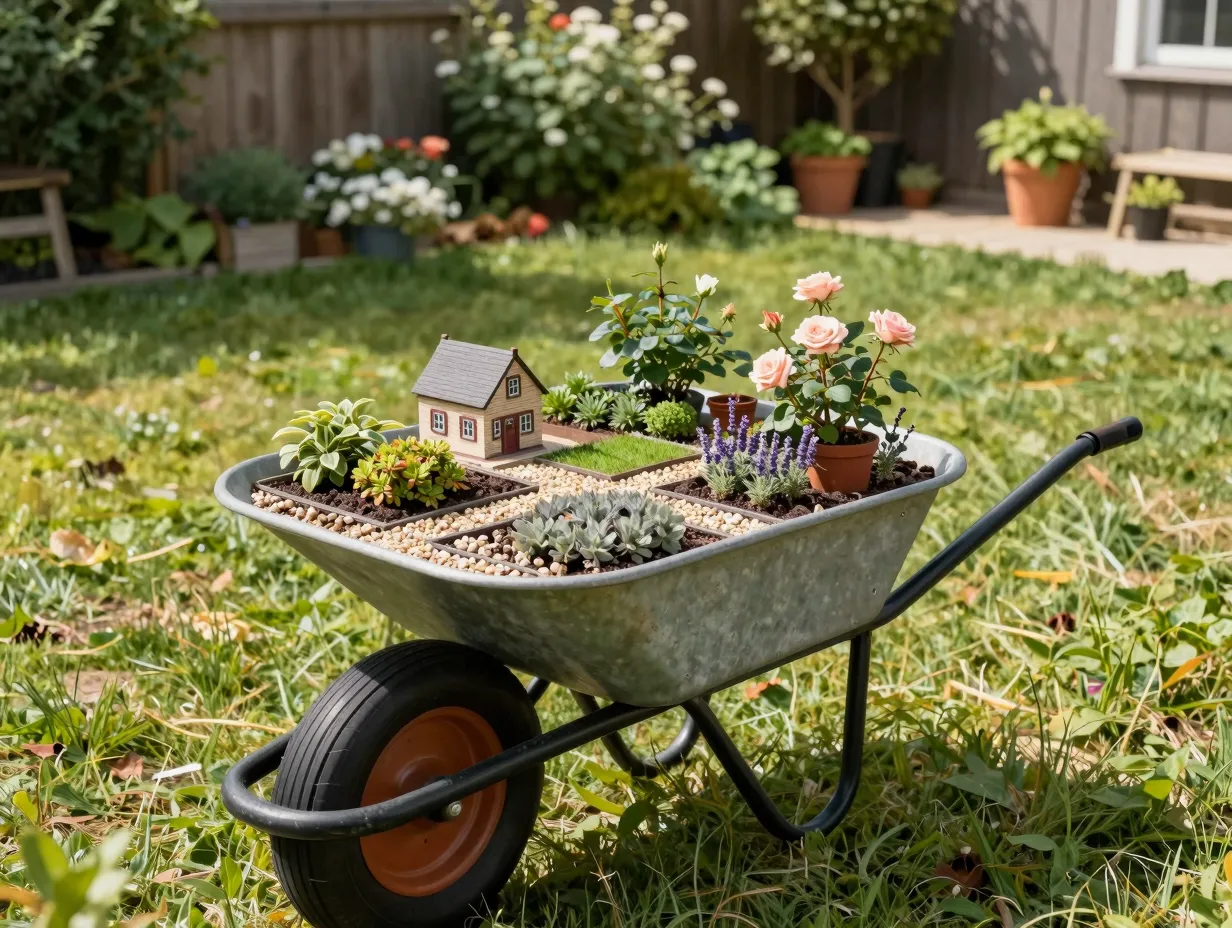
An old wheelbarrow that has seen better days is one of the most versatile containers you can use for a fairy garden. The deep basin holds enough soil for a genuine village scene, and the wheel means you can reposition it as the seasons change [1].
Layer the bottom with landscape fabric and coarse gravel, then fill with a rich potting mix. Divide the surface into zones: a cottage area, a garden plot, and a small open square. Use pea gravel to define the paths between zones.
What to plant: Creeping thyme works beautifully as a lawn substitute. Miniature roses or dwarf lavender add color and fragrance. Low-growing sedums fill gaps without overwhelming the scene.
“The wheelbarrow fairy village is the one design that truly earns the word ‘village’, it has enough room to tell a multi-chapter story.”
Because the wheelbarrow is mobile, you can bring it closer to a seating area when you want guests to admire it, then move it back to a sunnier spot for the plants’ benefit. This flexibility makes it one of the most practical designs on this list.
3. Birdbath Fairy Oasis
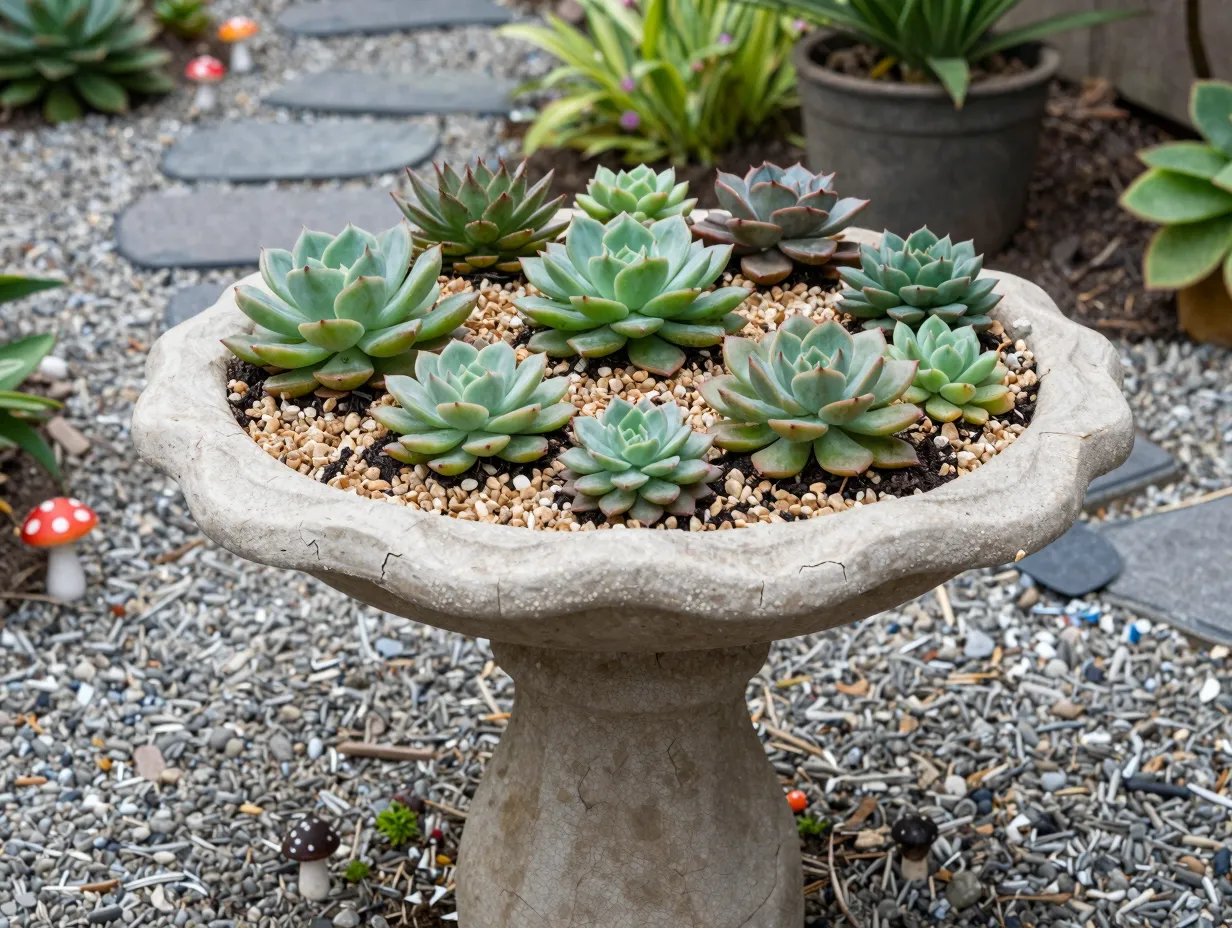
A cracked or outdated birdbath no longer useful for birds is ideal raw material for a raised fairy garden. The pedestal lifts the scene to eye level, which makes it far easier to appreciate the fine details you have worked so hard to create [2].
Fill the basin with a thin gravel layer, then add a succulent-friendly mix. Arrange succulents of varying heights, taller varieties at the center, ground-hugging types at the rim. Add a gravel path that winds through the basin, and place tiny mushroom figurines at intervals along it.
Materials list:
- One birdbath (ceramic, concrete, or resin)
- Coarse gravel or perlite for drainage
- Succulent potting mix
- Three to five succulent varieties
- Miniature mushroom figurines
- Fine pea gravel for the path
The elevated position also protects your miniature accessories from being disturbed by ground-level foot traffic or curious pets.
4. Terracotta Pot Tower
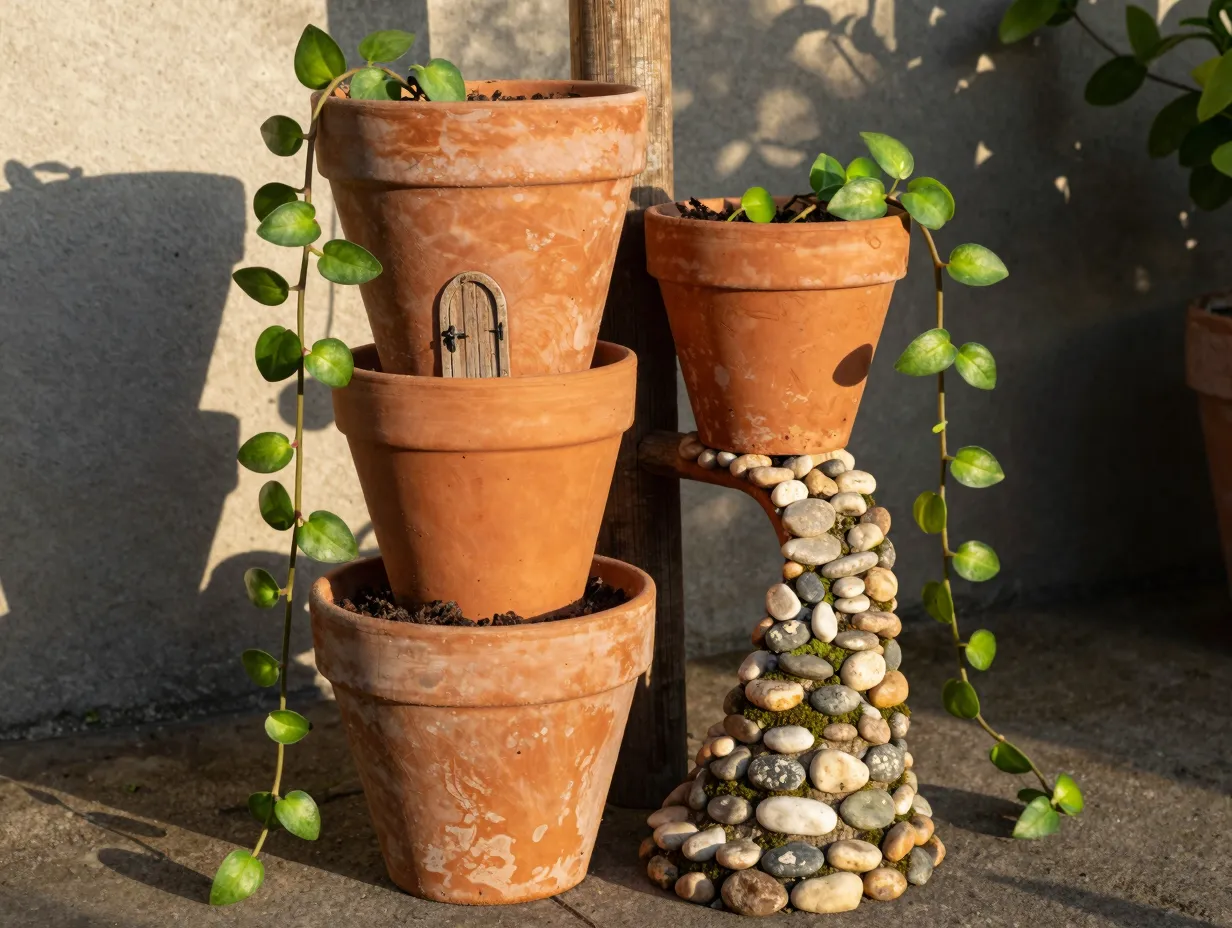
Stacking terracotta pots at playful, offset angles creates a tiered structure that gives your fairy garden genuine vertical dimension [2]. This design is especially useful in small spaces where horizontal spread is limited.
Start with a large pot as the base, fill it partially with soil, then set a medium pot on top at a slight angle so it leans to one side. Repeat with a smaller pot on top of that. Secure each pot with a wooden dowel run through the drainage holes for stability.
Plant trailing varieties like string of pearls or creeping jenny so they cascade over the edges, softening the hard lines of the clay. Place a tiny fairy door on the side of the largest pot, and add a winding pebble staircase that spirals up the outside.
Design note: Terracotta ages beautifully. Within a season or two, the pots will develop a natural patina of moss and mineral staining that makes the whole structure look as though it has been there for decades.
5. Lantern Fairy Garden
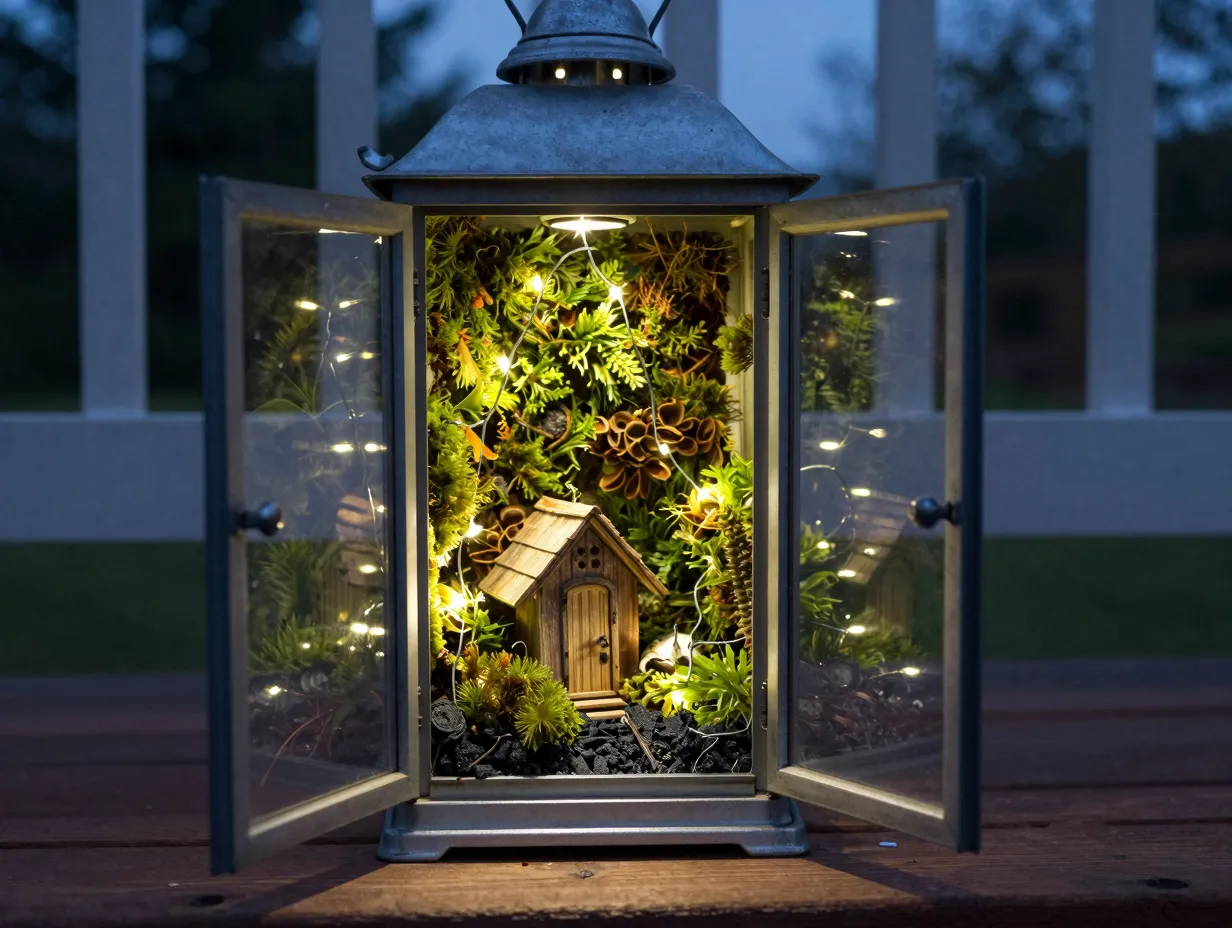
An old metal or glass lantern, the kind sold at craft stores or found at estate sales, becomes a self-contained fairy world with very little effort [2]. The glass panels protect delicate moss and tiny accessories from wind and heavy rain, making this one of the most weather-resilient designs on the list.
Open the lantern door and line the base with a thin layer of activated charcoal (to prevent mold), then add potting mix. Press sheet moss against the interior walls. Nestle a tiny cottage or fairy door into the moss, then add a strand of battery-powered micro LED lights.
At night, the lantern glows from within, casting soft light across the surrounding garden. I set one of these on my back porch steps last summer, and it became the most commented-on feature every time we had guests over.
Best plants for lantern gardens:
- Sheet moss (Hypnum or Mnium species)
- Miniature ferns
- Baby tears (Soleirolia soleirolii)
- Air plants (Tillandsia), which need no soil at all
6. Tree Stump Fairy Home
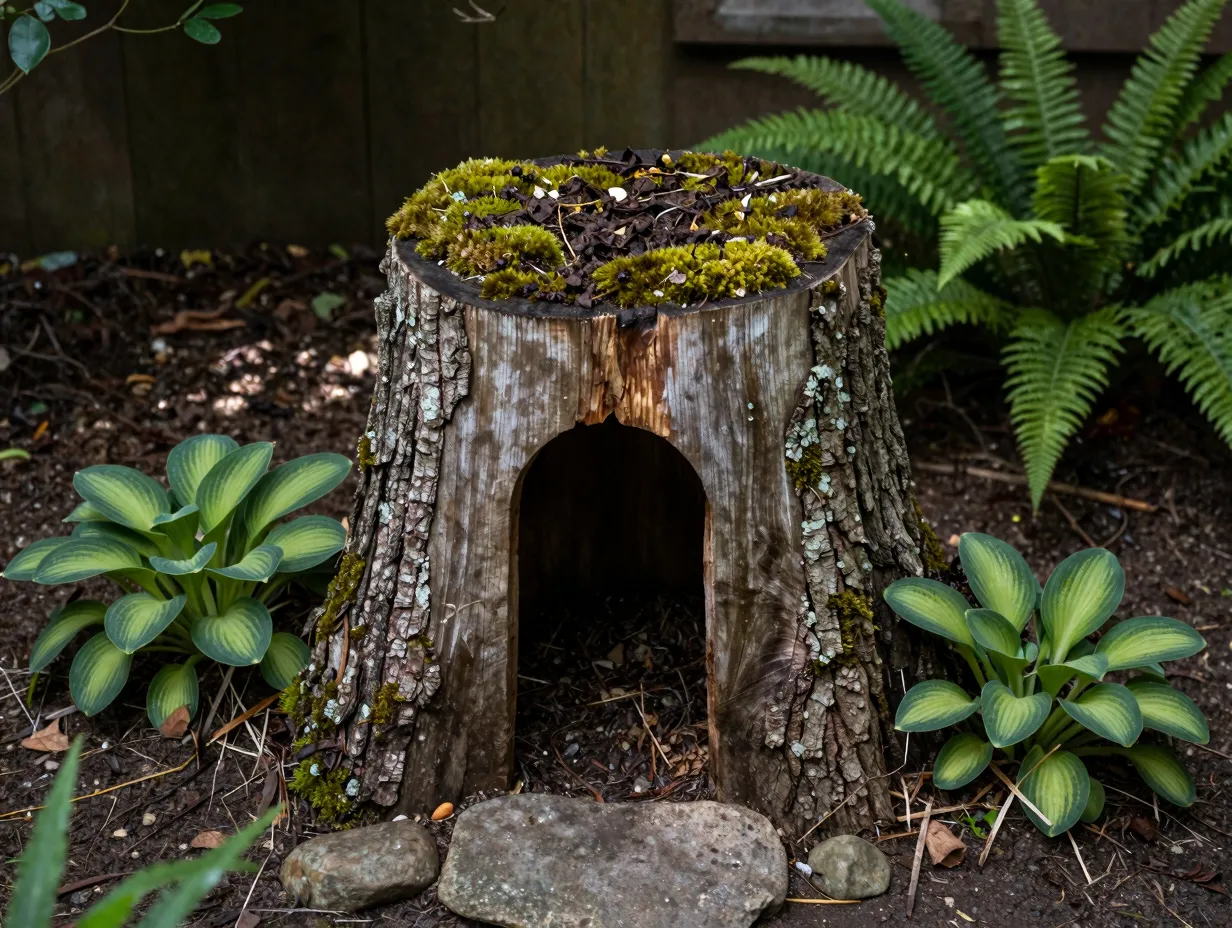
If you have a tree stump in your yard, you already have the most atmospheric fairy garden base imaginable. A hollow stump or a wide, flat-topped log becomes a rustic woodland fairy cottage with minimal intervention [2].
Carve or drill a small arched opening into the side of the stump to serve as a fairy door. Fill the top surface with potting mix and plant low-growing moss, miniature hostas, or woodland ferns. Arrange small stones to form a front path leading away from the door.
The natural wood grain, bark texture, and any existing moss or lichen all contribute to the illusion without any effort on your part. This is the most “found” design on the list, nature does most of the work.
Longevity tip: Treat the interior of the stump with a wood preservative before adding soil, or line it with heavy plastic sheeting. This slows the natural decomposition process and extends the life of your fairy home by several years.
7. Rock Pathway Garden
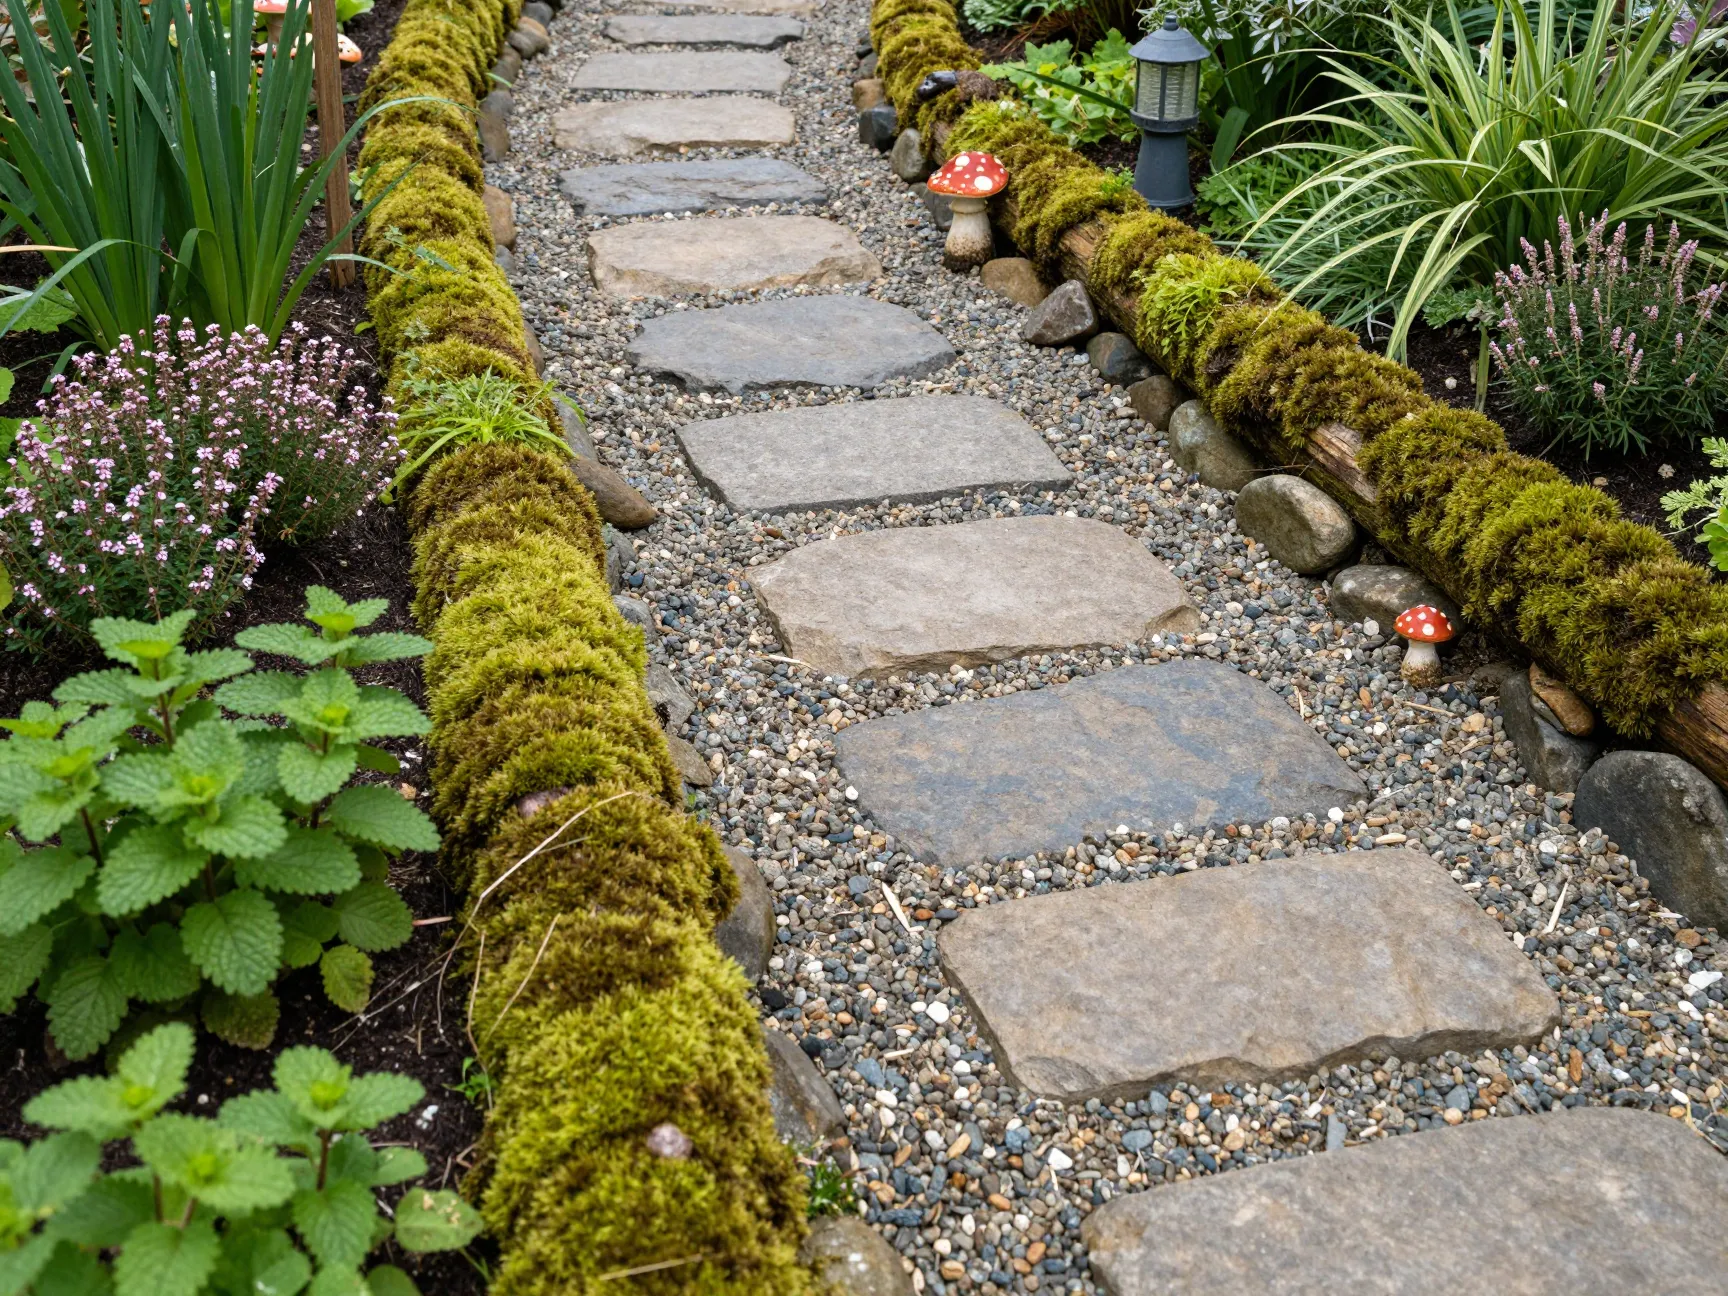
This design focuses on the journey rather than the destination. Line a moss-covered log or a raised garden bed edge with a winding pebble path, then populate the sides of the path with fairy animals, toadstools, and low-growing plants [2].
The path itself is the hero element. Use three sizes of pebble, large flat stepping stones, medium river rocks for edging, and fine gravel fill, to create a realistic sense of scale. Place a tiny lantern post at each curve in the path.
Suggested plant companions for the path:
- Corsican mint (Mentha requienii), forms a dense, fragrant mat
- Miniature brass buttons (Leptinella squalida), tiny ferny foliage
- Wooly thyme, soft texture, handles light foot traffic
- Irish moss, bright green, cushion-like growth
The rock pathway garden works especially well as a transitional element connecting two larger fairy garden features, such as a tree stump home and a birdbath oasis.
8. Mini Waterfall Oasis
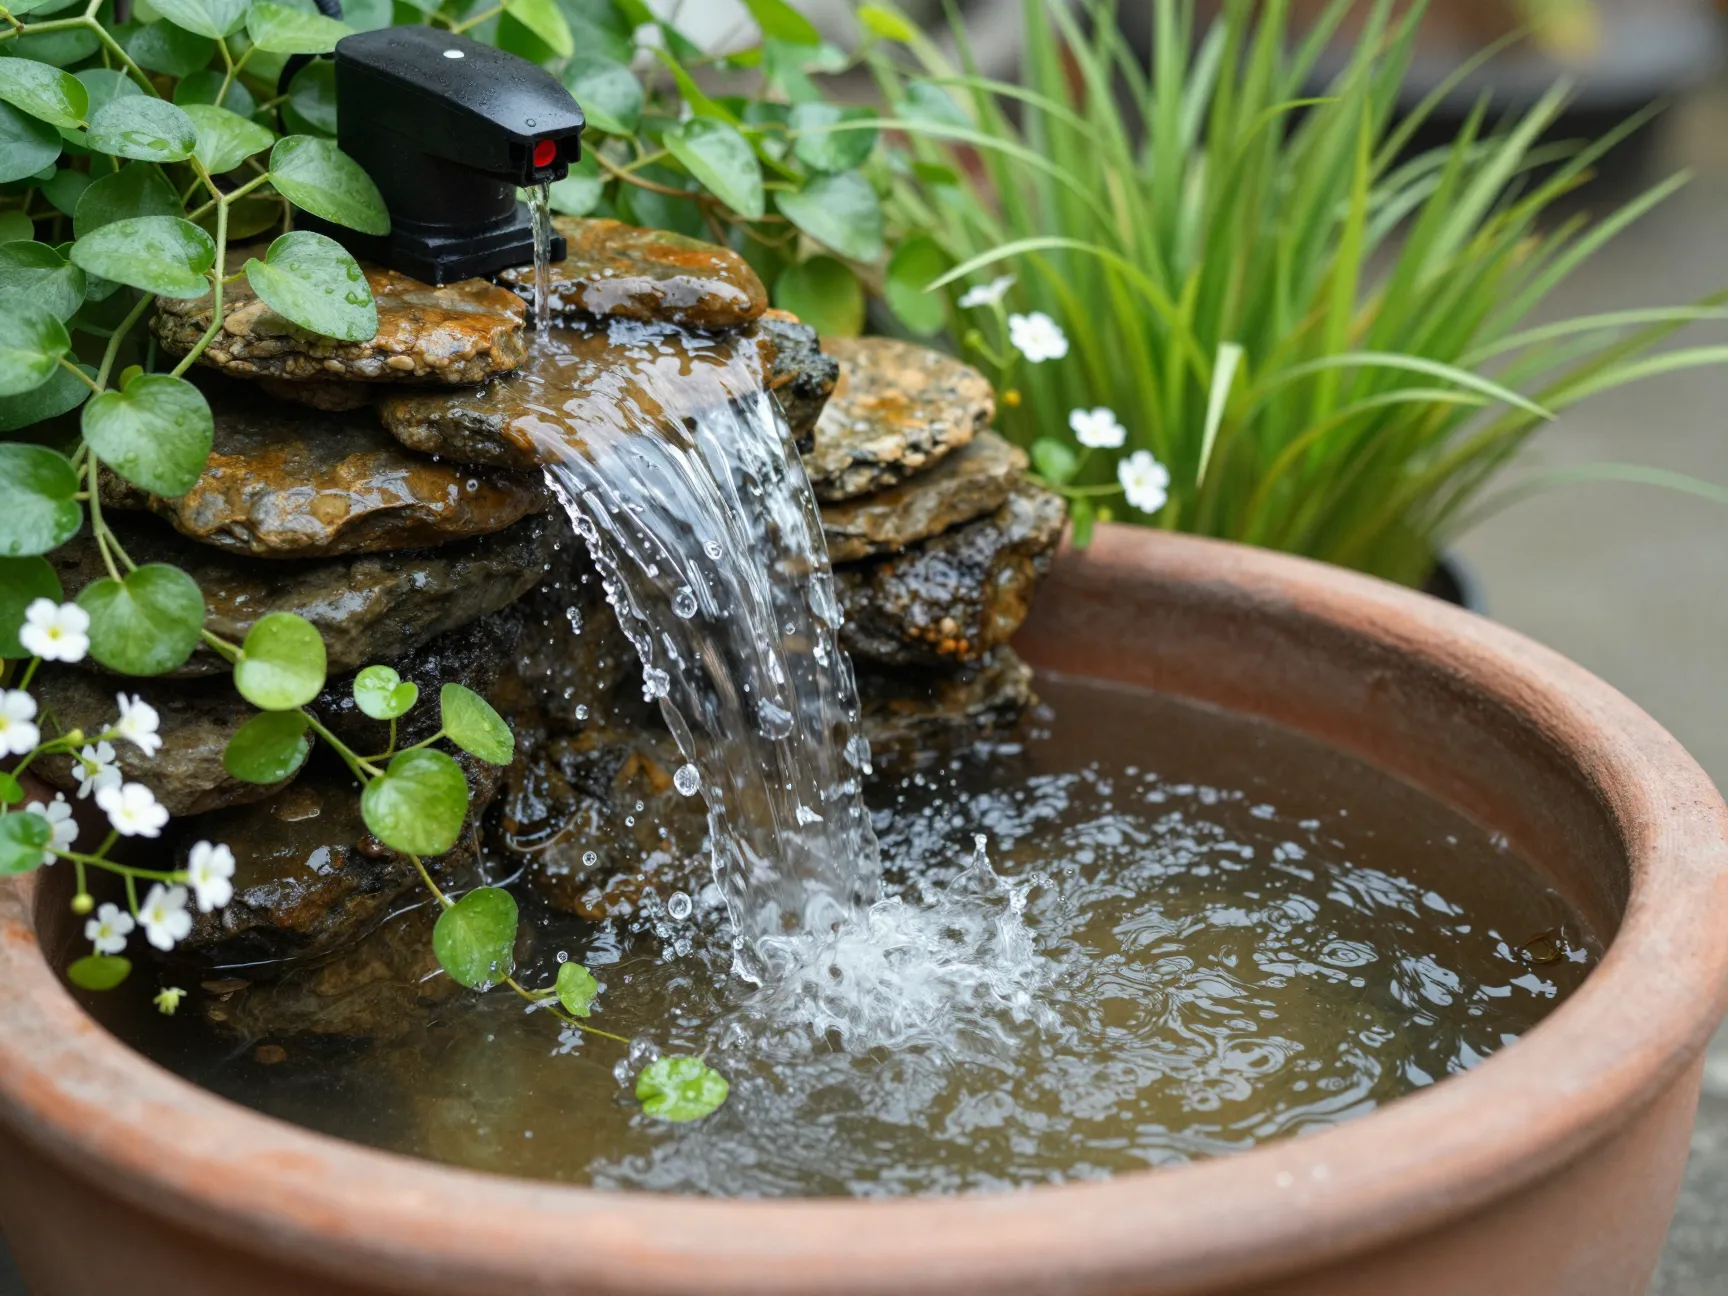
Water transforms a fairy garden from a static display into a living, breathing environment. A small submersible pump, available for under twenty dollars at most garden centers, is all you need to create a trickling fairy-sized waterfall [2].
Set the pump inside a shallow waterproof basin or a sealed terracotta pot. Stack flat stones above the pump outlet to create a cascade. Surround the basin with moisture-loving plants like creeping jenny, baby tears, or miniature rush grass. The sound of moving water adds an entirely new sensory dimension to the garden.
Safety note: Use a low-voltage pump rated for outdoor use, and keep the electrical connection away from standing water. A GFCI outlet is strongly recommended for any outdoor water feature.
“The sound of a miniature waterfall carries farther than you expect. Guests often hear it before they see it, which creates a wonderful moment of discovery.”
This design requires the most technical effort of the nine, but the payoff in atmosphere is unmatched.
9. Seashell Fairy Castle
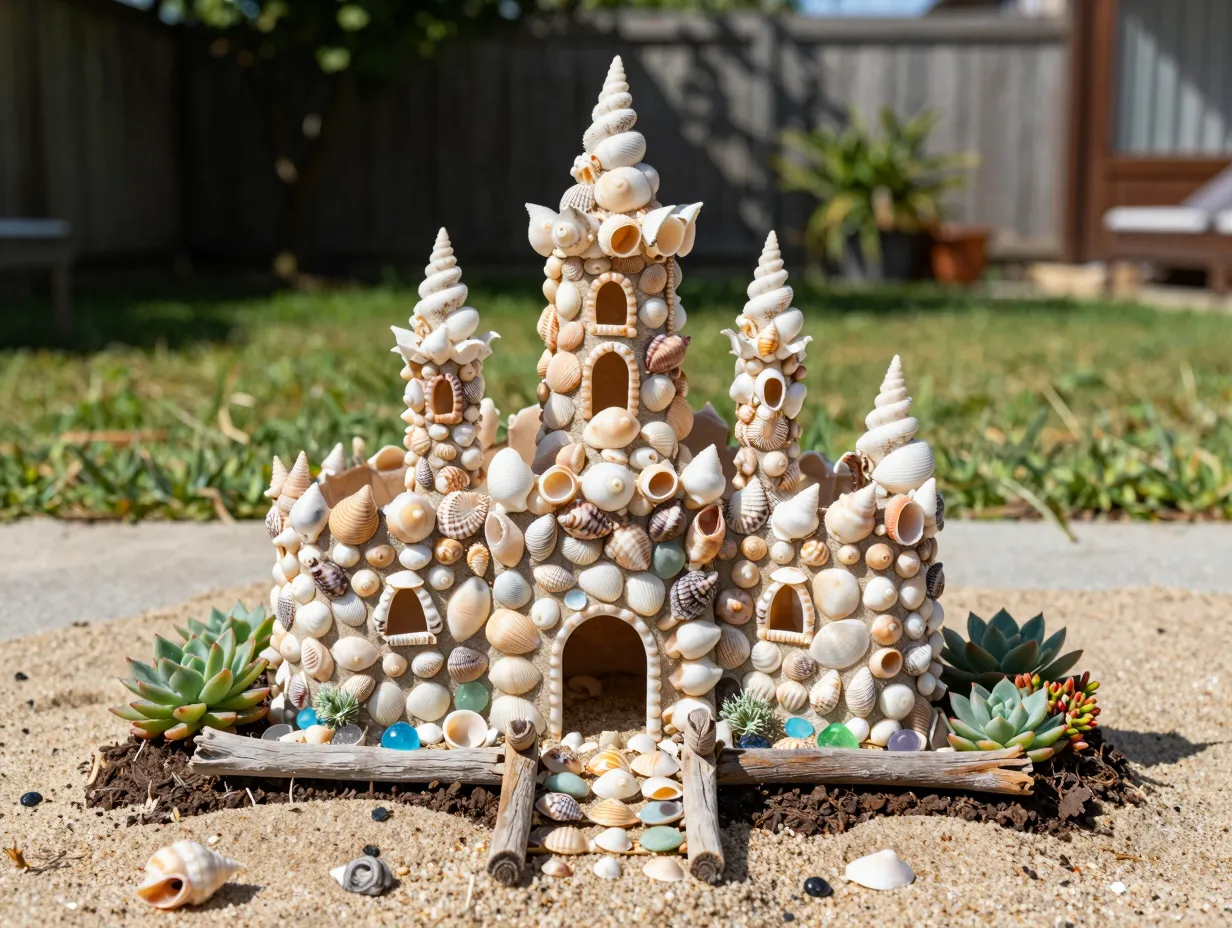
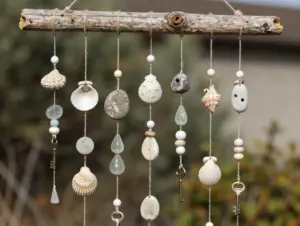
The final idea in these 9 Magical DIY Fairy Garden Ideas For Your Outdoor Wonderland brings a coastal narrative to your backyard. Collect or purchase an assortment of shells, clam shells for walls, spiral shells for towers, small cowrie shells for paving, and use waterproof adhesive to assemble a fairy castle [2].
Anchor the castle on a bed of fine sand mixed with potting soil. Add driftwood pieces as bridges or fences. Plant low-growing coastal-tolerant succulents like ice plant or hens-and-chicks around the base. A few pieces of sea glass catch the light beautifully and reinforce the beach theme.
Assembly tips:
- Use a strong waterproof epoxy or marine-grade adhesive for structural joins.
- Allow the adhesive to cure fully (at least 24 hours) before placing the castle outdoors.
- Seal the finished castle with a clear outdoor sealant to protect it from UV damage and moisture.
The seashell fairy castle is the most conversation-worthy design on this list. It is also a wonderful project to do with children, who can contribute shells from their own beach collections.
Choosing the Right Plants for Your Fairy Garden
No matter which of the 9 Magical DIY Fairy Garden Ideas For Your Outdoor Wonderland you choose to build, plant selection will determine whether your creation thrives or struggles. The table below summarizes the best plant choices by design type.
| Design | Best Plant Choices | Light Needs |
|---|---|---|
| Teacup | Succulents, sheet moss | Bright indirect |
| Wheelbarrow Village | Creeping thyme, miniature roses, sedums | Full sun |
| Birdbath Oasis | Succulents, gravel-tolerant groundcovers | Full sun |
| Terracotta Tower | String of pearls, creeping jenny | Partial sun |
| Lantern Garden | Sheet moss, miniature ferns, air plants | Low to medium |
| Tree Stump Home | Woodland ferns, miniature hostas, moss | Shade to partial |
| Rock Pathway | Corsican mint, wooly thyme, Irish moss | Partial sun |
| Mini Waterfall | Creeping jenny, baby tears, rush grass | Partial shade |
| Seashell Castle | Ice plant, hens-and-chicks, sea thrift | Full sun |
Common Mistakes to Avoid
Even experienced gardeners make predictable errors when building fairy gardens for the first time. Here are the most common ones, and how to sidestep them.
Skipping drainage. This is the number one killer of fairy gardens. Every container needs a drainage layer of gravel or perlite at the bottom, regardless of how small it is. Standing water rots roots and destroys the scene within weeks [1].
Overcrowding plants. It is tempting to fill every inch of soil, but plants need room to grow. A crowded fairy garden looks chaotic within one growing season. Leave at least a finger’s width of space between plants at planting time.
Using non-weatherproof accessories. Many inexpensive fairy garden figurines are made from resin or painted plaster that degrades rapidly in outdoor conditions. Look for accessories rated for outdoor use, or seal them yourself with a UV-resistant clear coat.
Ignoring the viewing angle. Most fairy gardens are viewed from above and slightly to one side. Build your scene with that perspective in mind, taller elements at the back, shorter ones at the front.
Mixing incompatible plant types. Pairing a moisture-loving fern with a drought-tolerant succulent in the same small container is a recipe for losing one or both plants. Keep plants with similar water and light needs together [1].
Seasonal Maintenance for Long-Term Magic
A fairy garden built in spring 2026 can look just as enchanting by autumn if you follow a simple maintenance routine.
Spring: Refresh the soil surface with a thin layer of compost. Replace any winter-damaged plants. Clean and reseal any painted accessories.
Summer: Water consistently but do not overwater. Trim back any plants that have outgrown their designated zones. Check that pebble paths have not been displaced by plant growth.
Autumn: Remove any annual plants before the first frost. Bring lantern gardens and teacup gardens indoors if temperatures will drop below freezing. Mulch around the base of outdoor designs to protect roots.
Winter: For permanent outdoor installations like the tree stump home or the birdbath oasis, a light layer of straw mulch over the soil surface will protect plant roots through cold snaps. Check that any water feature pumps have been drained and stored.
Conclusion
Building a fairy garden is one of those rare projects that rewards you at every stage, during the planning, during the building, and every time you walk past it afterward. The 9 Magical DIY Fairy Garden Ideas For Your Outdoor Wonderland covered in this guide range from a single teacup on a windowsill to a full wheelbarrow village, so there is genuinely something here for every space and every skill level.
Here are your actionable next steps:
- Choose one design from this list that matches your available space and budget.
- Source your container first, visit thrift stores, estate sales, or your own garage before buying anything new.
- Select two or three plants from the recommended list that suit your garden’s light conditions.
- Build the drainage layer before adding any soil. This single step will determine whether your garden survives its first season.
- Add one small accessory, a fairy door, a tiny bench, a miniature lantern, and let the storytelling begin.
The magic of a fairy garden is not in the figurines or the fancy containers. It is in the act of paying close attention to a small patch of the world and making it beautiful. Start with one idea from this list, and I promise you will be planning the next one before the first one is even finished.
References
[1] How To Make A Fairy Garden Step By Step Diy Guide – https://seedsheets.com/how-to-make-a-fairy-garden-step-by-step-diy-guide/?utm_source=openai
[2] 35 Diy Fairy Garden Ideas To Bring Enchantment To Your Backyard – https://www.thegardenstyle.com/outdoor/35-diy-fairy-garden-ideas-to-bring-enchantment-to-your-backyard/?utm_source=openai