8 DIY Clay Fairy Garden Accessories to Craft Your Own Enchanted World
A single afternoon with a block of polymer clay and a toothpick can produce an entire miniature world that costs less than ten dollars to build. That is the quiet magic behind the surge in clay fairy garden crafting, a hobby that has grown from a niche Pinterest trend into a full creative practice embraced by adults, families, and educators alike. If you have been searching for a way to combine sculpture, gardening, and storytelling into one satisfying project, the 8 DIY clay fairy garden accessories to craft your own enchanted world covered in this guide are exactly where to start.
Disclosure: This post contains affiliate links. As an Amazon Associate, we earn from qualifying purchases, and at no extra cost to you.
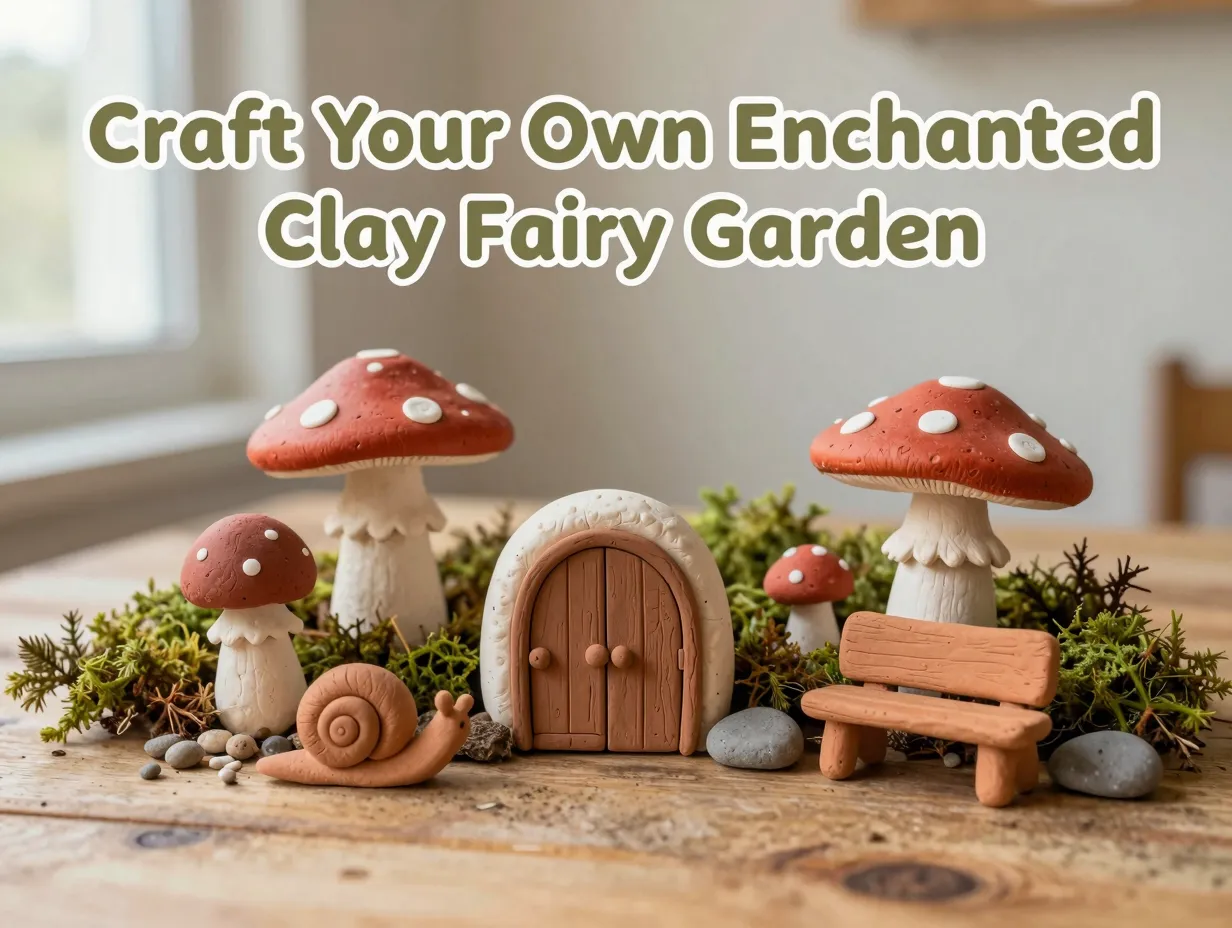
From sculpted mushrooms and rustic fairy doors to tiny snails and miniature furniture, these accessories transform an ordinary planter or glass jar into a scene that feels genuinely alive. Comprehensive tutorials on platforms like Instructables and dedicated craft blogs confirm that the barrier to entry is low, the materials are affordable, and the results are deeply rewarding [3][6]. Whether you are a first-time clay crafter or someone with years of sculpting experience, this guide walks you through every accessory with clear steps, material notes, and practical tips.
Key Takeaways
- Polymer clay and air-dry clay are both excellent choices for fairy garden accessories; polymer clay is more durable outdoors while air-dry clay is beginner-friendly and widely available.
- The 8 DIY clay fairy garden accessories to craft your own enchanted world include mushrooms, fairy doors, snails, trees, benches, flower pots, stepping stones, and lanterns.
- Most accessories require only basic tools: a toothpick, a rolling pin, a craft knife, and acrylic paint for finishing.
- Sealing finished pieces with outdoor-grade varnish dramatically extends their lifespan in garden settings.
- Combining multiple accessories in a single container, such as a glass jar or terracotta pot, creates the most visually compelling fairy garden scenes.
Why Clay Is the Best Material for Fairy Garden Accessories
Before diving into the specific projects, it is worth understanding why clay outperforms other materials for this type of craft. Wood, resin, and plastic all have their place, but clay offers a unique combination of workability, detail capacity, and finish quality that is hard to match.
Polymer clay (brands like Sculpey and Fimo) is baked in a home oven to harden permanently. It holds fine detail exceptionally well, resists moisture after sealing, and comes in dozens of pre-mixed colors. Air-dry clay requires no oven, making it accessible to children and beginners, though it benefits from a protective coat of varnish before going outdoors.
Here is a quick comparison of the two main clay types for this project:
| Feature | Polymer Clay | Air-Dry Clay |
|---|---|---|
| Curing method | Oven bake (130C/265F) | Air dry (12-24 hours) |
| Outdoor durability | High (with sealant) | Moderate (needs varnish) |
| Detail capacity | Excellent | Good |
| Beginner-friendly | Moderate | Very high |
| Average cost per project | $5-$12 | $3-$8 |
The 8 DIY Clay Fairy Garden Accessories to Craft Your Own Enchanted World
The following eight accessories are sequenced from simplest to most complex, so beginners can build confidence before tackling more detailed pieces. Each project includes a materials list, step-by-step instructions, and a finishing tip.
1. Clay Mushrooms
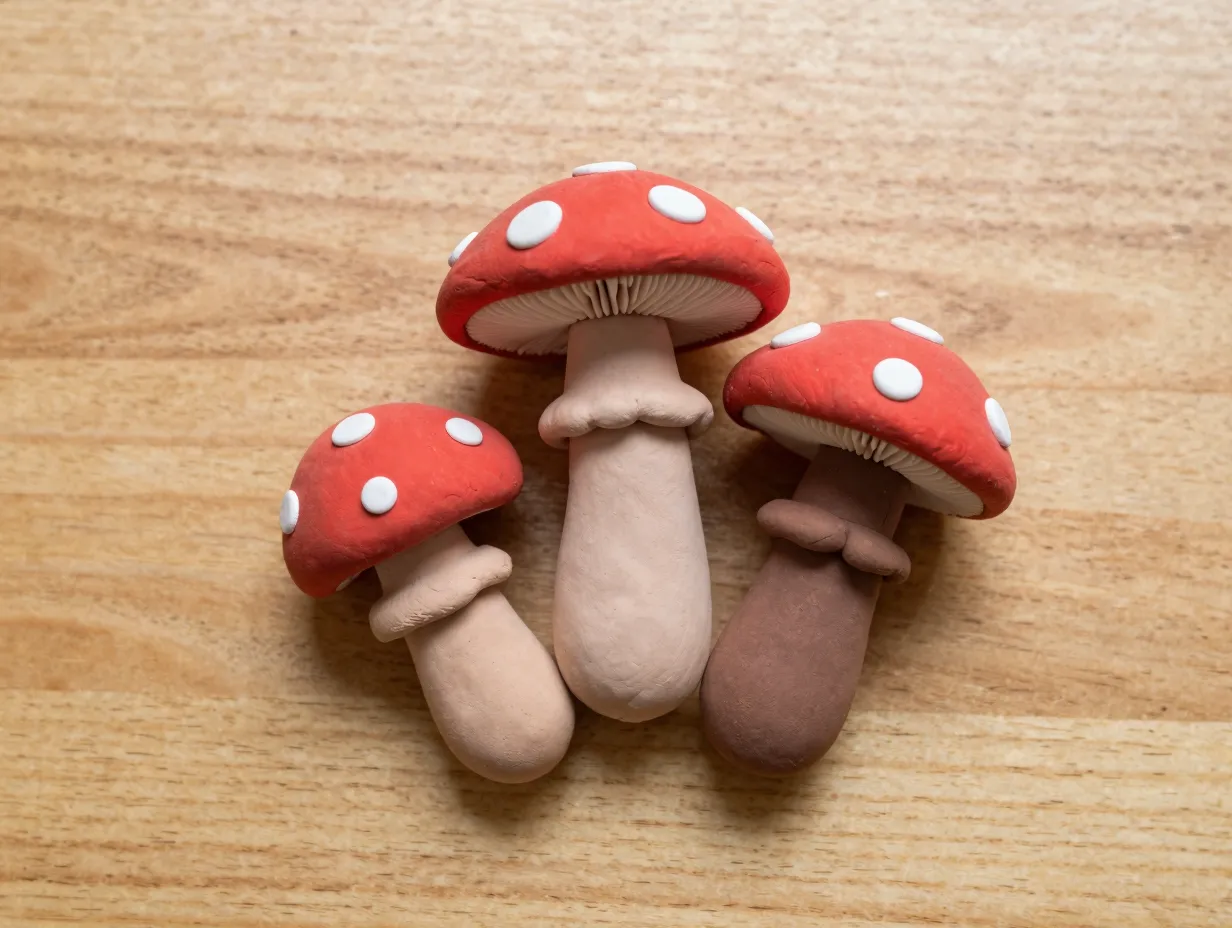
Mushrooms are the cornerstone of any fairy garden. They are iconic, easy to recognize, and forgiving to sculpt, which makes them the ideal first project for beginners. The classic red-capped mushroom with white spots is a crowd favorite, but earthy brown and cream varieties add realism to more naturalistic scenes [3][6].
Materials needed:
- Red, white, and brown polymer or air-dry clay
- Toothpick
- Small ball stylus or the eraser end of a pencil
Steps:
- Roll a small ball of brown clay into a cylinder roughly 2 cm tall for the stem. Taper the bottom slightly so it looks natural.
- Roll a larger ball of red clay and flatten it into a dome shape for the cap. The cap should be roughly twice the diameter of the stem.
- Press the cap gently onto the top of the stem, blending the join with a fingertip.
- Use the toothpick to add a ring of gills on the underside of the cap.
- Roll tiny balls of white clay and press them onto the top of the cap for spots.
- Bake or allow to air dry, then seal with matte varnish.
Pro tip: Make mushrooms in clusters of three different heights. A grouping always looks more natural than a single specimen.
2. Fairy Doors
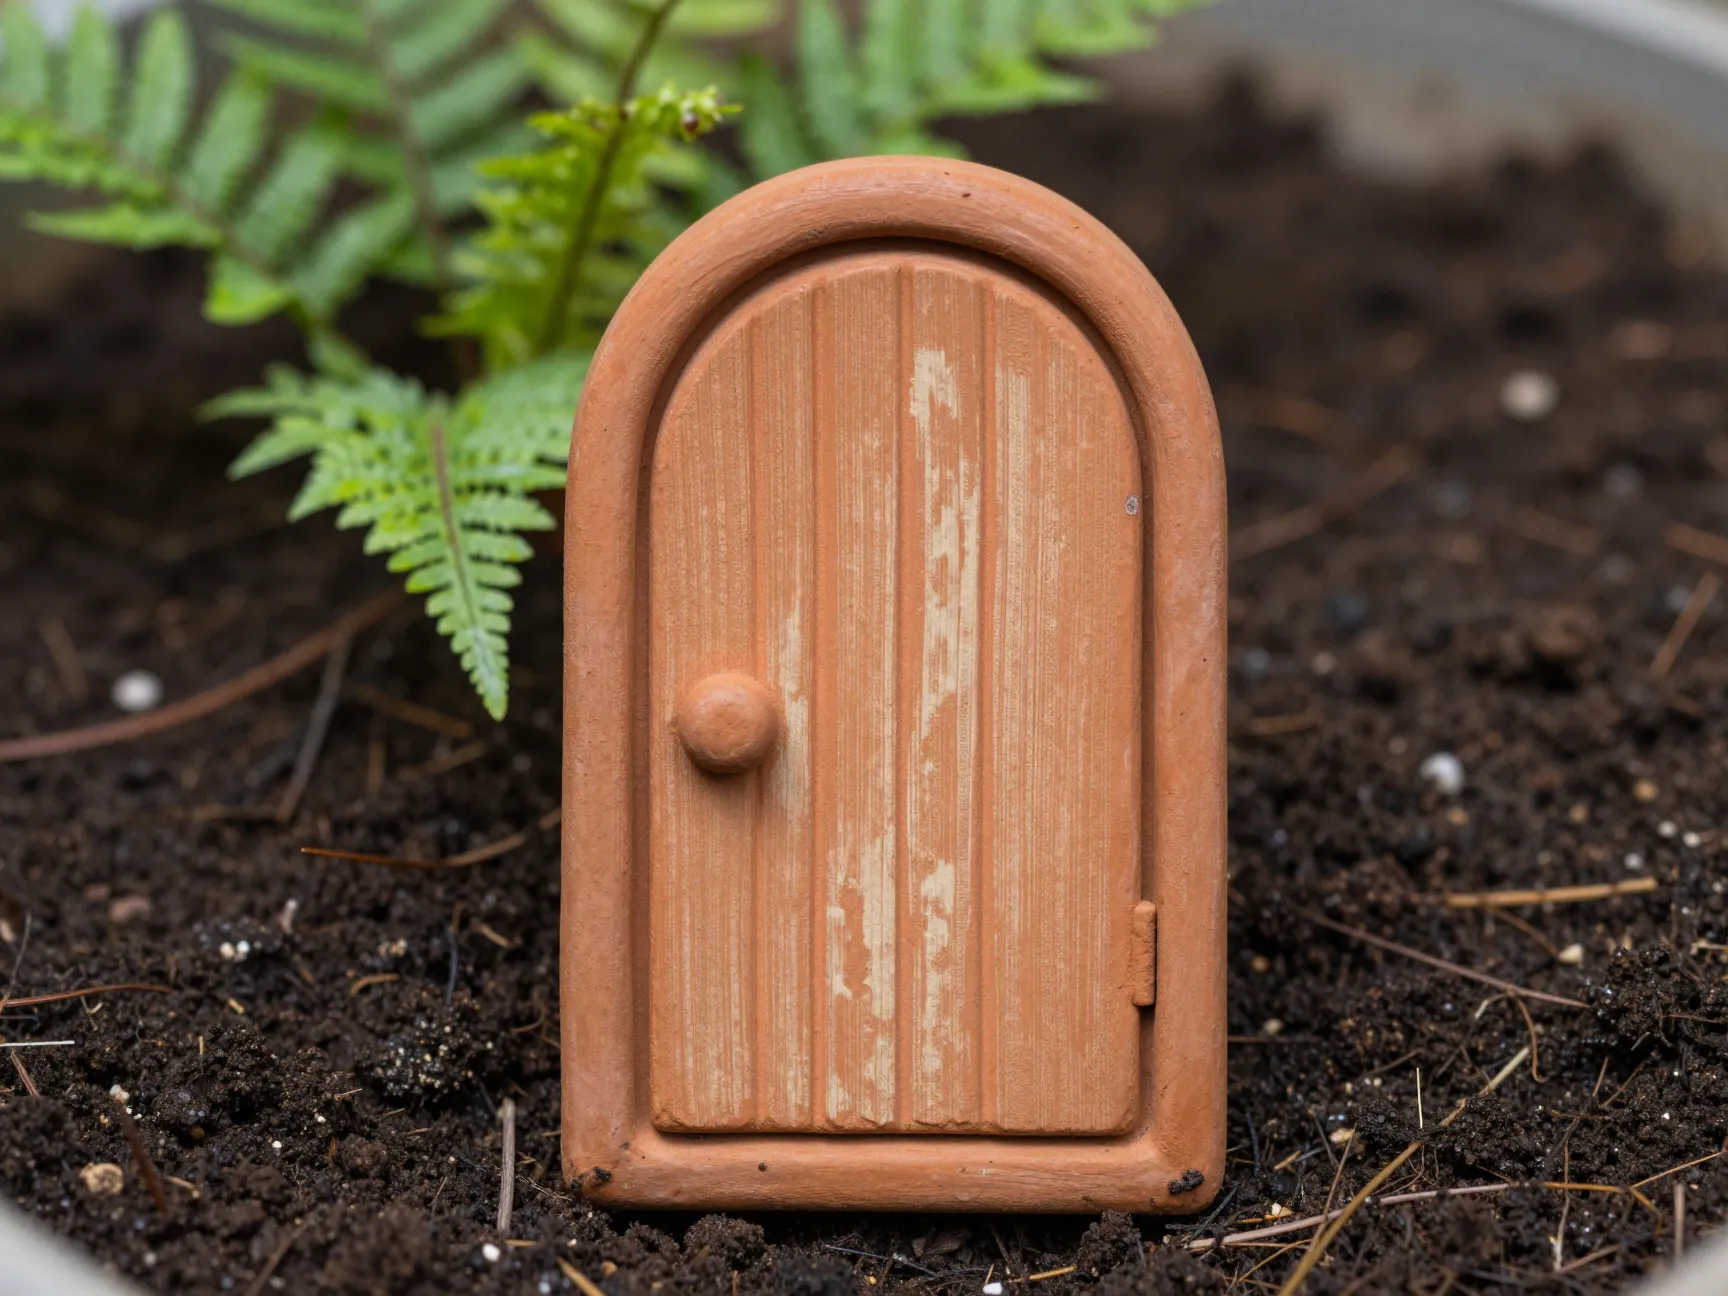
A fairy door is the narrative anchor of any enchanted garden. It implies that something lives there, just out of sight. These small arched doors can be pressed directly into soil at the base of a tree trunk or glued to a garden wall [6].
Materials needed:
- Brown or terracotta clay
- Toothpick and flat sculpting tool
- Tiny seed beads or small round clay balls (for the doorknob)
- Acrylic paint in dark brown and cream
Steps:
- Roll out a slab of brown clay to about 4 mm thickness.
- Cut an arched door shape roughly 5 cm tall and 3 cm wide using a craft knife.
- Use the flat sculpting tool to score vertical plank lines across the door surface.
- Add a small round clay ball as a doorknob on one side.
- Press a thin clay strip around the arch edge to create a door frame.
- Bake or dry, then dry-brush with cream acrylic paint to highlight the plank texture.
I made my first fairy door with leftover terracotta clay and was surprised at how much character a little dry-brushing added. The texture suddenly looked like aged wood.
3. Clay Snails
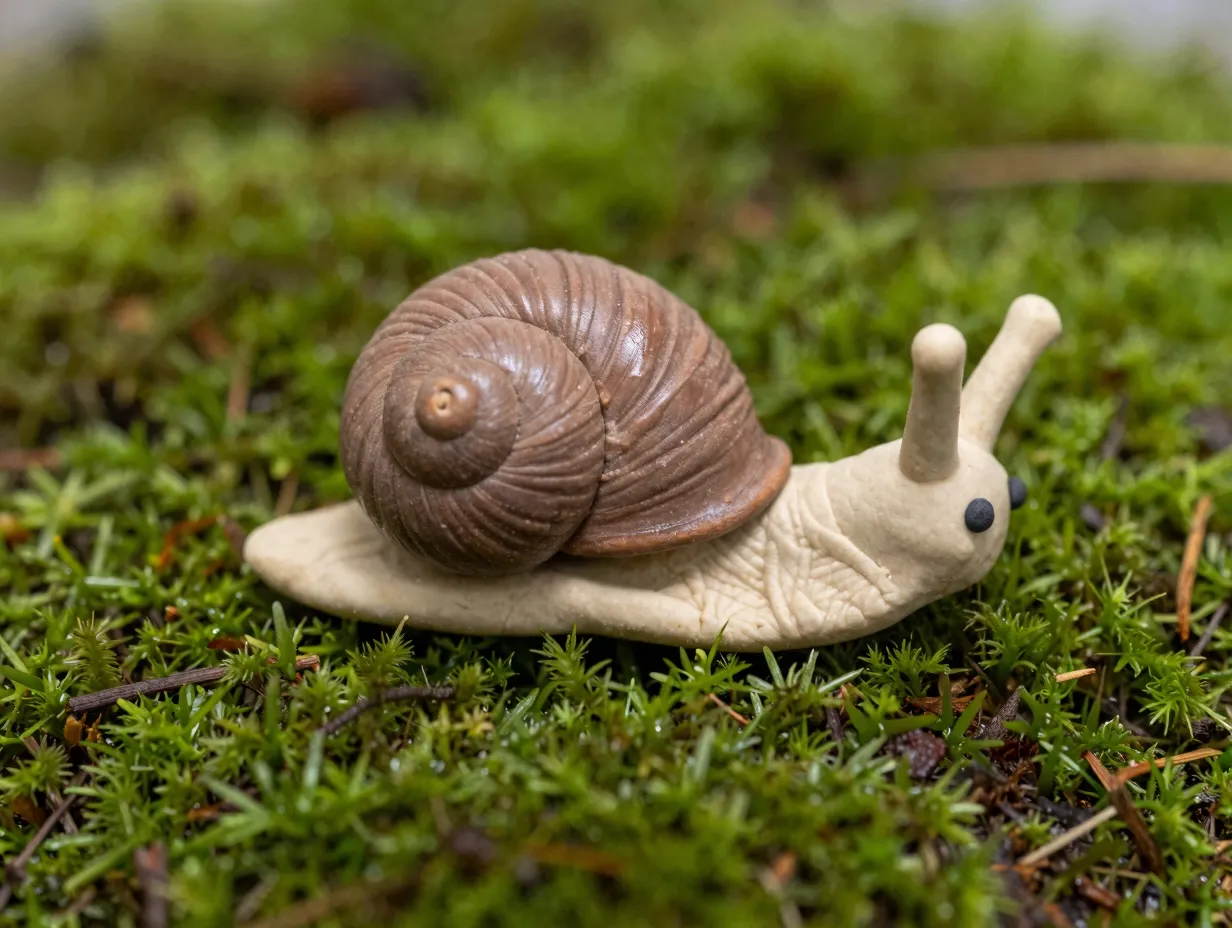
Snails bring a sense of gentle movement and whimsy to a fairy garden. They are also an excellent exercise in coiling and shaping, two fundamental clay techniques [3][6].
Materials needed:
- Brown and cream clay
- Toothpick
- Black acrylic paint (for eyes)
Steps:
- Roll a thin log of brown clay and coil it into a spiral shell shape. Press the coils together gently so the shell holds its form.
- Roll a small teardrop of cream clay for the body. Flatten the wide end slightly to form the foot.
- Attach the shell to the top of the body by pressing gently.
- Use the toothpick to add two tiny antennae at the front of the head.
- Dot a tiny amount of black paint at the tip of each antenna for eyes.
- Seal with gloss varnish to give the shell a natural sheen.
4. Miniature Trees and Toadstools
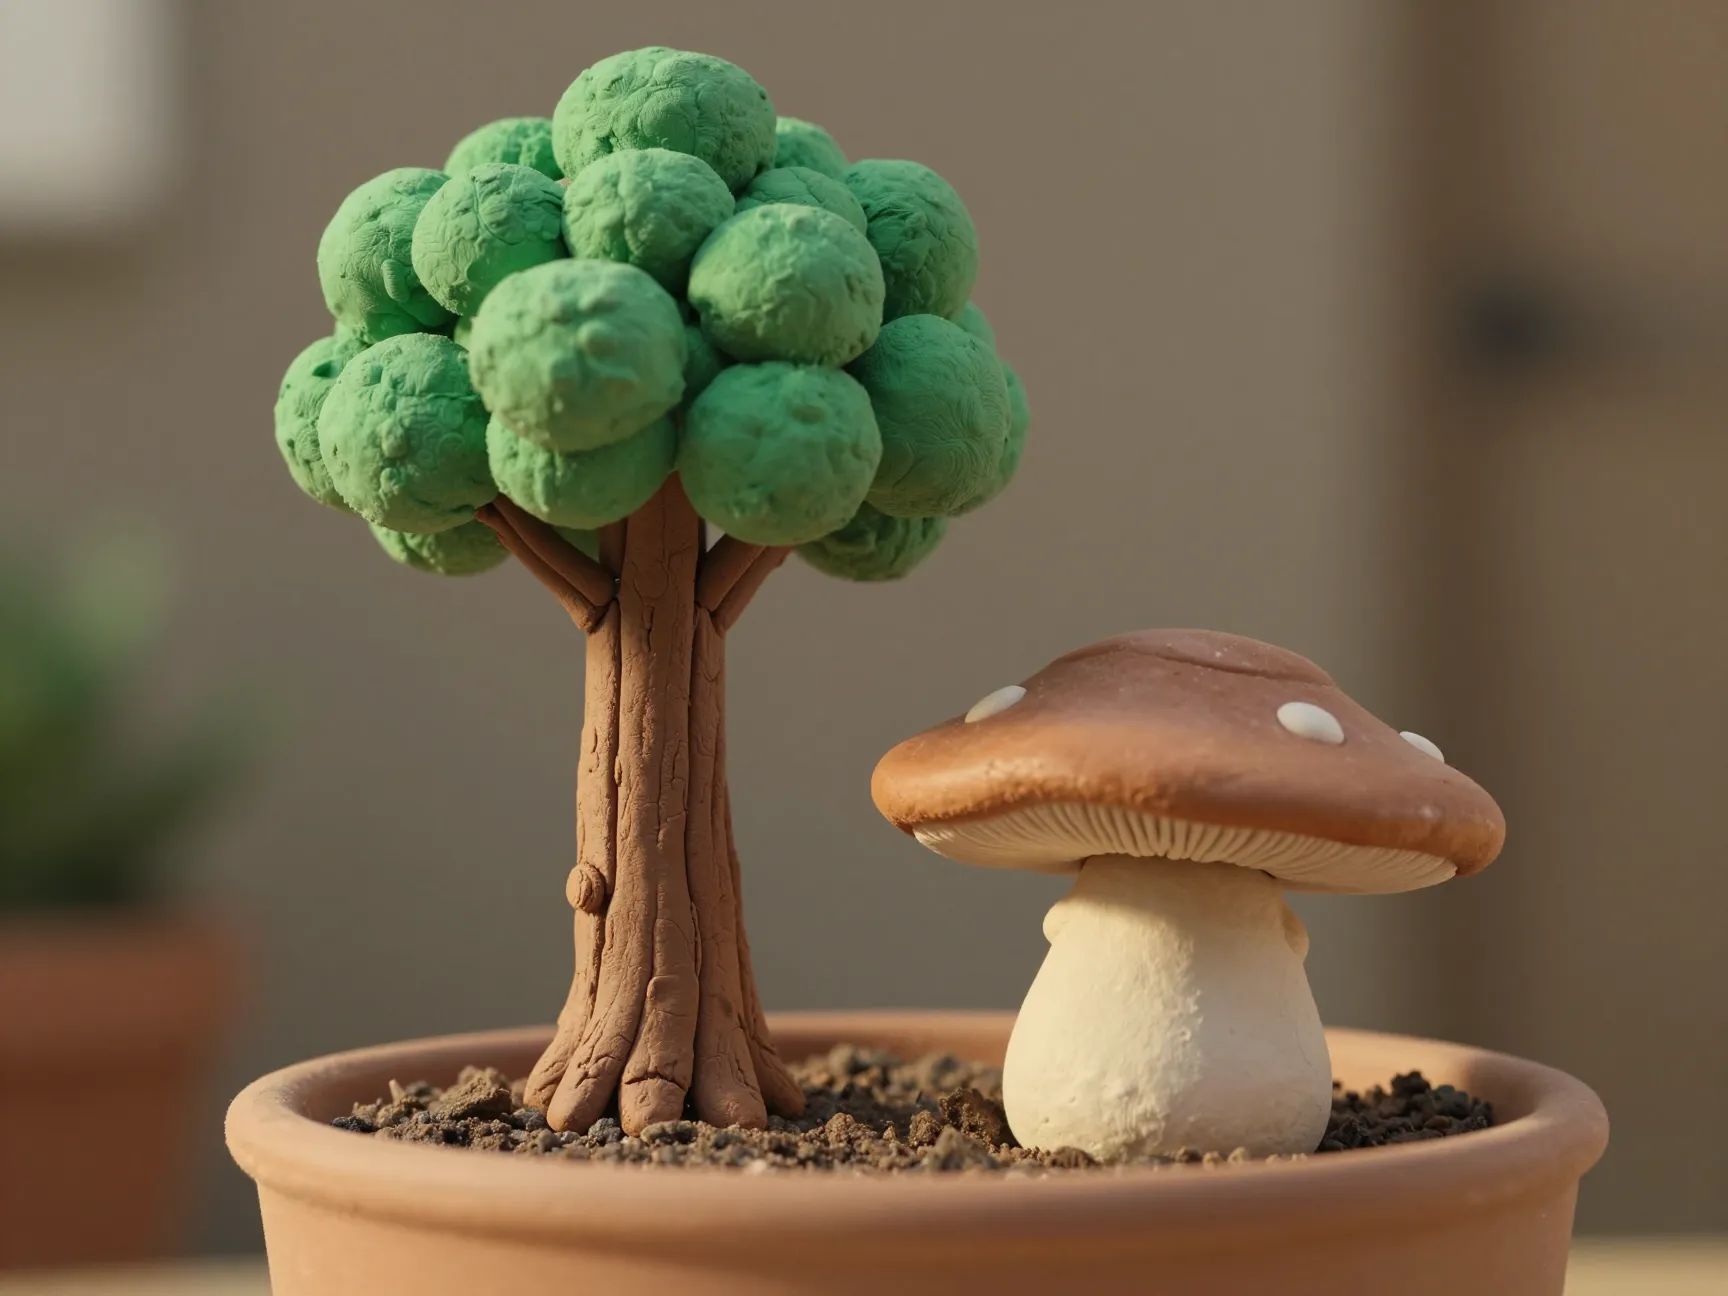
Trees give vertical dimension to a fairy garden, which is especially important in container gardens where horizontal space is limited. A simple clay tree trunk paired with a wire armature and air-dry clay foliage creates a convincing miniature specimen [6].
Materials needed:
- Brown clay (trunk)
- Green clay or air-dry clay (foliage)
- Thin floral wire
- Acrylic paint in multiple greens and browns
Steps:
- Wrap brown clay around a short section of floral wire, building up a tapered trunk shape with visible bark texture scored by a toothpick.
- Bend the top of the wire into several small branches.
- Press small balls of green clay onto each branch, blending them together to form a rounded canopy.
- Bake or dry the trunk and foliage separately, then assemble with strong craft glue.
- Dry-brush the canopy with a lighter green to add depth.
Variation: Sculpt a flat-topped toadstool using the same technique as the mushroom above, but scale it up to 6-8 cm tall. These work beautifully as fairy garden seating.
5. Clay Benches and Furniture
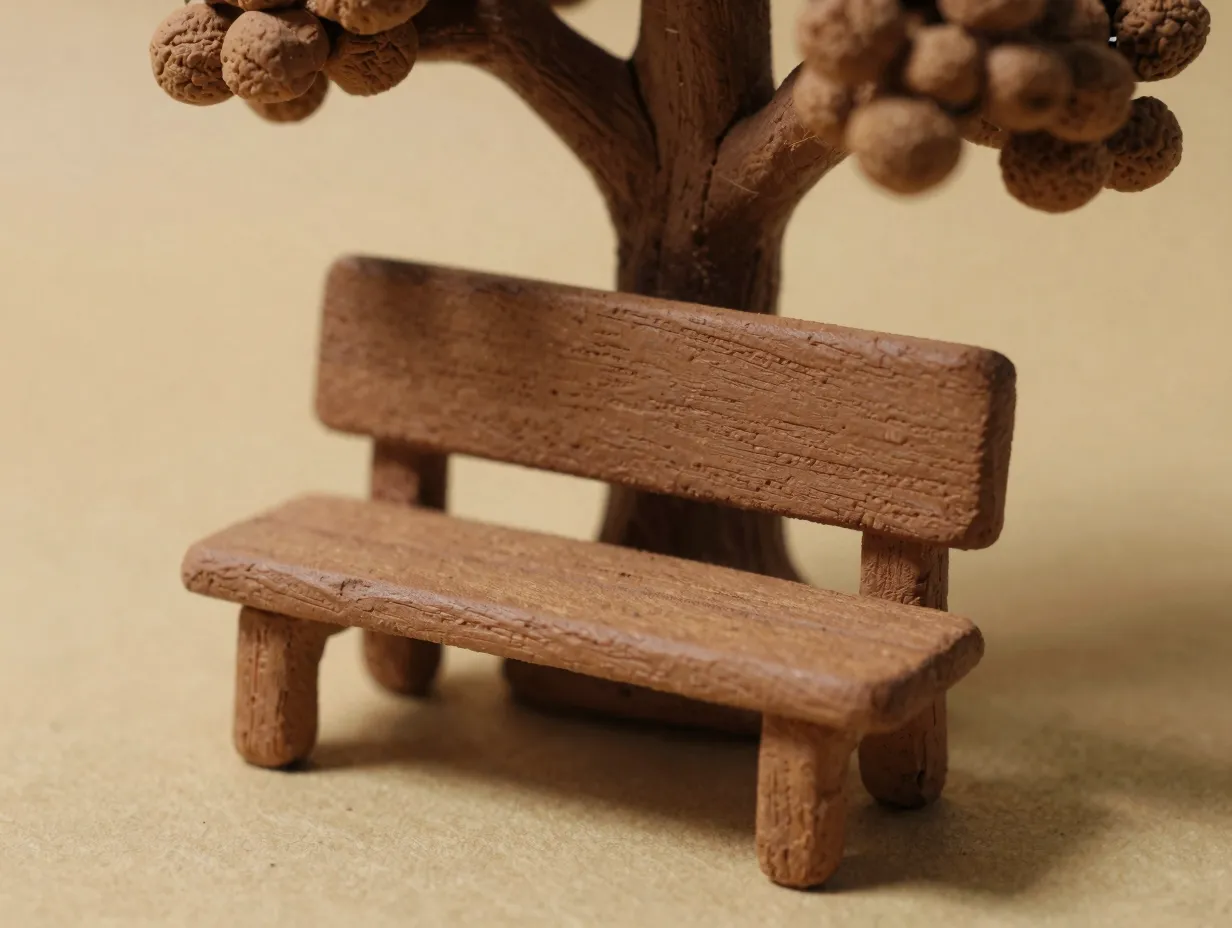
Miniature furniture is where clay fairy garden crafting starts to feel like set design. A tiny bench or garden chair placed beneath a clay tree completes a scene in a way that no single element can do alone [3].
Materials needed:
- Brown or gray clay
- Flat sculpting tool
- Toothpick
- Acrylic paint in wood tones
Steps:
- Roll four equal cylinders for the bench legs, each about 1.5 cm tall.
- Flatten a rectangular slab of clay for the seat, roughly 4 cm wide and 2 cm deep.
- Press the legs onto the underside of the seat at each corner, blending the joins.
- Roll two thin slabs for the backrest and press them vertically against the back legs.
- Score plank lines across the seat and backrest with the flat sculpting tool.
- Bake or dry, then paint in warm wood tones and seal.
6. Flower Pots and Baskets
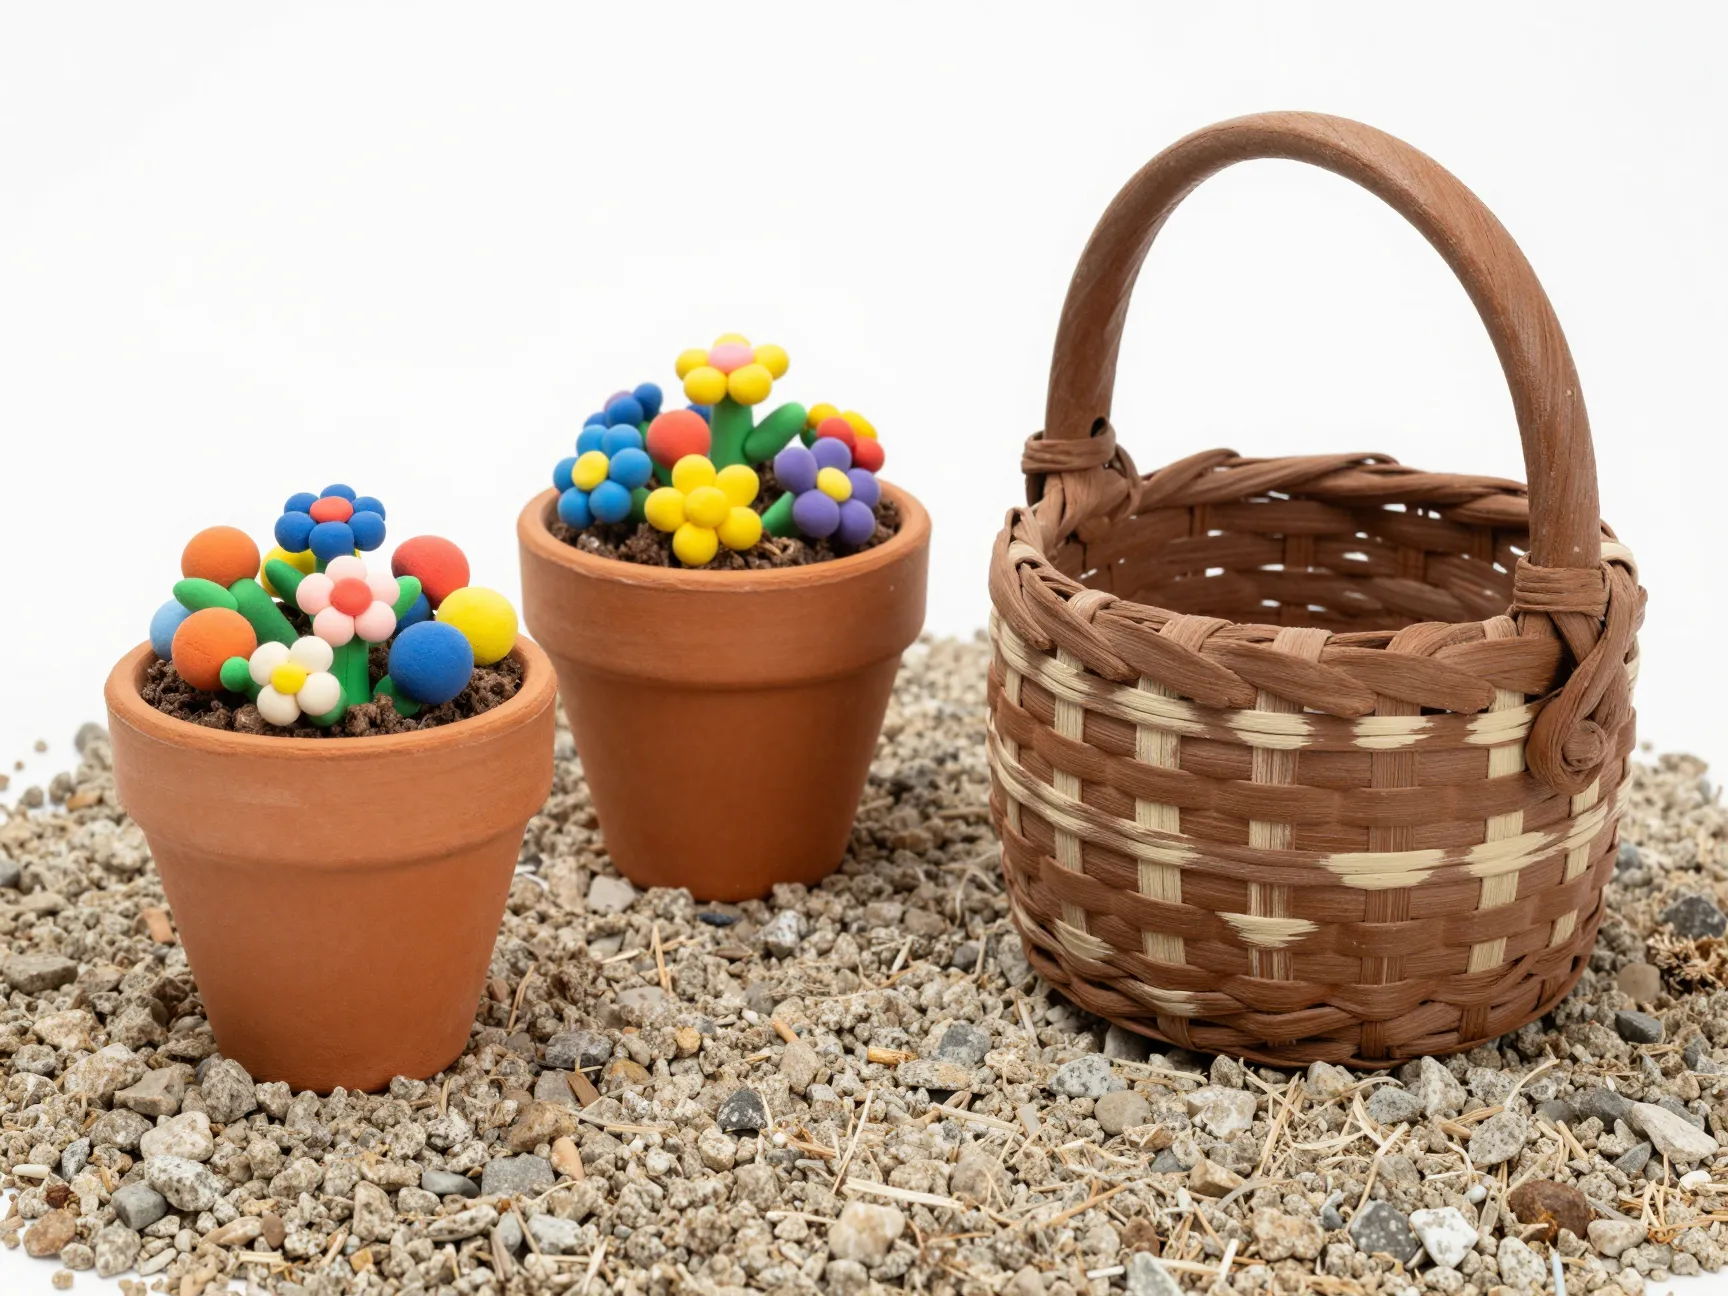
Small clay flower pots and woven-look baskets add domestic charm to a fairy garden. They suggest that the garden’s inhabitants tend to their space with care [3].
Materials needed:
- Terracotta or red clay (pots)
- Brown clay (baskets)
- Tiny balls of colored clay (flowers)
- Toothpick
Steps for flower pots:
- Roll a ball of terracotta clay and press your thumb into the center to create a hollow.
- Pinch the walls upward and outward to form a classic pot shape.
- Roll a thin coil and press it around the rim for a lip.
- Fill the pot with tiny balls of colored clay to represent flowers.
- Bake or dry, then seal.
Steps for baskets:
- Roll a ball of brown clay and hollow it out as above.
- Use the toothpick to score a woven crosshatch pattern all over the exterior.
- Add a thin clay handle arching over the top.
- Dry-brush with cream paint to highlight the weave texture.
7. Stepping Stones
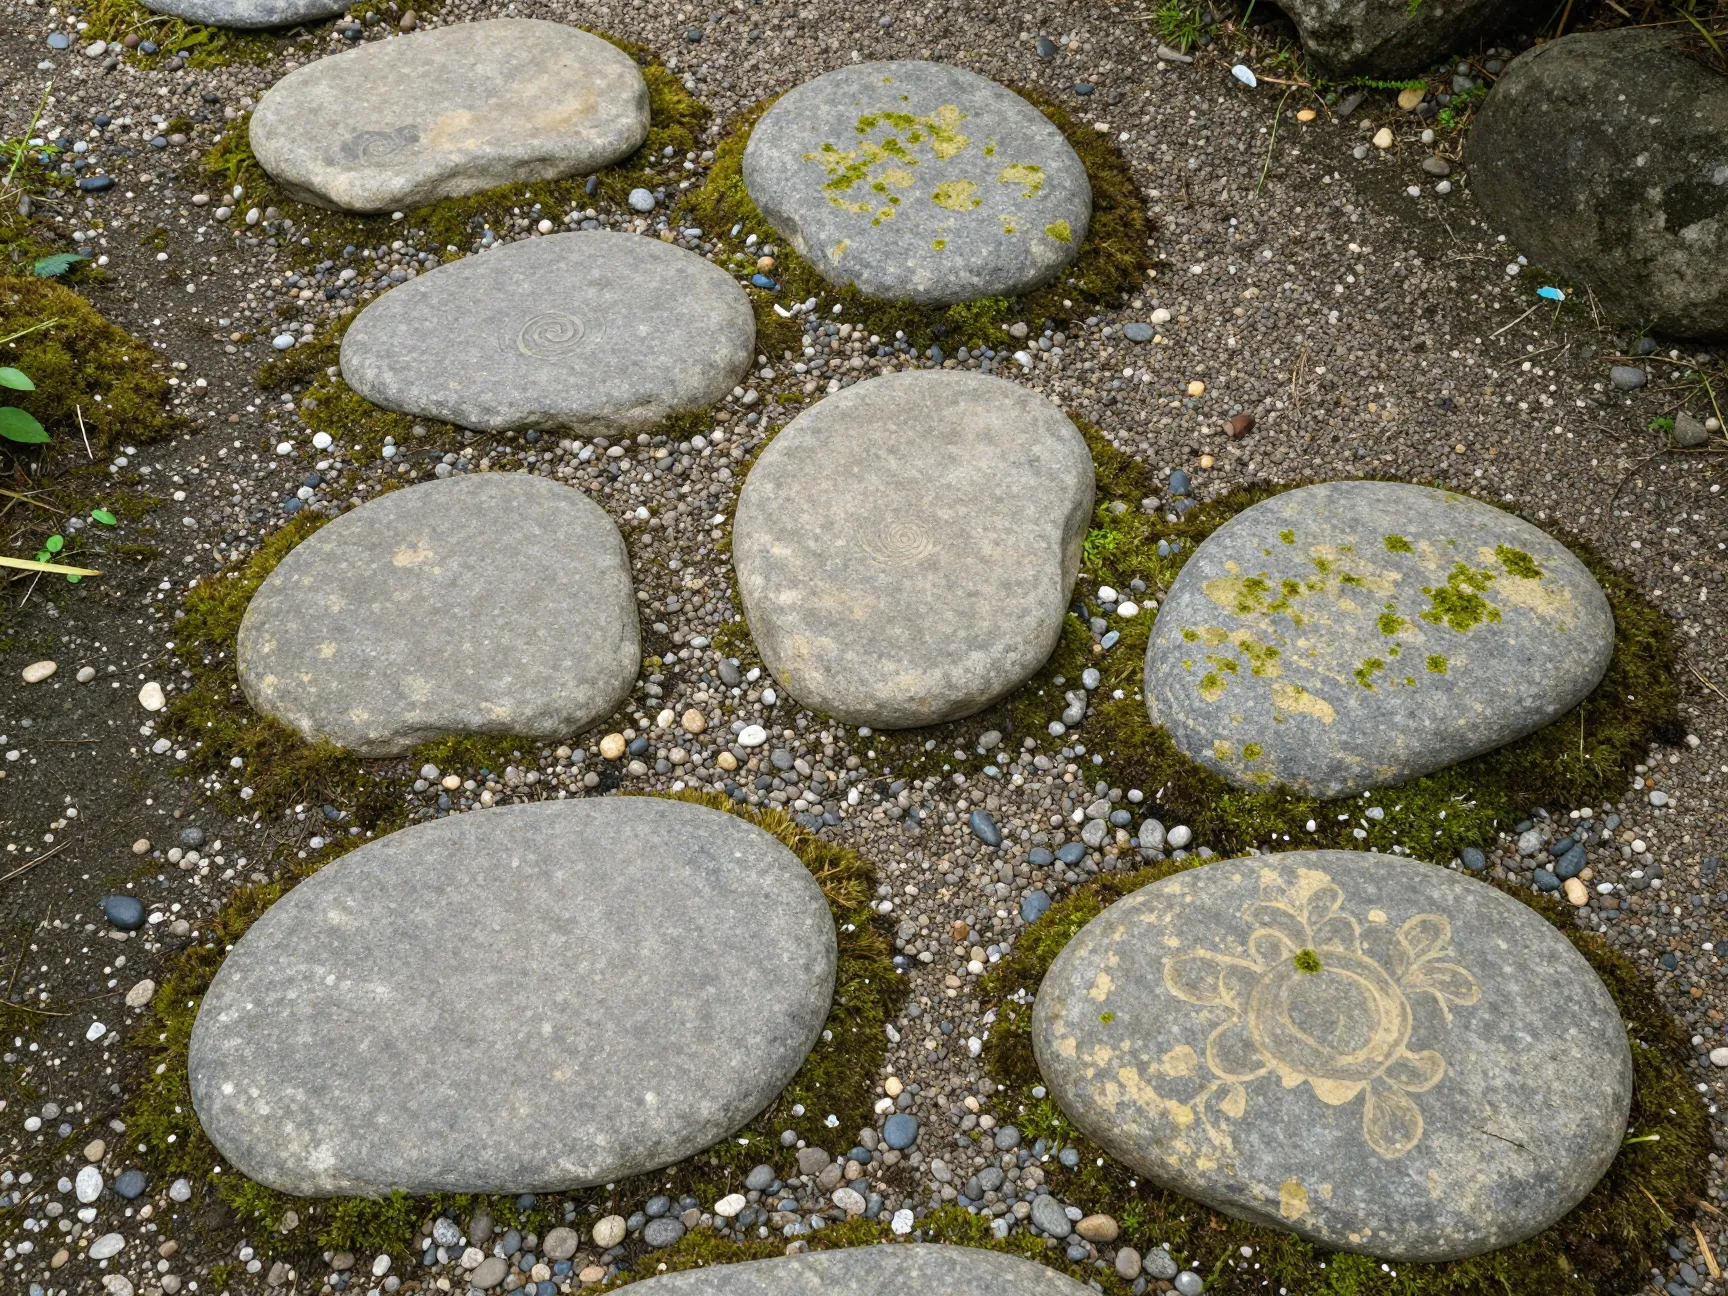
Stepping stones create a path through the fairy garden, guiding the eye and giving the scene a sense of journey and scale [6].
Materials needed:
- Gray or stone-colored clay
- Toothpick or small stamps
- Acrylic paint in gray, cream, and moss green
- Small dried flowers or pressed leaves (optional, for impressions)
Steps:
- Roll out a slab of gray clay to about 5 mm thickness.
- Cut irregular oval or rounded shapes, roughly 2-3 cm across, to mimic natural stones.
- Press a dried flower or leaf into the surface of each stone for a decorative impression, then remove it.
- Alternatively, use the toothpick to carve small runes, spirals, or floral patterns.
- Bake or dry, then dry-brush with cream and moss green paint to simulate weathering.
- Arrange in a winding path through the finished garden.
Tip: Odd numbers of stepping stones always look more natural than even numbers. A path of five or seven stones reads as organic rather than manufactured.
8. Miniature Lanterns
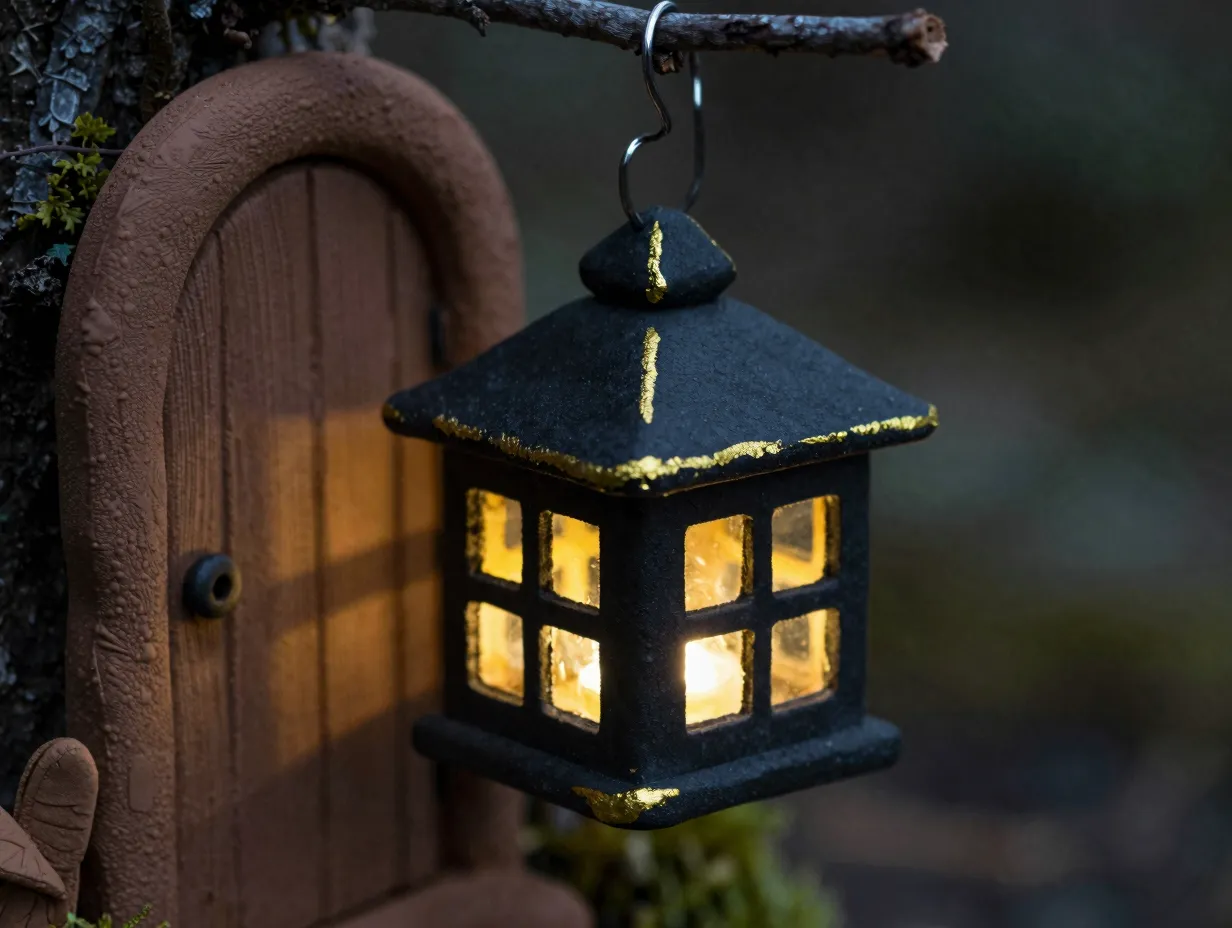
Lanterns are the most technically challenging of the 8 DIY clay fairy garden accessories to craft your own enchanted world, but they are also the most dramatic. A tiny clay lantern placed beside a fairy door or along a stepping stone path transforms the garden into a scene that looks magical even in daylight [4][5].
Materials needed:
- Black or dark gray clay
- Translucent yellow clay or small yellow glass beads
- Thin wire or headpins
- Gold acrylic paint
Steps:
- Roll a small cube of black clay, roughly 2 cm on each side.
- Use a craft knife to cut small rectangular windows on each face of the cube.
- Press tiny pieces of translucent yellow clay behind each window opening to simulate glass.
- Roll a small pyramid or dome of black clay for the roof and press it onto the top of the cube.
- Thread a short length of wire through the top to create a hanging hook.
- Bake or dry, then dry-brush with gold paint along the edges for a metallic finish.
Variation: For a simpler lantern, skip the windows and instead roll a tall cylinder, hollow it out from the top, and place a small LED tea light inside. This works especially well for indoor fairy garden displays.
How to Assemble Your Complete Enchanted World
Creating individual accessories is satisfying, but assembling them into a cohesive scene is where the real magic happens. The most successful fairy gardens follow a few simple design principles.
Choose your container first. A glass jar works beautifully for a self-contained indoor scene, as demonstrated in the Instructables “Fairy Garden in a Jar” project [6]. A wide terracotta pot or a shallow wooden trough suits outdoor displays. The container determines the scale of every accessory you make.
Layer from back to front. Place taller elements like trees and doors at the back of the container, medium elements like benches and flower pots in the middle, and low elements like snails and stepping stones at the front. This creates depth even in a small space.
Use natural materials as a base. Moss, small pebbles, fine gravel, and dried bark chips make excellent ground cover and give clay accessories a natural context that enhances their realism.
Seal everything before placing it outdoors. A coat of outdoor-grade polyurethane varnish on each clay piece will protect it from rain, UV light, and temperature changes. Apply two coats for pieces that will sit directly in soil.
A note on color harmony: Stick to an earthy palette of terracotta, sage green, cream, and warm brown for a cohesive look. Bright primary colors can work for a more playful, children’s garden aesthetic, but they tend to clash with natural ground cover materials.
Tips for Crafting With Children
Fairy garden crafting is one of the most effective family craft activities available in 2026 because it combines fine motor skill development with imaginative storytelling. Children as young as four can participate in rolling clay balls and pressing spots onto mushrooms, while older children can tackle fairy doors and stepping stones independently.
A few practical guidelines for crafting with children:
- Use air-dry clay rather than polymer clay when working with young children, since it requires no oven.
- Keep a bowl of water nearby; slightly dampened fingers smooth clay surfaces beautifully and prevent cracking.
- Let children name their fairy garden inhabitants and build the accessories around the story they create. A child who has decided that a fairy named Briar lives in a mushroom house will be far more motivated to sculpt carefully than one who is simply following instructions.
- Accept imperfection as part of the charm. A slightly lopsided bench or a mushroom with uneven spots tells its own story.
Finishing and Display Ideas for Your 8 DIY Clay Fairy Garden Accessories
Once all eight accessories are complete and sealed, the finishing and display choices make a significant difference to the overall impact of the scene.
Indoor displays benefit from a glass cloche or terrarium container that protects the accessories from dust while creating a greenhouse effect that suits the fairy garden aesthetic. A layer of preserved moss from a craft store makes an ideal base.
Outdoor displays work best in a partially shaded location. Direct afternoon sun can fade acrylic paint even through varnish over time, and intense heat can soften polymer clay pieces that were not fully cured. Morning sun with afternoon shade is the ideal exposure.
Seasonal updates keep the garden feeling fresh. Swap out flower pot colors for autumn tones in fall, add tiny clay snowflakes to stepping stones in winter, or introduce new accessories as your skills develop. The modular nature of clay fairy garden accessories means the scene can evolve continuously.
Photography tip: The best time to photograph a fairy garden is during the golden hour, when low-angle sunlight rakes across the surface of the clay and reveals every texture and detail. A macro lens or smartphone macro mode brings out the craftsmanship in even the smallest pieces.
Conclusion
The 8 DIY clay fairy garden accessories to craft your own enchanted world covered in this guide represent a complete toolkit for building a miniature scene that is genuinely personal and deeply satisfying to create. From the first mushroom you roll to the final lantern you hang beside a clay fairy door, each piece carries the evidence of your own hands and imagination.
Here are your actionable next steps:
- Start with a single mushroom using air-dry clay this weekend. Master the basic pinch-and-shape technique before moving on to more complex pieces.
- Choose your container before you begin sculpting so that every accessory is proportioned correctly for the space.
- Work through the eight accessories in the order presented, from simplest to most complex, to build skills progressively.
- Seal every finished piece with at least two coats of outdoor varnish before placing it in a garden setting.
- Share your finished scene with the crafting community on social platforms or in local craft groups. The feedback and encouragement you receive will motivate your next project.
Clay fairy garden crafting rewards patience, curiosity, and a willingness to embrace the imperfect. The enchanted world you build will be unlike any other, because no one else will have made it quite the way you did.
References
[1] Watch – https://www.youtube.com/watch?v=ZmqUPlwxWRE
[2] Watch – https://www.youtube.com/watch?v=p0ppOCOJvo0
[3] Clay Fairy Garden Creations – https://www.happyfamilyart.com/craft-tutorials/clay-fairy-garden-creations/
[4] Watch – https://www.youtube.com/watch?v=3Ikig2EC-LA
[5] Watch – https://www.youtube.com/watch?v=gnmgUyGSOUs
[6] Fairy Garden In A Jar – https://www.instructables.com/Fairy-Garden-in-a-Jar/