8 Easy Hanging Flowers DIY Projects For Indoor Gardens
A NASA Clean Air Study found that indoor plants can remove up to 87% of air toxins in just 24 hours, and yet most people still leave their vertical wall space completely bare. That is a missed opportunity. The 8 Easy Hanging Flowers DIY Projects For Indoor Gardens covered in this guide turn empty air into living, blooming displays without requiring a contractor, a large budget, or years of gardening experience.
Disclosure: This post contains affiliate links. As an Amazon Associate, we earn from qualifying purchases, and at no extra cost to you.
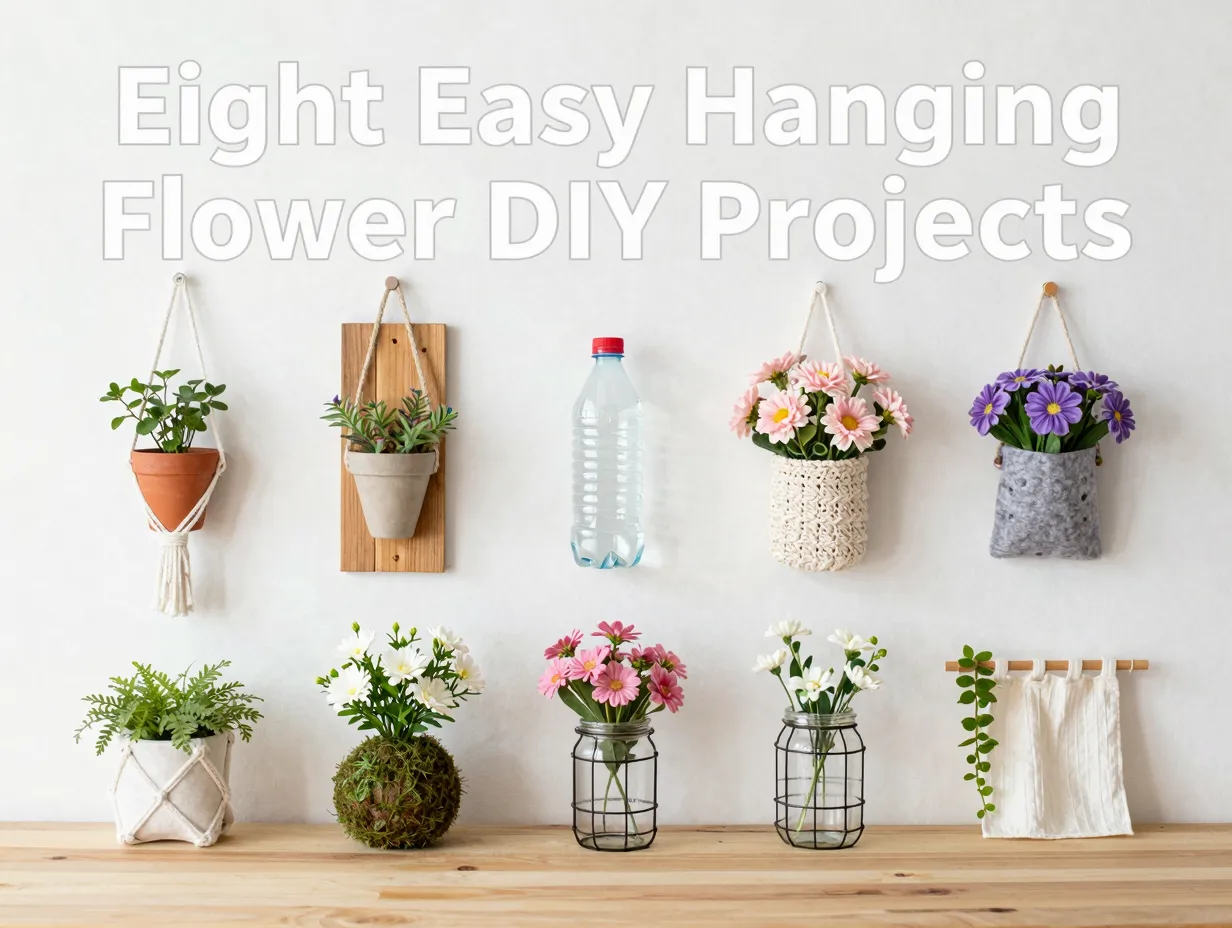
I started my own indoor hanging garden after moving into a studio apartment with almost no floor space. Within a weekend, I had transformed a blank wall and two windows into a cascading arrangement of flowers and trailing plants that guests still comment on today. The projects below are the ones I tested, refined, and kept.
Whether you are a complete beginner or a seasoned crafter looking for fresh ideas, these projects deliver real results with materials you can find at any hardware or craft store.
Key Takeaways
- Hanging flower projects maximize vertical space, making them ideal for small apartments and rooms with limited floor area.
- Materials like macramé cord, recycled glass jars, felt pockets, and moss are inexpensive and widely available.
- Eco-friendly options such as upcycled plastic bottles and recycled glass containers reduce household waste while beautifying your space.
- Techniques range from beginner-friendly (curtain rod displays, felt pockets) to moderately skilled (macramé, kokedama), so there is a project for every level.
- Proper plant selection, choosing species suited to indirect indoor light, is the single most important factor in long-term success.
The Full List: 8 Easy Hanging Flowers DIY Projects For Indoor Gardens
The projects below are numbered in ascending order from the most beginner-friendly to those requiring a bit more skill. Each one includes the core materials, a brief method overview, and plant recommendations so you can start planning immediately.
1. Macramé Plant Hangers
Skill level: Beginner
Time required: 2 to 3 hours
Estimated cost: $10 to $25
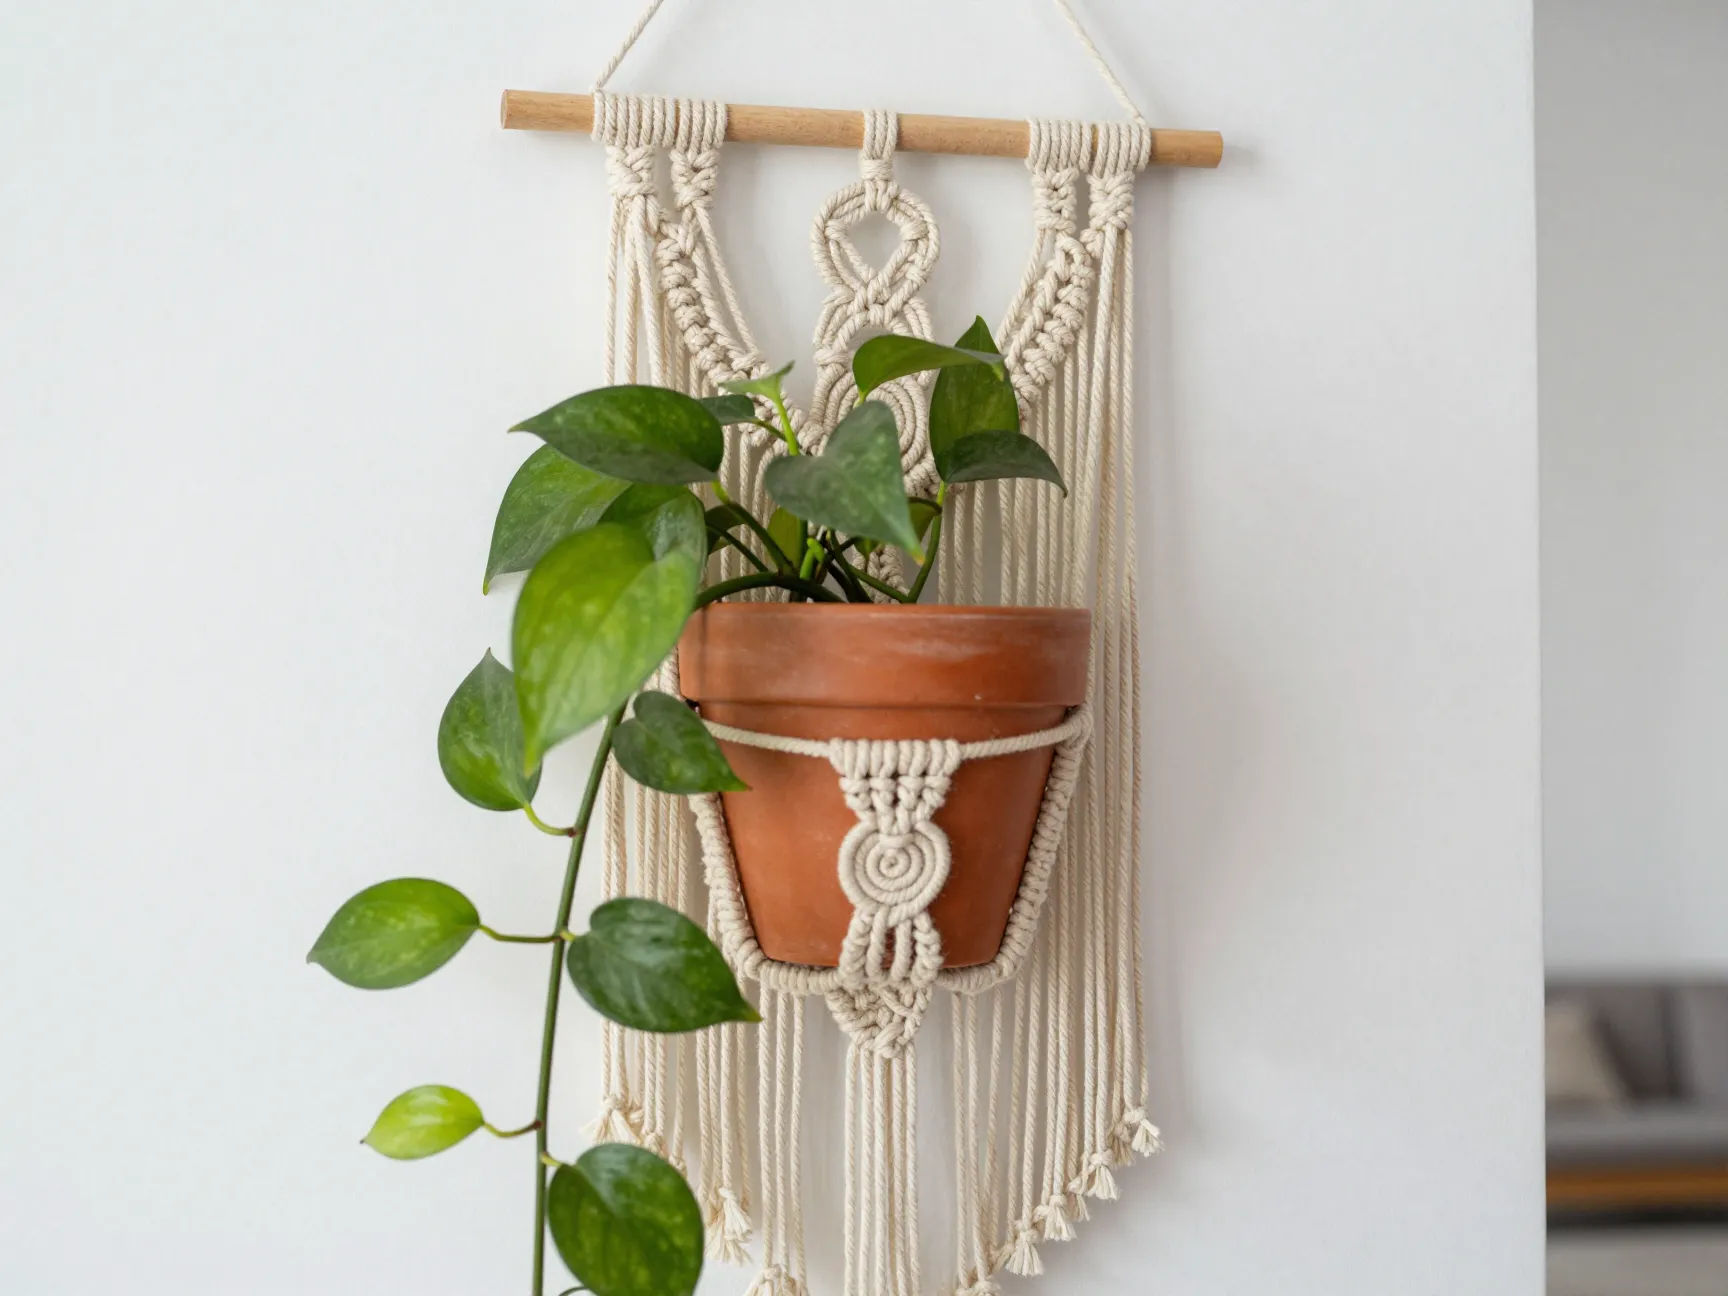
Macramé plant hangers remain one of the most popular choices for adding a bohemian touch to indoor spaces [1]. The technique involves knotting natural cotton or jute cord into a decorative cradle that holds a standard terracotta or ceramic pot.
What you need:
- 5mm natural cotton macramé cord (about 30 feet per hanger)
- A wooden dowel or metal ring for the top
- A ceiling hook or curtain rod
- Scissors
How to make it: Cut eight equal lengths of cord, fold them in half, and loop them through your top ring. Work a series of square knots and spiral knots down the length until you create a pocket wide enough to hold your pot. Finish with a gathered knot at the bottom and trim the fringe.
Macramé hangers are ideal for displaying cascading plants like pothos, string of pearls, or trailing petunia. The open weave allows air circulation around the pot, which reduces the risk of root rot. I have three of these hanging in my living room, and the texture they add to a plain white wall is remarkable.
“The beauty of macramé is that no two hangers are identical, every knot carries the maker’s hand.”
2. Vertical Scrap Wood and Rope Planter
Skill level: Beginner to intermediate
Time required: 3 to 4 hours
Estimated cost: $15 to $35
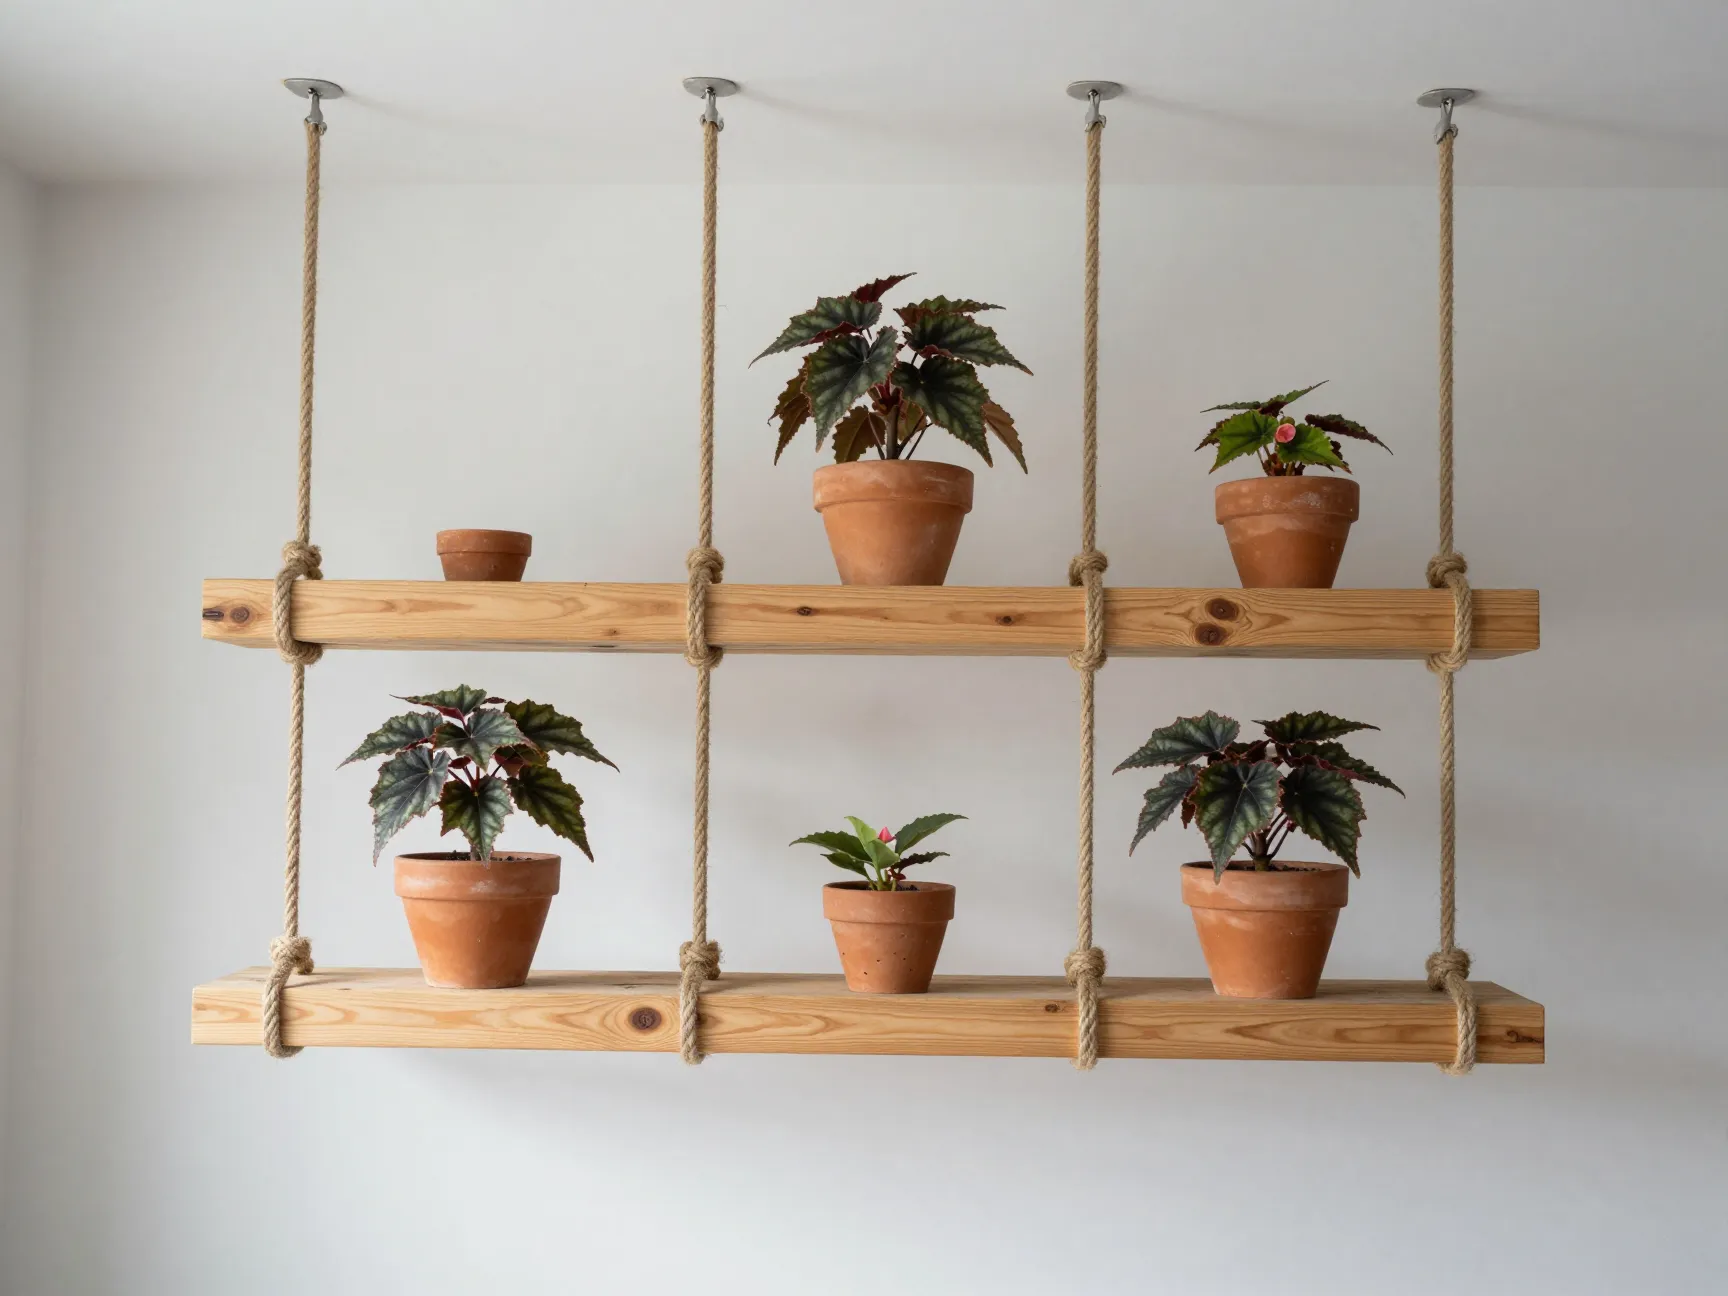
Creating vertical plant hangers using scrap wood, terra cotta pots, and rope is an effective way to maximize space [2]. This approach is particularly beneficial for those with limited floor area because it stacks multiple plants along a single vertical line rather than spreading them across a surface.
What you need:
- One piece of scrap wood (roughly 1 inch x 4 inches x 36 inches)
- Three small terra cotta pots with drainage holes
- Heavy-duty jute or nylon rope
- A drill with a 1/2-inch bit
- Two ceiling hooks
How to make it: Drill two holes near each end of the wood plank. Thread rope through the holes and tie secure knots beneath the plank to hold it level. Attach a second plank below the first using the same method, spacing them about 12 inches apart. Hang your pots on each plank using small pot hooks or wire loops. Secure the whole assembly to two ceiling hooks.
This design works beautifully with small flowering plants like African violets, mini orchids, or compact begonias. The staggered levels create visual depth that a single hanging pot simply cannot achieve.
3. Upcycled Plastic Bottle Hanging Planters
Skill level: Beginner
Time required: 1 to 2 hours
Estimated cost: $0 to $5 (using materials you already own)
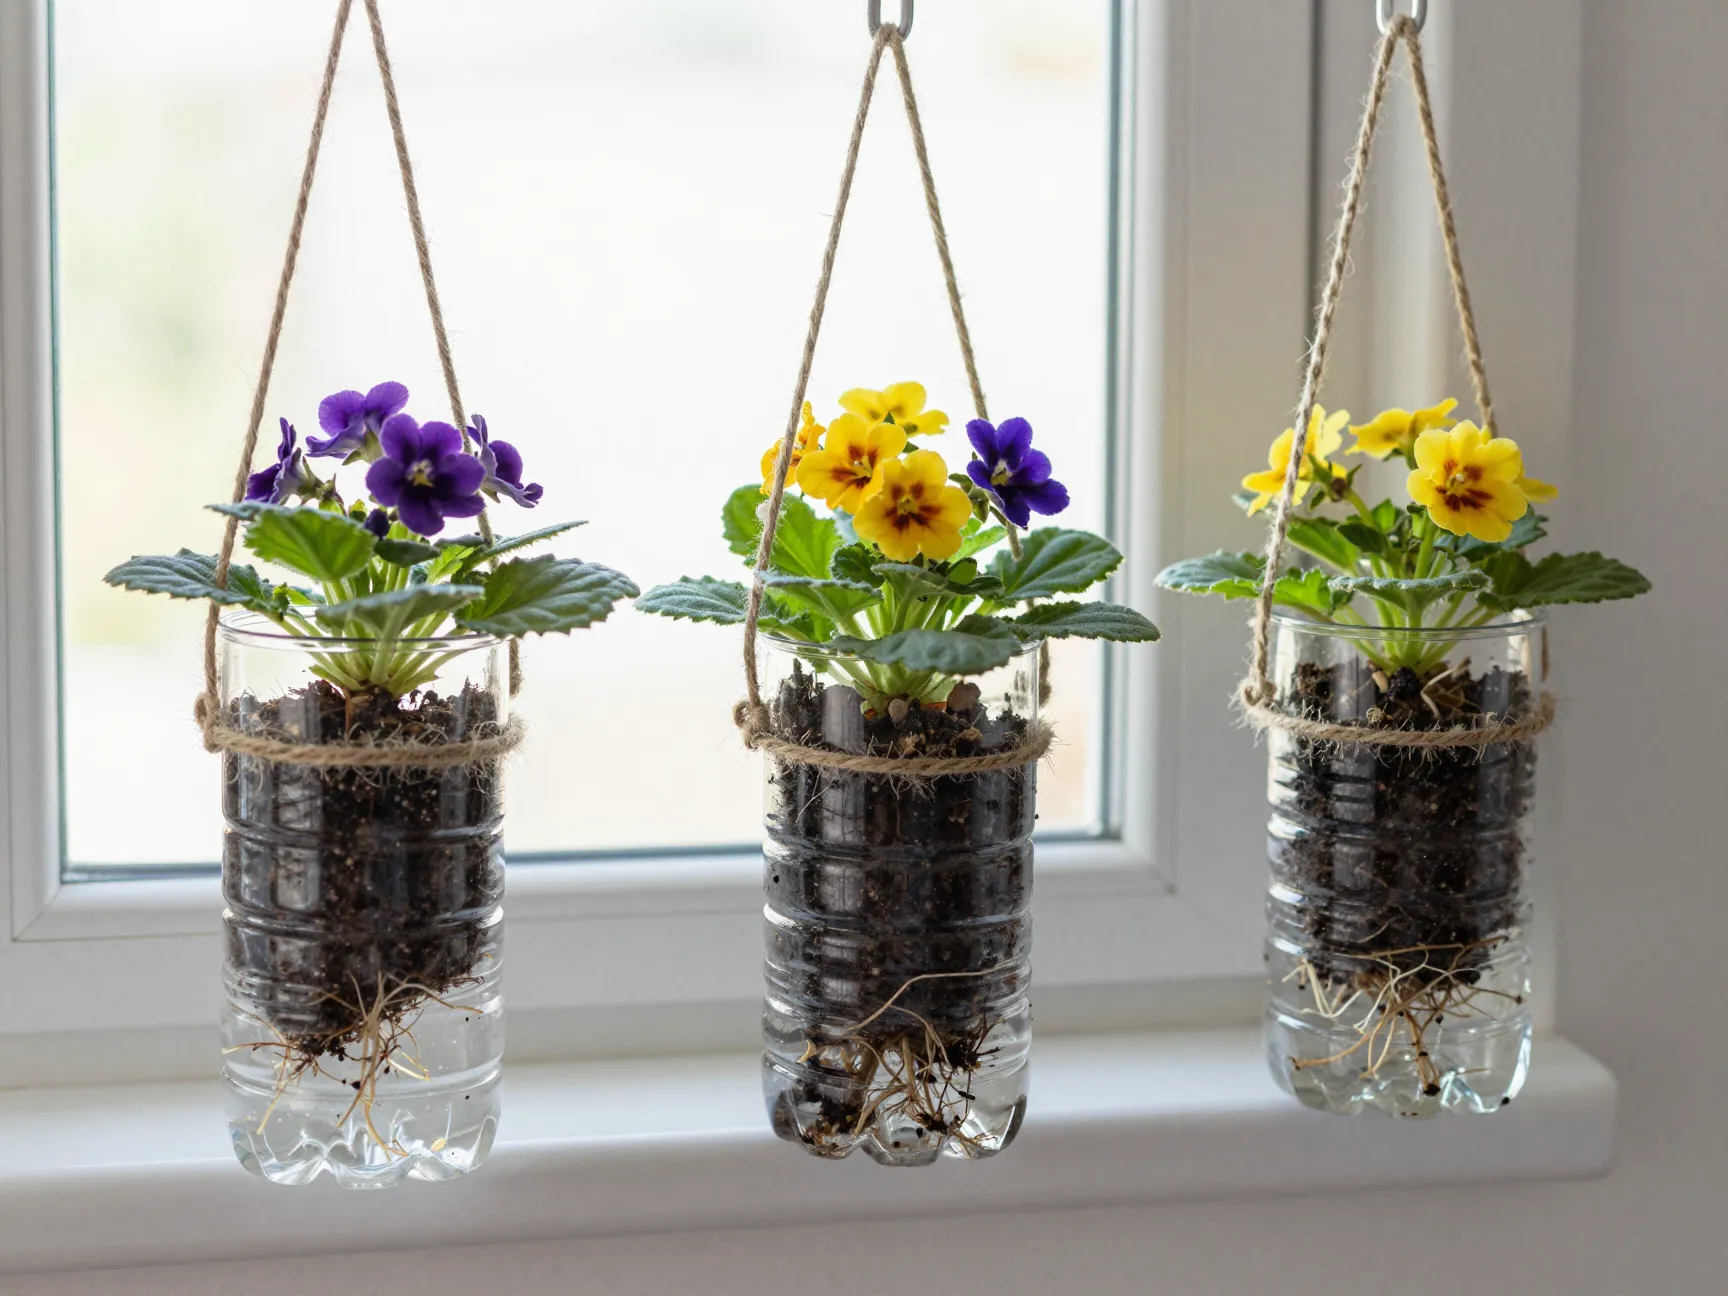
Repurposing plastic bottles into hanging planters is an eco-friendly and cost-effective method to enhance indoor gardens [3]. This practice reduces household waste and adds a unique, handcrafted aesthetic that store-bought planters rarely match.
What you need:
- Clean 2-liter plastic bottles
- A sharp craft knife or scissors
- Twine or paracord
- A hole punch or heated skewer
- Potting soil and small plants
How to make it: Cut the bottle horizontally about one-third from the bottom. Punch two small holes on opposite sides near the cut edge. Thread twine through the holes and tie a knot on the inside to secure it. Fill the bottom section with potting soil and plant a small flowering annual like lobelia, sweet alyssum, or mini impatiens. Hang from a hook or curtain rod.
I made a row of six of these along my kitchen window using bottles that would have gone into recycling. The total cost was essentially zero, and the effect, a bright line of color at eye level, was immediate.
4. Crochet Hanging Flower Baskets
Skill level: Intermediate (basic crochet knowledge required)
Time required: 4 to 6 hours
Estimated cost: $8 to $20
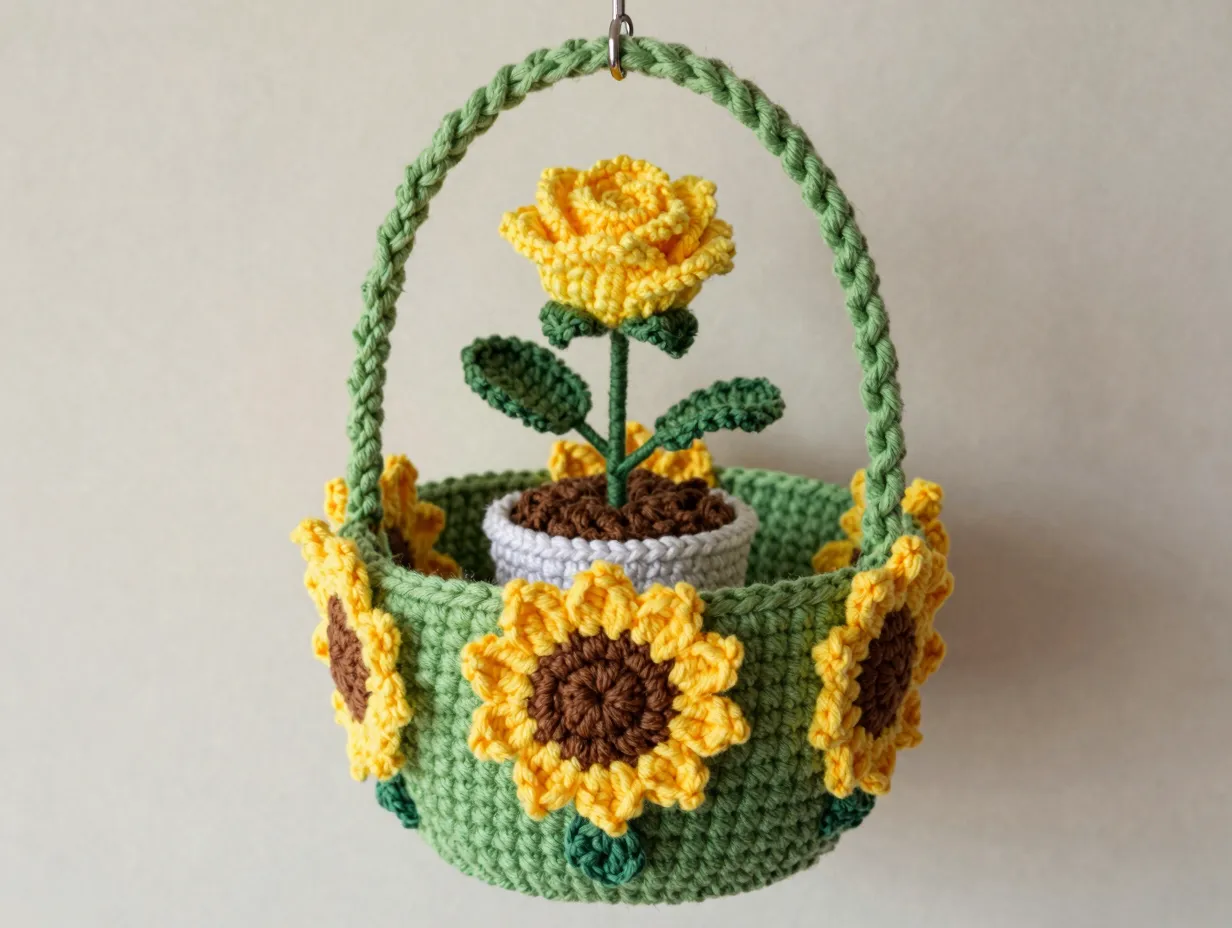
For those interested in fiber crafts, creating crochet hanging flower baskets adds a handmade charm to indoor gardens that no factory-made product can replicate [4]. Free patterns such as the Sunflower Hanging Wall Basket cater to a range of skill levels and produce stunning results.
What you need:
- Worsted weight cotton yarn in your chosen colors
- A 5mm crochet hook
- Stitch markers
- A hanging ring or dowel
- A free pattern (sunflower and daisy designs are widely available)
How to make it: Using a magic ring, work rounds of single and double crochet to build the base of the basket. As you increase rounds, the basket naturally curves upward. Work petal shapes around the rim to create a floral effect. Attach hanging cords to three evenly spaced points on the rim and tie them to a central ring at the top.
The finished basket can hold a small pot liner with a compact plant like a miniature rose or a small pot of pansies. The yarn absorbs a small amount of moisture, which can actually help regulate humidity around the plant roots.
5. Felt Pocket Vertical Garden
Skill level: Beginner
Time required: 1 to 2 hours
Estimated cost: $10 to $20
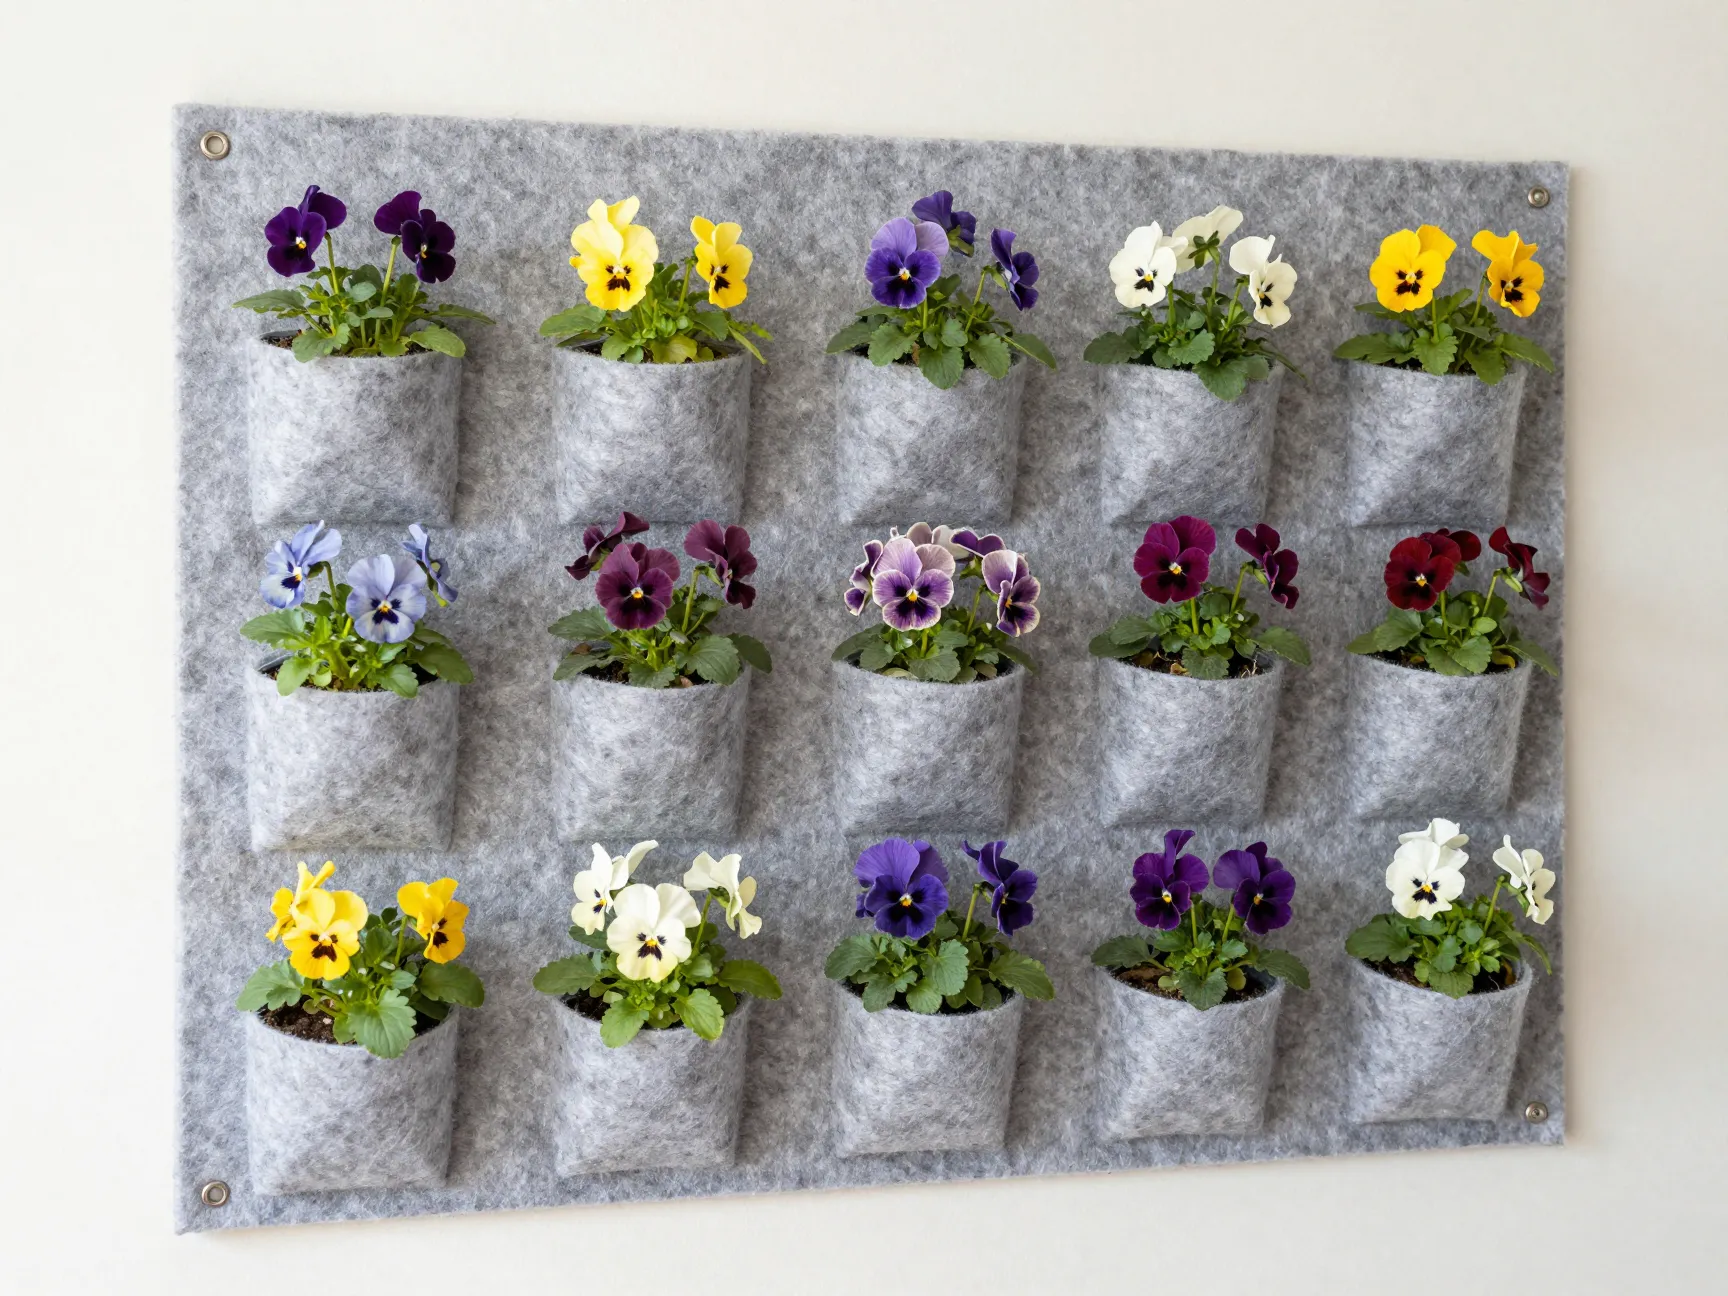
Utilizing felt pockets to create vertical gardens is a flexible and modular approach, ideal for growing herbs or flowers in small spaces [5]. This method is particularly favored by apartment dwellers and balcony gardeners because the panels can be rearranged or expanded at any time.
What you need:
- A sheet of heavy-duty felt (at least 3mm thick)
- Scissors or a rotary cutter
- A sewing machine or strong fabric glue
- Grommets and a grommet kit
- Potting mix and small plants
How to make it: Cut the felt into a large rectangular backing panel and several smaller pocket rectangles. Attach the pockets to the backing in a grid pattern using fabric glue or a simple running stitch. Install grommets at the top corners for hanging. Fill each pocket with a small amount of potting mix and tuck in compact flowering plants like violas, lobelia, or small marigolds.
The felt naturally wicks moisture, helping to keep roots evenly hydrated. A single panel measuring 24 inches by 36 inches can hold up to twelve small plants, turning one square foot of wall space into a dense, colorful display.
6. Hanging Kokedama Moss Balls
Skill level: Intermediate
Time required: 2 to 3 hours
Estimated cost: $15 to $30
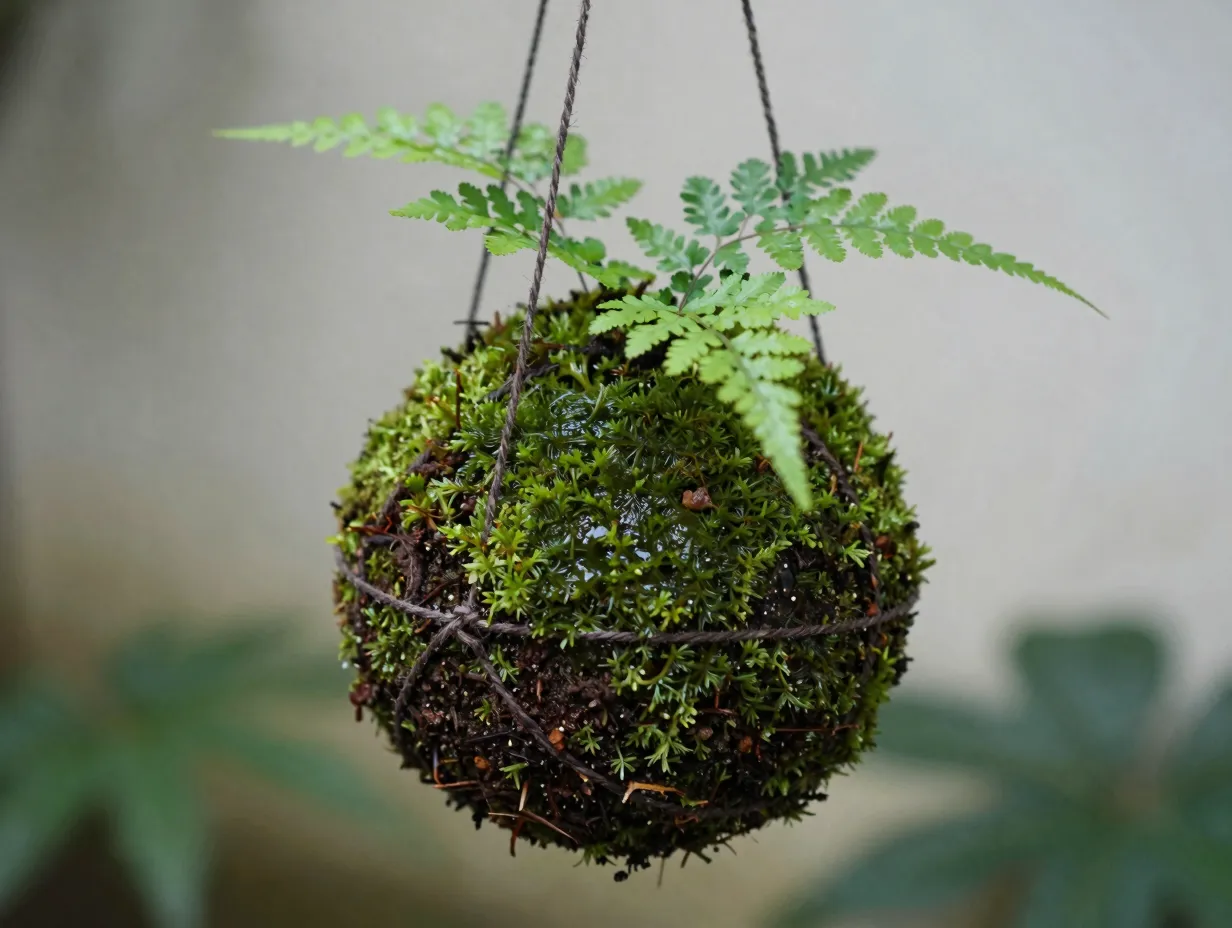
Originating from Japan, kokedama involves creating moss balls around plants that are then suspended with string [3]. This technique offers one of the most artistic and visually striking ways to display indoor plants, and it requires no pot at all.
What you need:
- Akadama soil or a mix of peat and bonsai soil
- Sheet moss (available at craft stores)
- Fishing line or dark twine
- A plant with a compact root ball (peace lily, fern, or small orchid work well)
- A spray bottle of water
How to make it: Mix your soil into a firm ball around the plant’s roots, pressing firmly to compact it. Wrap the entire ball in damp sheet moss, covering all soil. Bind the moss tightly with fishing line, wrapping in multiple directions until the ball holds its shape securely. Attach three equal lengths of twine to the top and tie them together above the ball for hanging.
Kokedama requires regular misting, about every two to three days, and a brief soak in a bowl of water once a week. The moss ball should feel damp but never waterlogged. When I made my first kokedama with a small maidenhair fern, the result looked like something from a Japanese botanical garden. Guests always ask about it first.
7. Recycled Glass Jar Hanging Planters
Skill level: Beginner
Time required: 1 hour
Estimated cost: $5 to $15
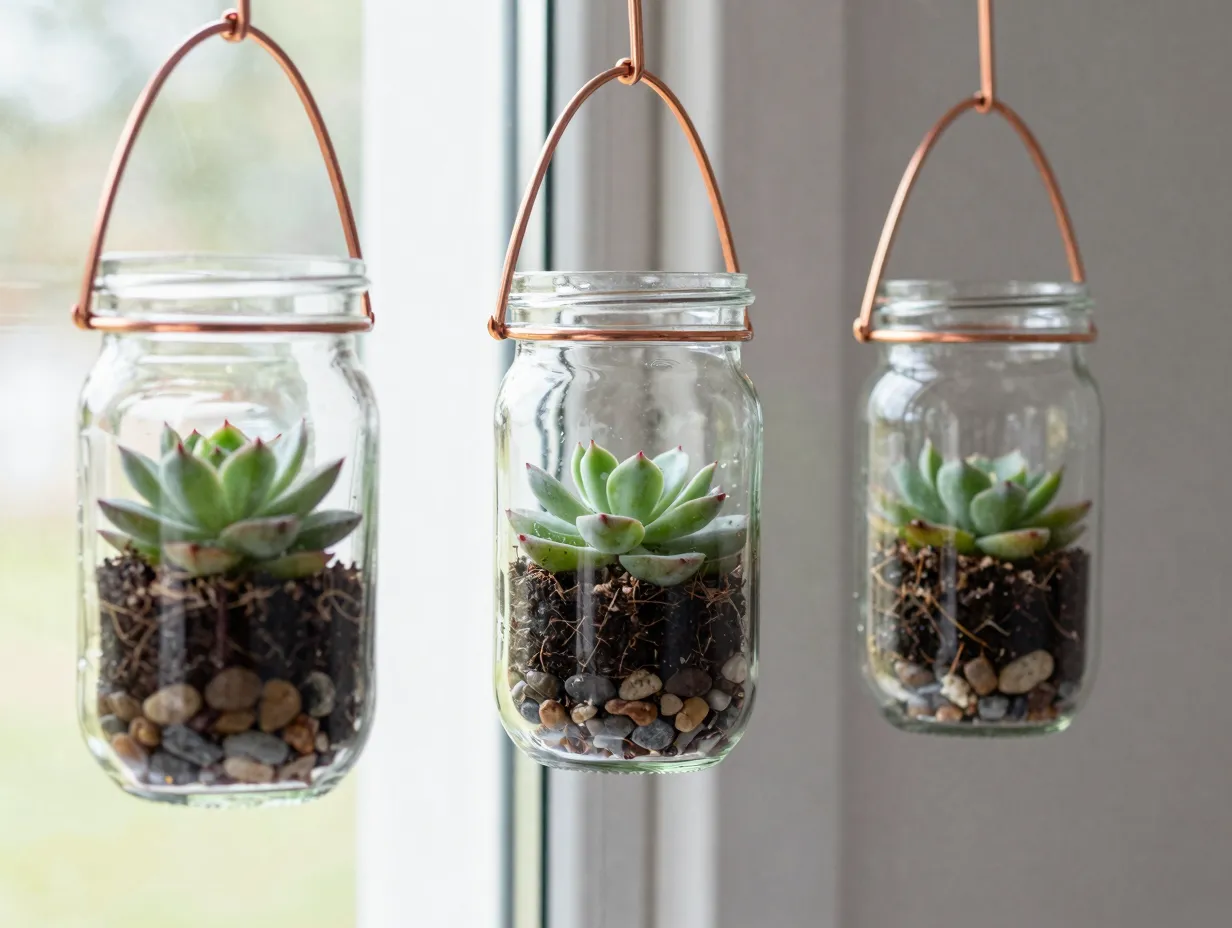
Crafting hanging planters from recycled glass containers like mason jars or wine bottles provides an eco-friendly twist on indoor gardening [6]. The transparent walls add a light, airy feel to the décor and allow you to monitor soil moisture and root health at a glance.
What you need:
- Clean mason jars or wide-mouth glass jars
- Copper wire or thick twine
- A wire cutter and needle-nose pliers
- Small pebbles for drainage
- Potting mix and compact flowering plants
How to make it: Wrap copper wire tightly around the neck of the jar, twisting it to create a secure collar. Extend two lengths of wire upward from opposite sides of the collar and twist them together at the top to form a hanging loop. Add a layer of small pebbles to the bottom of the jar for drainage (since drilling glass requires a diamond-tipped bit and extra care), then add potting mix and your plant.
Glass jars work particularly well with small flowering succulents, air plants with blooms, or compact herbs like thyme that occasionally flower. A row of three jars hung at slightly different heights along a kitchen window creates a clean, modern display.
8. Living Curtain of Hanging Plants
Skill level: Beginner to intermediate
Time required: 2 to 4 hours (plus ongoing plant training)
Estimated cost: $20 to $50
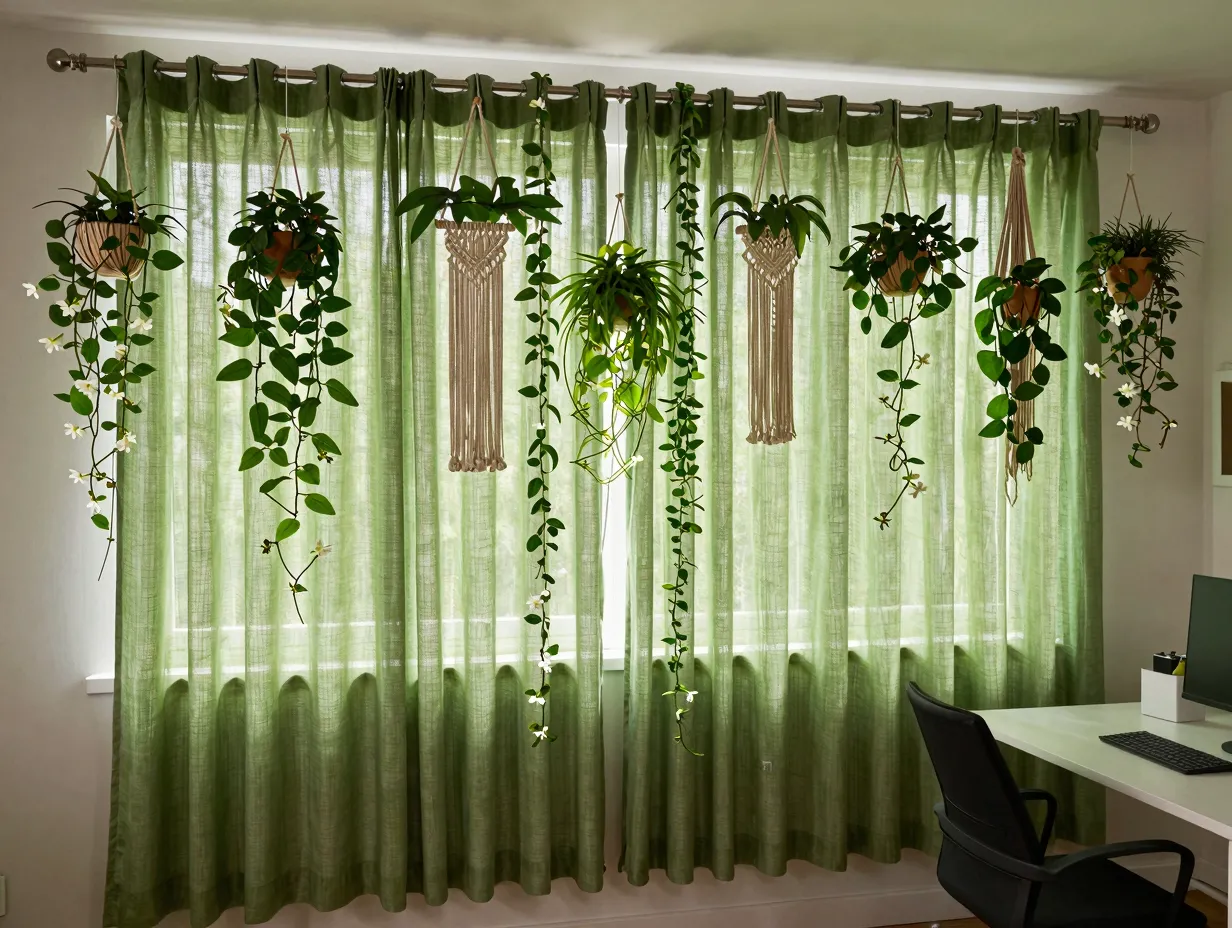
Creating a living green curtain by hanging plants in front of windows not only enhances aesthetics but also improves air quality noticeably [7]. Suitable plants for this setup include climbing jasmine, creeping fig, and philodendron, all of which thrive in the bright indirect light typical of most window positions.
What you need:
- A sturdy curtain rod rated for at least 20 pounds
- Multiple hanging planters or macramé hangers
- Thin garden wire or clear fishing line for training vines
- Plants: jasmine, pothos, creeping fig, or philodendron
- Wall anchors and screws appropriate for your wall type
How to make it: Install a curtain rod across your window frame using heavy-duty brackets. Hang a series of planters along the rod at evenly spaced intervals. As the plants grow, use short lengths of clear fishing line to guide trailing stems along the rod and down toward the floor, creating a cascading green wall effect. For flowering varieties like jasmine, the blooms will eventually fill the space between the window and the room with both color and fragrance.
This is the most ambitious project on the list, but it is also the most transformative. My living curtain took about three months to fill in fully, but once it did, it became the defining feature of my home office, a floor-to-ceiling wall of green that also blocks harsh afternoon sun.
Choosing the Right Plants for Your Hanging Projects
The project structure matters, but plant selection determines whether your indoor hanging garden thrives or struggles. The table below summarizes the best flowering plants for each project type.
| Project | Best Plants | Light Requirement |
|---|---|---|
| Macramé hanger | Pothos, string of pearls, trailing petunia | Bright indirect |
| Vertical wood planter | African violet, mini orchid, begonia | Medium indirect |
| Plastic bottle planter | Lobelia, sweet alyssum, impatiens | Bright indirect to direct |
| Crochet basket | Miniature rose, pansy, viola | Bright indirect |
| Felt pocket garden | Viola, lobelia, marigold | Bright indirect |
| Kokedama | Peace lily, maidenhair fern, orchid | Low to medium indirect |
| Glass jar planter | Flowering succulent, air plant, thyme | Bright indirect |
| Living curtain | Jasmine, creeping fig, philodendron | Bright indirect |
Key care principles for all hanging indoor plants:
- Water more frequently than ground-level plants because hanging containers dry out faster due to increased air exposure.
- Use a lightweight potting mix with added perlite to improve drainage and reduce the weight load on your hooks.
- Rotate planters a quarter turn every two weeks to ensure even light exposure on all sides.
- Fertilize monthly during spring and summer with a diluted liquid fertilizer; reduce to every six to eight weeks in autumn and winter.
Tools and Materials Overview
Before starting any of the 8 Easy Hanging Flowers DIY Projects For Indoor Gardens, gathering your supplies in advance saves time and prevents mid-project frustration. The following are the core tools that appear across multiple projects.
Essential tools:
- A power drill with standard and masonry bits
- Needle-nose pliers
- Sharp scissors or a rotary cutter
- A stud finder (for ceiling hooks in drywall)
- A level
Common materials across projects:
- Natural cotton or jute macramé cord
- Heavy-duty ceiling hooks rated for at least 15 pounds
- Potting mix with perlite
- Copper wire (18 to 20 gauge)
- Sheet moss
Most of these items are available at hardware stores, craft retailers, or garden centers. Buying cord and wire in bulk reduces cost significantly if you plan to complete more than one project.
Common Mistakes to Avoid
Even straightforward DIY projects go wrong when a few key principles are ignored. Based on my own experience and the guidance found across multiple indoor gardening resources [1][2][7][8], these are the mistakes most likely to derail your hanging garden.
1. Using hooks that are too small. A fully watered hanging planter can weigh 5 to 10 pounds. Always use hooks rated for at least twice the expected weight and anchor them into a ceiling joist or use a toggle bolt in drywall.
2. Overwatering. Hanging planters have less soil volume than ground-level containers, so they are more vulnerable to root rot. Water only when the top inch of soil feels dry.
3. Choosing the wrong plant for the light level. A sun-loving plant placed in a dim corner will decline quickly regardless of how well-crafted the hanger is. Match the plant to the actual light available, not the light you wish were available.
4. Ignoring drainage. Every planter needs a drainage solution. For pots with holes, use a saucer or drip tray. For sealed containers like glass jars, add a thick pebble layer at the base.
5. Hanging too high. Plants hung above eye level are easy to forget. Keep planters within comfortable reach for watering and inspection, roughly 5 to 6 feet from the floor works well for most people.
Conclusion
The 8 Easy Hanging Flowers DIY Projects For Indoor Gardens described in this guide cover every skill level, budget range, and aesthetic preference. From a quick afternoon project using recycled plastic bottles to the slow, rewarding build of a living jasmine curtain, each project adds genuine beauty and measurable air quality benefits to your indoor space.
Your next steps:
- Assess your available wall and ceiling space, noting where natural light is strongest.
- Choose one beginner-friendly project, macramé hangers or felt pockets are the lowest barrier to entry.
- Gather materials in a single shopping trip using the tools and materials list above.
- Complete your first project, observe how the plant responds over two to three weeks, then add a second project.
- Gradually build toward a full vertical garden by mixing textures: macramé beside glass jars beside kokedama creates a layered, gallery-quality display.
The vertical space in your home is some of the most underused real estate you own. These projects give it purpose, color, and life, and none of them require more than a free afternoon and a willingness to try something new.
References
[1] Indoor Hanging Planter Ideas – https://casolia.com/indoor-hanging-planter-ideas/?utm_source=openai
[2] DIY Hanging Planter Ideas – https://www.diycraftsy.com/diy-hanging-planter-ideas/?utm_source=openai
[3] 6 Creative DIY Indoor Hanging Garden Concepts – https://inhabitat.com/6-creative-diy-indoor-hanging-garden-concepts/?utm_source=openai
[4] Crochet Flower Basket Wall Hanging Free Patterns – https://crocht.com/crochet-flower-basket-wall-hanging-free-patterns/?utm_source=openai
[5] Hanging Gardens Ideas – https://www.garden.eco/hanging-gardens-ideas?utm_source=openai
[6] Creative Hanging Basket Ideas – https://ecocation.org/creative-hanging-basket-ideas/?utm_source=openai
[7] Hanging Plant Ideas – https://www.ruralsprout.com/hanging-plant-ideas/?utm_source=openai
[8] Hanging Plants – https://thegreenfy.com/hanging-plants/?utm_source=openai