9 Beautiful Macrame Plant Hanger Designs To DIY For Your Home
Macrame craft sales jumped by more than 40% on major handmade marketplaces between 2022 and 2025, yet the average store-bought plant hanger still costs three to five times more than the materials needed to make one yourself. That gap between price and value is exactly why so many home decorators are picking up cotton cord and learning the basics. If you have been looking for a creative, budget-friendly way to display your houseplants, these 9 Beautiful Macrame Plant Hanger Designs To DIY For Your Home are the perfect starting point.
Disclosure: This post contains affiliate links. As an Amazon Associate, we earn from qualifying purchases, and at no extra cost to you.
Whether you are a complete beginner or someone who has already made a few simple hangers, this guide walks you through nine distinct styles, from the most basic single-pot hanger to eye-catching multi-tiered shelves. Each design builds on a small set of core knots, so the skills you learn early carry forward into every project that follows. [1]
Key Takeaways
- Most macrame plant hangers require only three to four knot types: square knots, spiral knots, double half-hitch knots, and gathering knots.
- Standard projects use 3-4 mm natural cotton cord, with strand counts between 6 and 24 cords cut to lengths of 7-12 feet each. [1]
- Beginners should start with a simple single-pot hanger before progressing to multi-pot or wall-mounted designs.
- The right cord thickness and pot weight must be matched carefully to ensure structural safety.
- All nine designs in this guide can be completed with basic tools: a wooden dowel or ring, scissors, and measuring tape.
Why Macrame Plant Hangers Are Worth Making in 2026
Before diving into the designs themselves, it helps to understand why DIY macrame has stayed so popular. The craft requires no electricity, no expensive equipment, and very little dedicated workspace. A ball of cotton cord, a sturdy hook or dowel, and a free afternoon are genuinely all you need to get started.
I made my first plant hanger on a rainy Saturday using a tutorial I found online, and the entire project cost under six dollars in materials. The finished hanger now holds a trailing pothos in my kitchen window, and guests consistently ask where I bought it. That reaction never gets old.
Beyond the personal satisfaction, handmade hangers offer something store-bought versions simply cannot: exact customization. You choose the length, the knot density, the fringe style, and whether the hanger holds one pot or three. That flexibility is what makes the craft so enduring. [3]
A quick note on materials before you begin:
- Cord: 3 mm single-strand cotton cord works well for lighter pots; 4 mm braided or twisted cord handles heavier ceramic planters. [4]
- Ring or dowel: A 2-inch brass or wooden ring serves as the anchor point for most single-pot designs.
- Pot size: Most beginner patterns are designed for 4- to 6-inch pots. Always check the hanger’s basket width before choosing your planter.
9 Beautiful Macrame Plant Hanger Designs To DIY For Your Home
The nine designs below are arranged from simplest to most complex. If you are new to macrame, work through them in order. If you already have some experience, feel free to jump to whichever style catches your eye.
1. The Classic Single-Pot Hanger
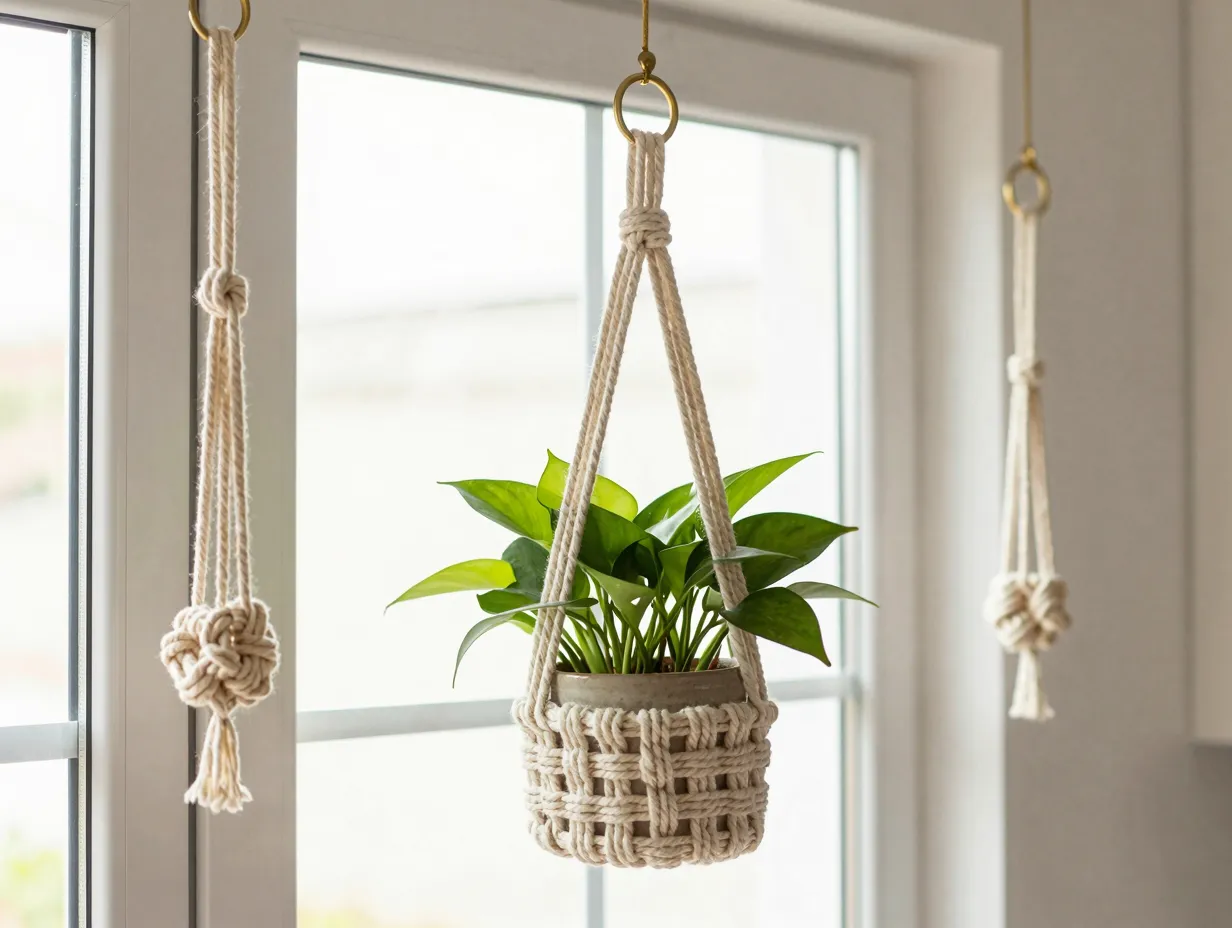
This is the foundational design that every macrame tutorial starts with, and for good reason. The classic single-pot hanger uses eight cords folded in half through a ring, creating sixteen working strands. You tie a gathering knot at the top, work a series of square knots down the length, and finish with a basket of alternating square knots to cradle the pot. [2]
What you need:
- 8 cords cut to 8 feet each (3 mm cotton)
- 1 wooden or brass ring (2 inches)
- Scissors
Why it works: The alternating square knot basket naturally conforms to round pots, distributing weight evenly. This design is also the fastest to complete, typically taking 60 to 90 minutes for a first-timer.
The classic hanger looks beautiful in groups of three hung at staggered heights, which is a simple way to create a statement display without advanced skills. [6]
2. The Spiral Twist Hanger
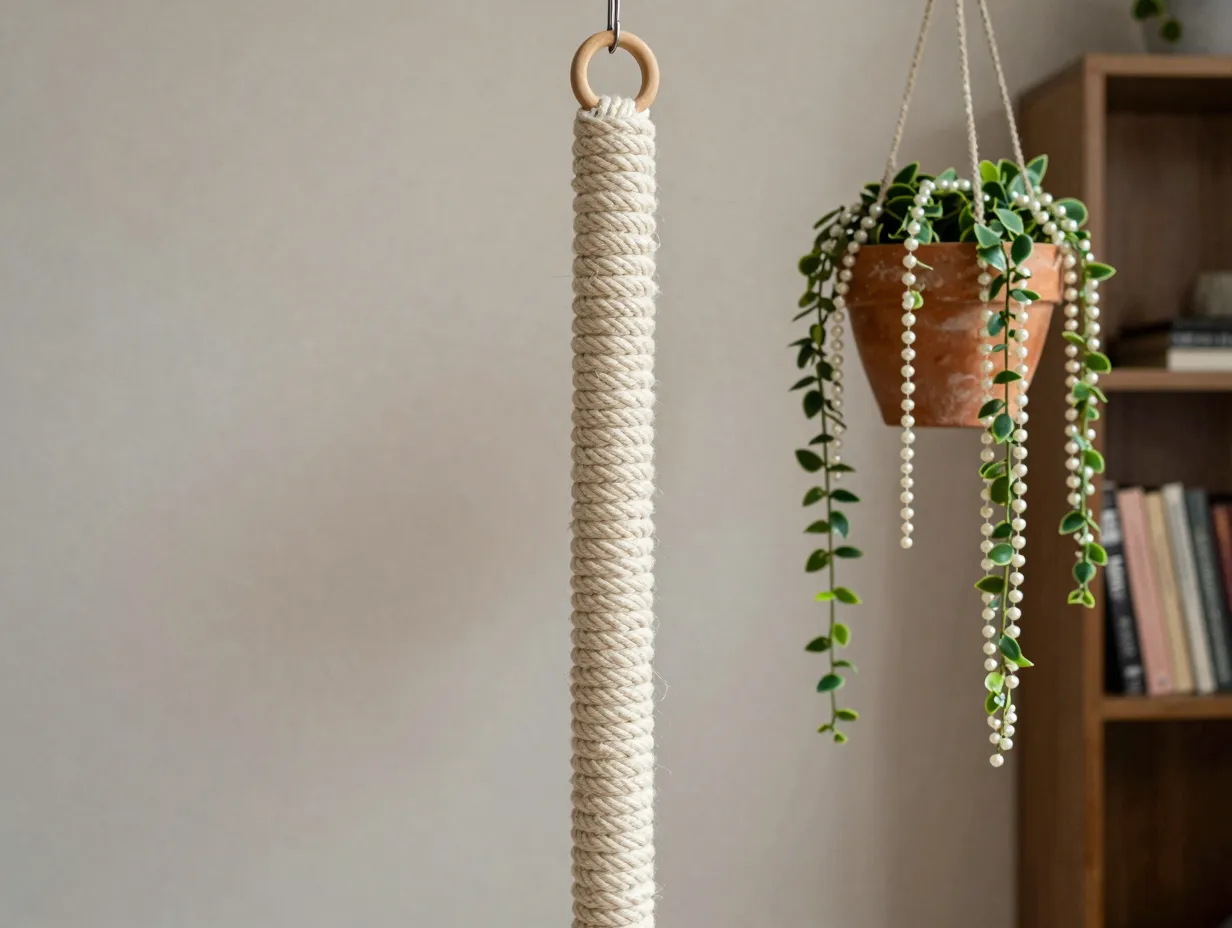
Once you are comfortable with square knots, the spiral (or half-square) knot variation opens up a whole new visual texture. Instead of completing the full square knot, you repeat only the first half of the motion consistently, which causes the cord to rotate naturally into a tight, rope-like spiral.
The spiral twist hanger uses the same basic structure as the classic design but replaces the straight knotted sections with spiral columns. The effect is elegant and slightly more organic-looking, which pairs beautifully with trailing plants like string of pearls or ivy. [4]
Pro tip: Use at least 10 feet of cord per strand for spiral sections, because the twisting motion consumes cord faster than standard square knots.
3. The Diamond Pattern Hanger
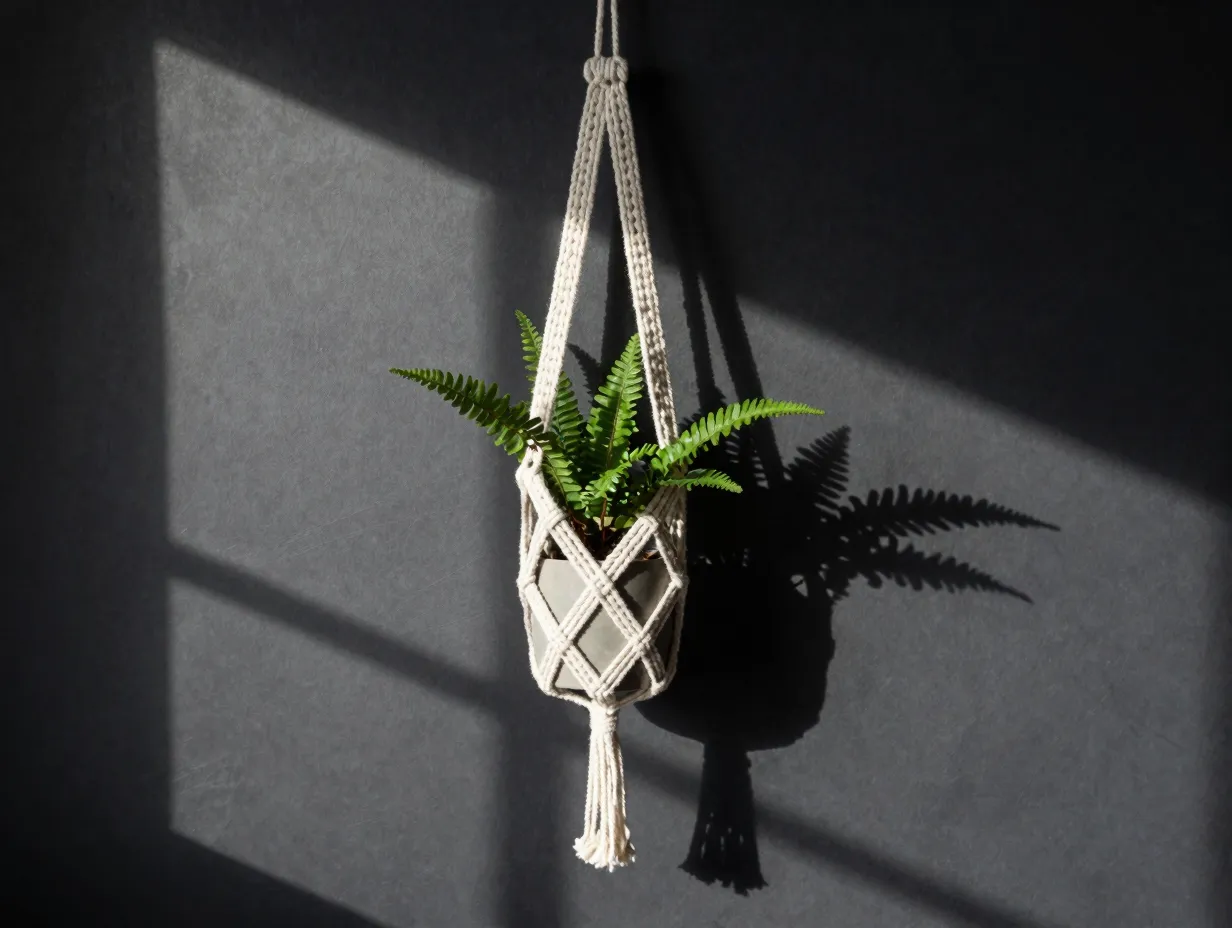
This design introduces double half-hitch knots, which are the building blocks of geometric shapes in macrame. By working diagonal rows of double half-hitch knots, you create open diamond shapes along the body of the hanger that catch light and add visual depth.
The diamond pattern hanger looks far more complex than it actually is. Once you understand how to set the angle of your working cord and pull each half-hitch tight, the diamonds form almost automatically. [7]
Suggested cord: 4 mm twisted cotton in a natural or bleached white tone, which makes the diamond geometry easier to see as you work.
This design is particularly striking when displayed against a dark wall, where the open negative space of the diamonds creates a shadow pattern throughout the day.
4. The Boho Fringe Hanger
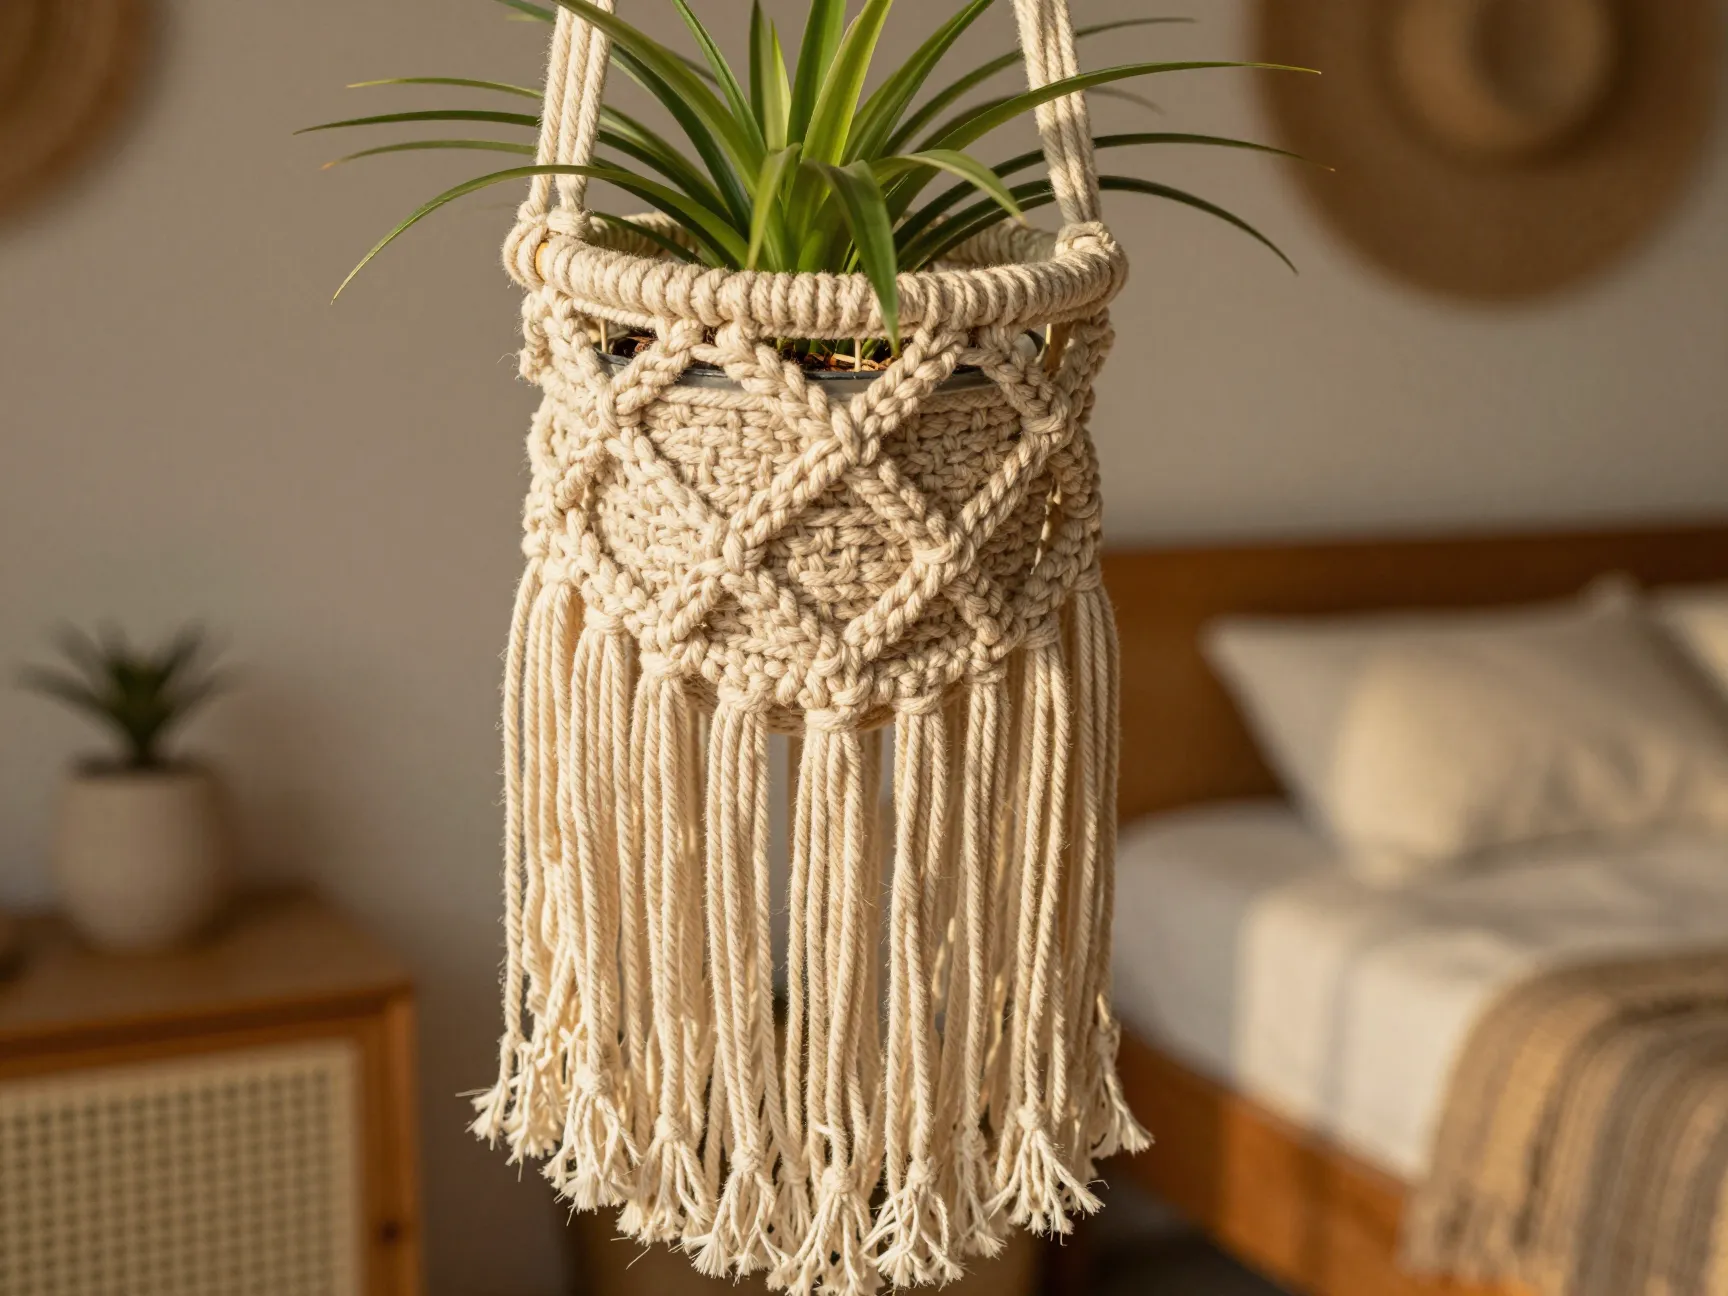
Fringe is one of the most recognizable elements of bohemian macrame, and the boho fringe hanger leans into it fully. After forming the pot basket, the remaining cord ends are left long and brushed out with a stiff comb or pet slicker brush to create a full, feathery fringe below the plant.
The brushed fringe softens the structured knotwork above it and adds movement to the hanger, making it feel alive even when the air is still. [5]
Design tip: Use a single-ply cotton cord rather than braided cord for the fringe section. Single-ply unravels into individual fibers more easily, producing a fuller, softer result.
Fringe length can range from 4 inches for a subtle finish to 12 inches or more for a dramatic, floor-grazing effect on taller hangers.
5. The Minimalist Two-Cord Hanger
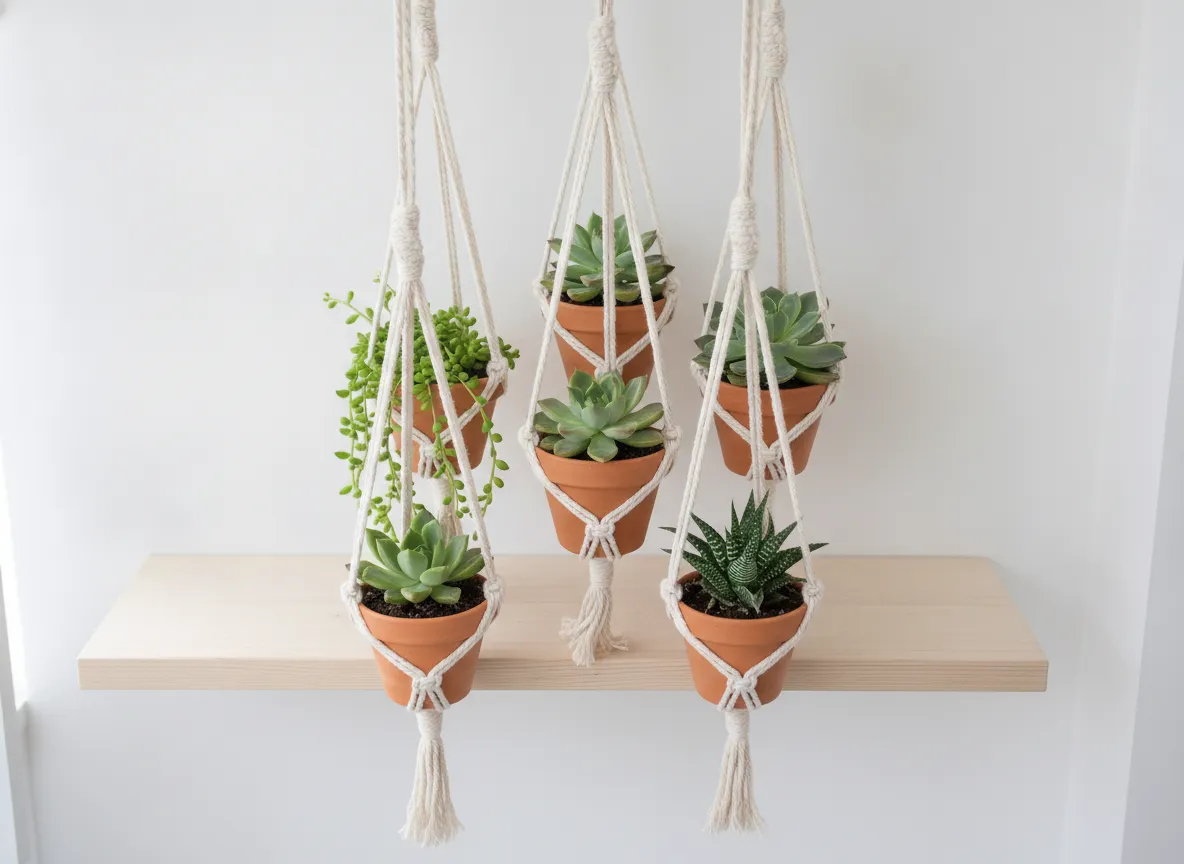
Not every design needs to be elaborate. The minimalist two-cord hanger uses just two long cords folded in half, creating four strands. These four strands are knotted at intervals with simple overhand knots, then spread into a wide cradle at the base.
This design is ideal for small, lightweight pots like 2- to 3-inch succulents or air plants. The open, airy structure lets the plant itself become the focal point rather than the knotwork. [9]
What makes it special: The minimalist hanger can be completed in under 30 minutes, making it an excellent project for crafting with children or for a quick weekend refresh of a shelf or window display.
I keep a cluster of five of these in my bathroom, each holding a small succulent, and the entire display took less than two hours to make from scratch.
6. The Double-Pot Stacked Hanger
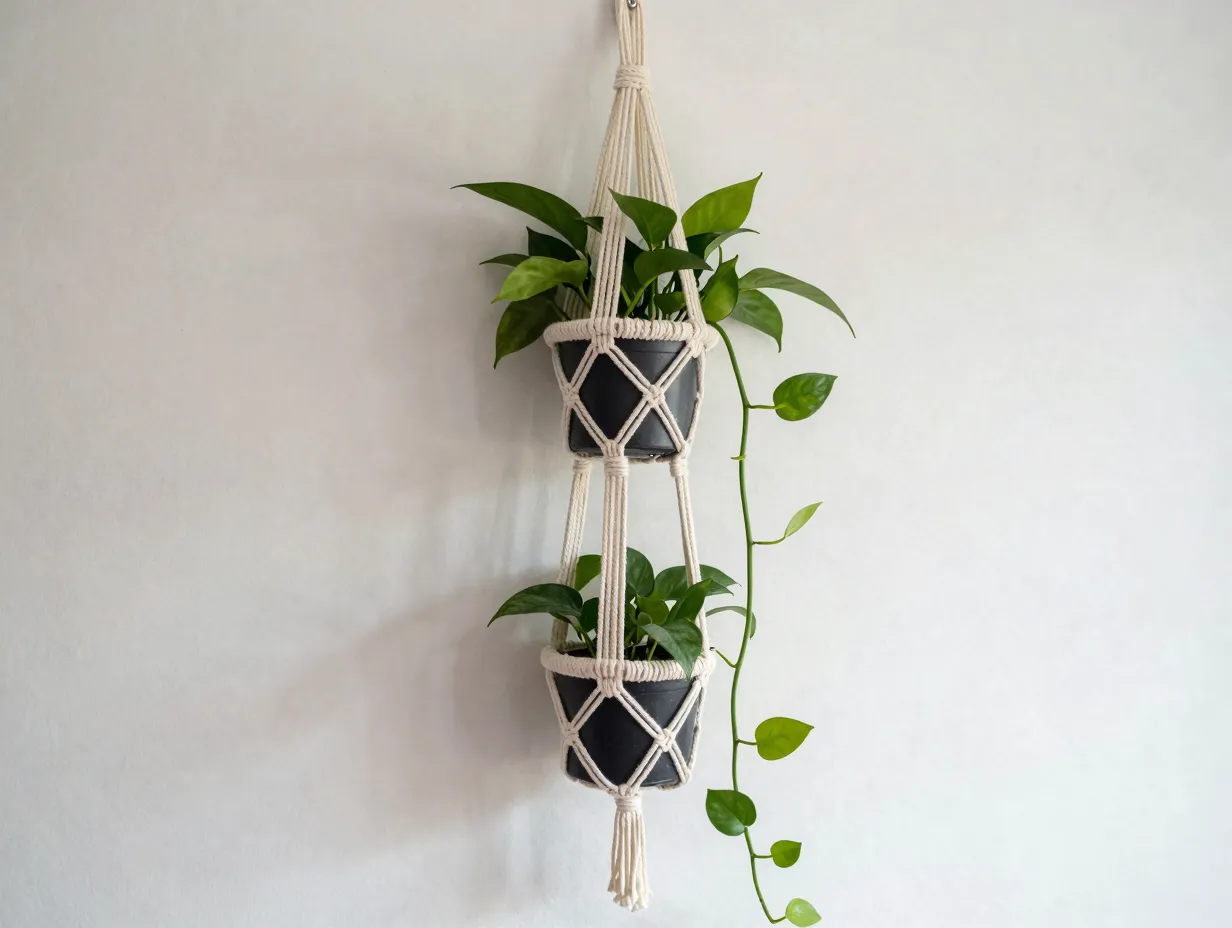
This design steps up in complexity by incorporating two pot cradles on a single hanger, one above the other. The upper cradle sits roughly midway along the hanger, while the lower cradle forms near the bottom. Both cradles use alternating square knot baskets. [1]
Cord requirement: Because you are creating two baskets, each cord needs to be longer, typically 12 feet per strand, to ensure you have enough material to complete both sections without running short.
Planting suggestion: Pair a fuller plant like a pothos or philodendron in the upper cradle with a trailing plant like a string of hearts in the lower cradle, so the trailing stems cascade downward and soften the structure.
The double-pot stacked hanger is one of the most practical designs on this list because it doubles your display space without requiring twice the ceiling hooks.
7. The Wide-Mouth Bowl Hanger
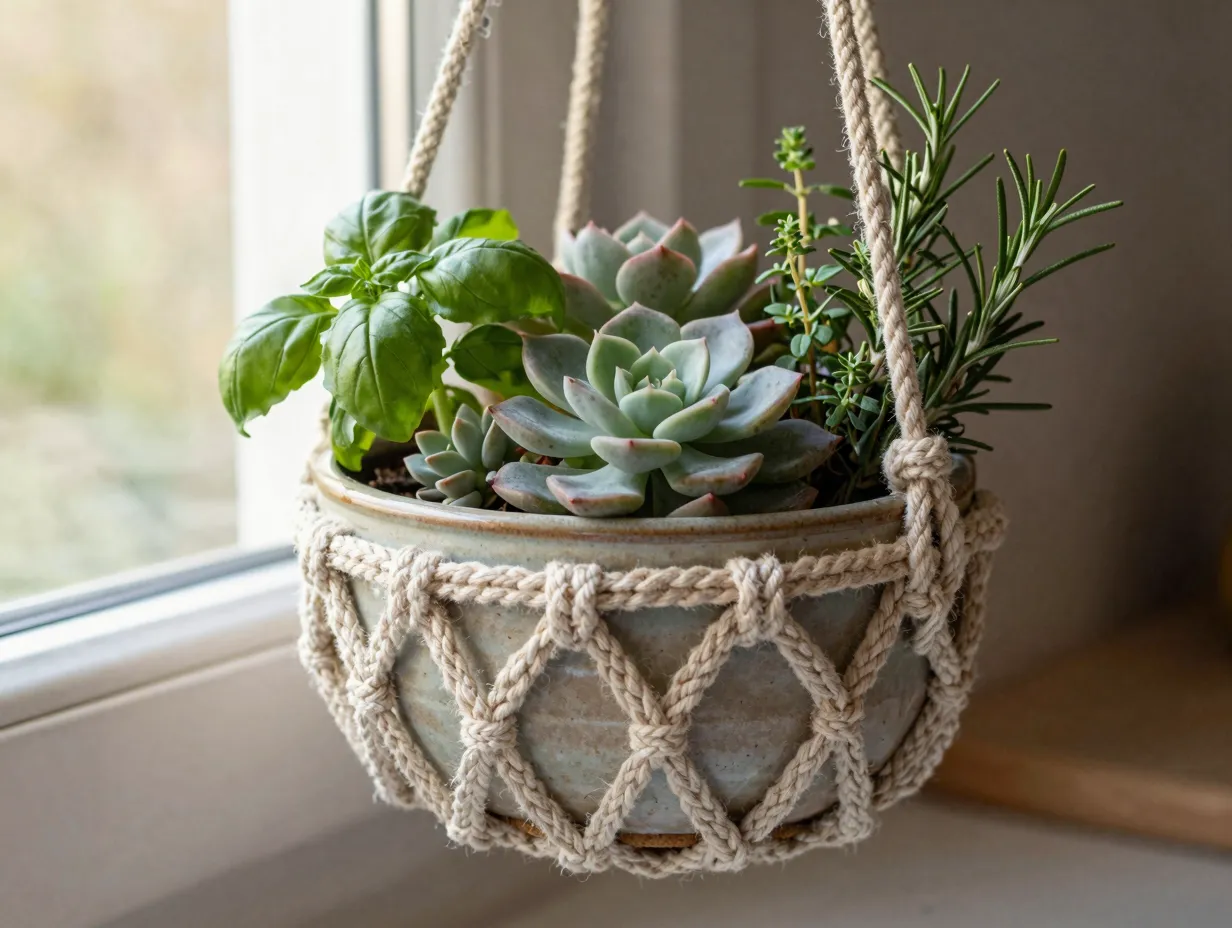
Most plant hangers are designed for standard cylindrical or tapered pots. The wide-mouth bowl hanger is specifically engineered for shallow, wide bowls and dish planters, which are increasingly popular for succulent arrangements and herb gardens.
The key difference is in the basket construction. Instead of a tight alternating square knot basket, this design uses a wider, shallower net of loose square knots spaced farther apart, which allows the bowl’s rim to rest securely without tipping. [8]
Cord spacing: Leave at least 1.5 inches between knots in the basket section to accommodate the wider base of a bowl-style planter.
This hanger looks particularly beautiful in a kitchen window holding a small herb bowl with basil, thyme, and rosemary growing together.
8. The Wall-Mounted Plant Hanger
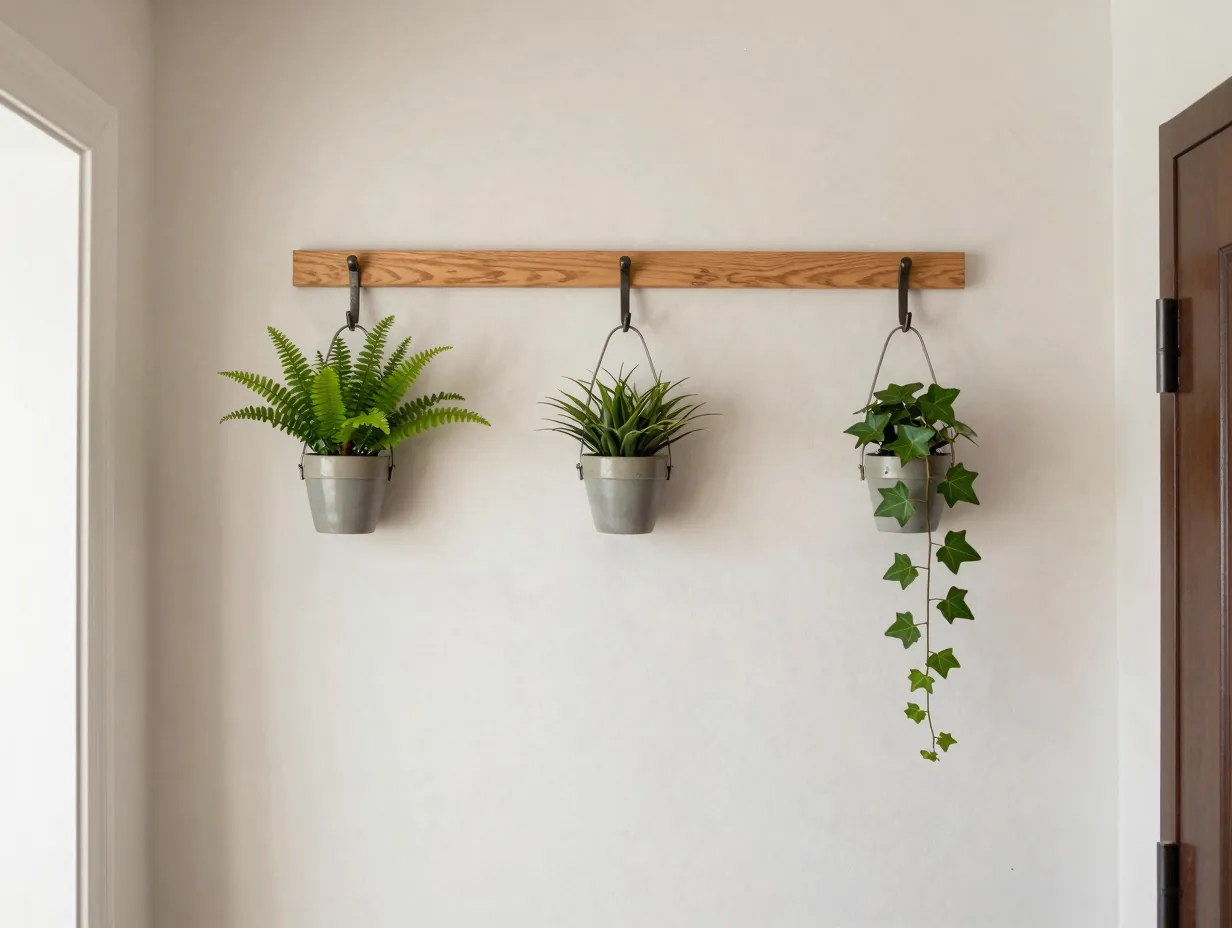
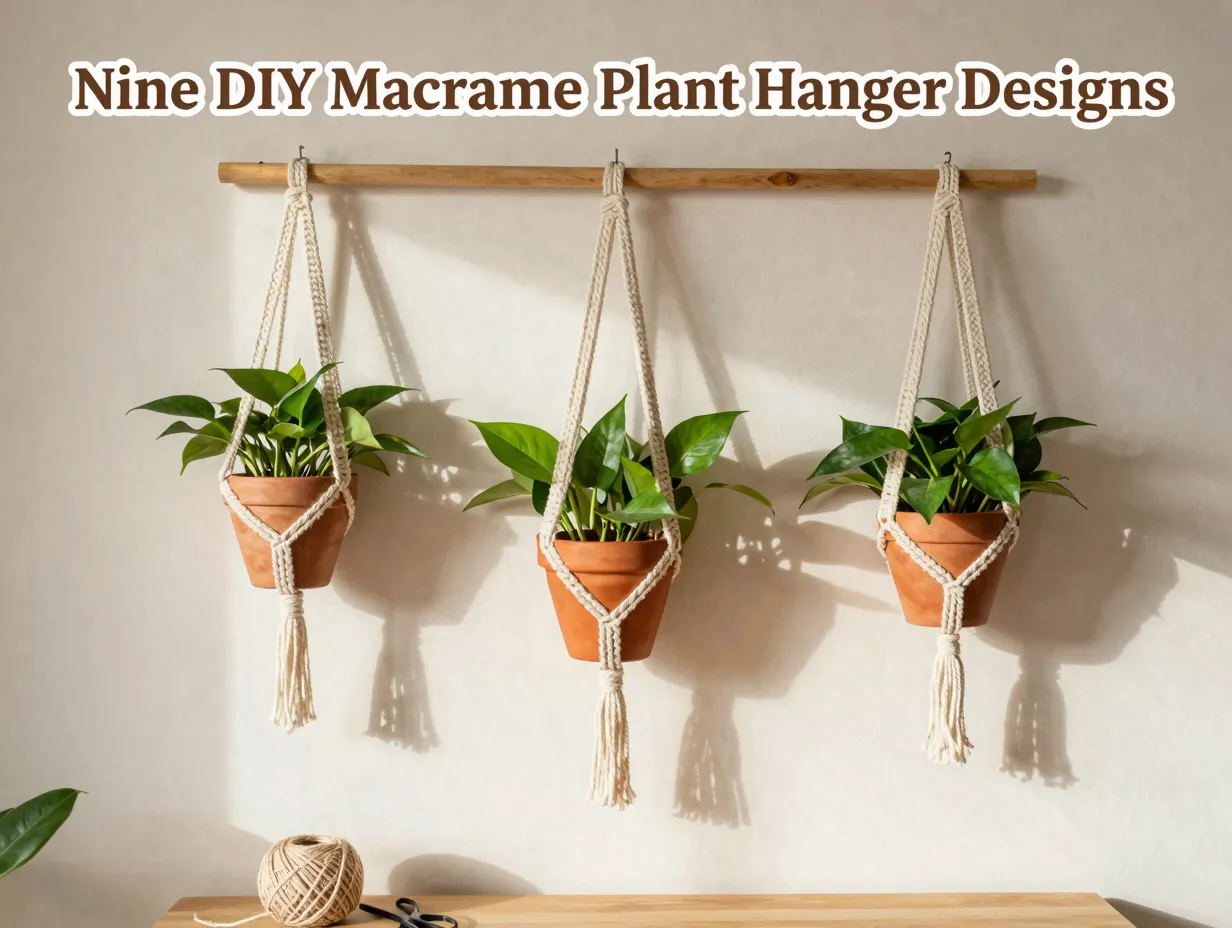
All of the designs above hang vertically from a single hook or ceiling mount. The wall-mounted plant hanger takes a different approach, attaching horizontally to a wooden dowel that is fixed to the wall. The plant cradles hang down from the dowel, creating a living wall display. [8]
What you need:
- A wooden dowel or driftwood branch (12-18 inches wide)
- 16-24 cords cut to 10 feet each (3-4 mm cotton)
- Two wall hooks or nails
Design flexibility: A single dowel can support two to four pot cradles side by side, depending on the dowel length and pot size. Each cradle is essentially a miniature version of the classic single-pot hanger, attached to the dowel at regular intervals.
The wall-mounted style works exceptionally well in narrow spaces like hallways or beside a front door, where a vertical hanging hanger would take up too much depth.
9. The Multi-Tiered Macrame Shelf
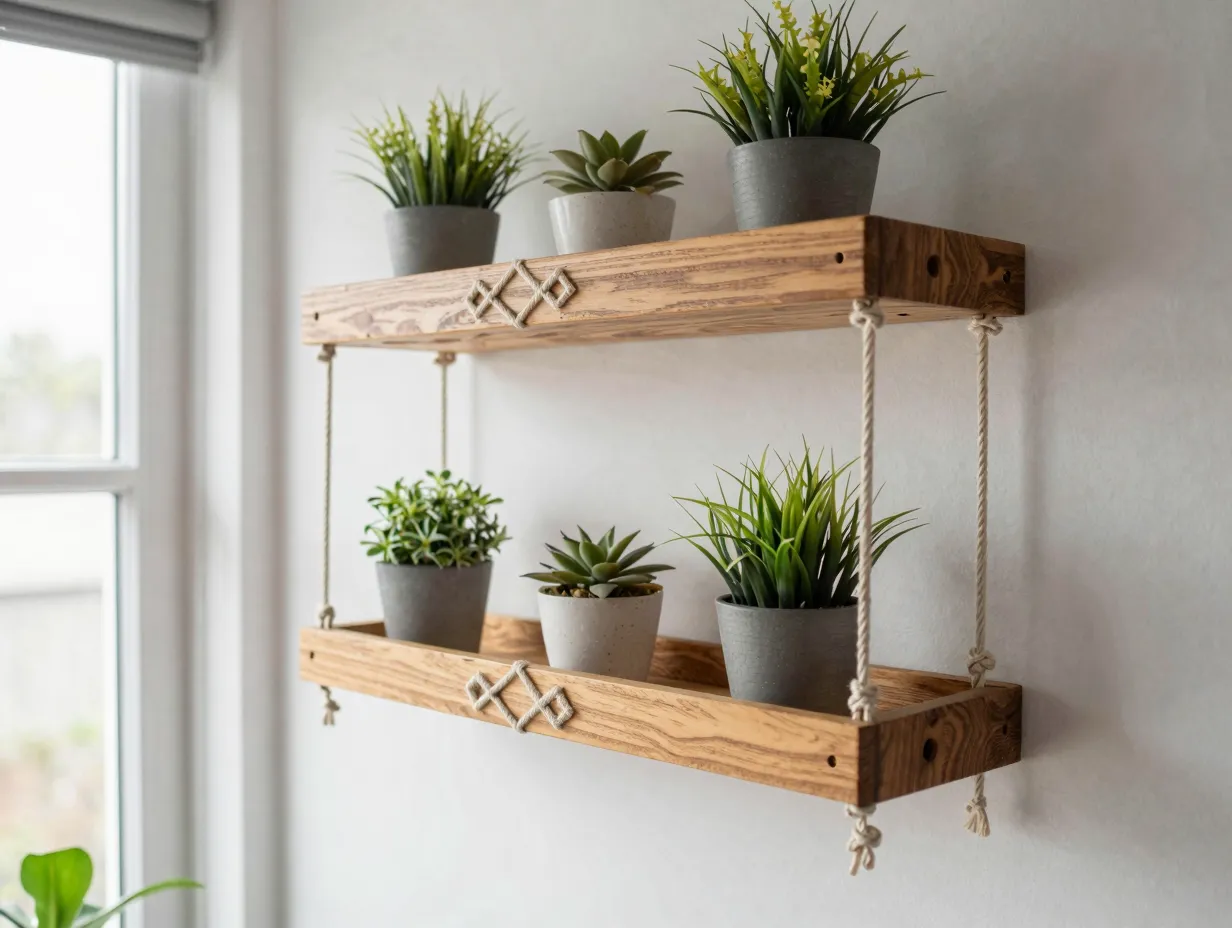
The most ambitious design in this collection, the multi-tiered macrame shelf combines knotted cord with one or two small wooden boards to create a functional hanging shelf. Plants sit on the boards rather than inside cord baskets, which means you can display plants in any pot shape, including square and rectangular planters. [1]
Materials:
- Two wooden boards (approximately 8 x 4 inches each)
- 24 cords cut to 12 feet each (4 mm cotton)
- Drill with small bit (to thread cord through board corners)
Construction overview: Cords are threaded through drilled holes at the four corners of each board and knotted underneath to support the board’s weight. Between the boards, decorative knotwork such as diamond patterns or spiral columns adds visual interest.
This design functions as both a plant display and a decorative shelf, making it one of the most versatile pieces you can add to a home. [9]
“The multi-tiered shelf is the project that turns a casual macrame hobbyist into someone who genuinely understands structural knotwork. Once you build one, everything else feels manageable.”
Essential Knots and Techniques for All Nine Designs
Understanding the knots behind these designs removes most of the intimidation from the craft. The table below summarizes the four core knots used across all nine designs, along with which projects rely on them most heavily.
| Knot Type | Difficulty | Used In | Key Purpose |
|---|---|---|---|
| Square Knot | Beginner | Designs 1, 2, 6, 7, 9 | Body structure and pot basket |
| Spiral (Half-Square) Knot | Beginner | Design 2 | Decorative twist columns |
| Double Half-Hitch Knot | Intermediate | Designs 3, 8, 9 | Geometric shapes and diagonal rows |
| Gathering Knot | Beginner | All nine designs | Securing cord bundle at top and base |
A note on tension: Consistent tension is the single most important technical skill in macrame. Loose knots create an uneven, sloppy appearance, while overly tight knots make the basket too rigid to hold a round pot comfortably. Practice each knot on a short test piece before beginning a full project. [6]
Choosing the Right Cord for Each Design
Cord selection affects both the appearance and the structural integrity of your hanger. Here is a practical breakdown:
- 3 mm single-strand cotton: Best for lightweight pots under 2 lbs. Produces a soft, slightly fuzzy texture that brushes out well for fringe designs. [4]
- 3 mm braided cotton: Slightly stronger than single-strand. Holds knots more crisply, which suits geometric designs like the diamond pattern hanger.
- 4 mm twisted cotton: The most versatile option. Handles pots up to 5 lbs comfortably and works well for both beginner and advanced designs. [7]
- 5 mm or thicker rope: Reserved for heavy ceramic pots or the multi-tiered shelf design where structural strength matters most.
Avoid: Synthetic cords like nylon or polypropylene for indoor hangers. They are harder to knot, do not brush into fringe well, and look noticeably less natural than cotton alternatives. [5]
Common Mistakes and How to Avoid Them
Even experienced crafters run into the same handful of problems. Knowing these pitfalls in advance saves significant frustration.
- Cutting cords too short. Always cut cords longer than you think you need. A general rule is to cut each cord four times the desired finished length of the hanger, plus extra for the basket section. [2]
- Skipping the test knot. Before committing to a full project, tie a few practice knots with your chosen cord. Different cord materials behave differently, and a five-minute test saves hours of rework.
- Ignoring pot weight. A beautiful hanger that drops a heavy pot is a safety hazard. Always verify that your cord thickness and knot count can support the combined weight of the pot, soil, and plant.
- Uneven cord lengths after knotting. This usually means inconsistent tension. Use a clip or tape to hold cords in place while you work, and check alignment every few rows. [6]
- Fringe that will not brush out. This happens when braided cord is used instead of single-ply. For fringe designs, always choose single-ply or single-strand cotton.
Conclusion
The 9 Beautiful Macrame Plant Hanger Designs To DIY For Your Home covered in this guide represent a genuine progression from beginner-friendly basics to genuinely impressive statement pieces. Starting with the classic single-pot hanger gives you the foundational skills, and each subsequent design adds one or two new techniques that build naturally on what came before.
Here are your actionable next steps:
- Gather your materials: a spool of 3 mm or 4 mm natural cotton cord, a wooden ring, and scissors are enough to start.
- Begin with Design 1, the classic single-pot hanger, and complete it fully before moving on.
- Once you have finished two or three designs, revisit the knot table above and identify which techniques you want to develop further.
- Display your hangers in groups of two or three at staggered heights for maximum visual impact.
- Share your finished pieces with a crafting community or a local plant swap group, where handmade hangers are always appreciated and often traded.
Macrame is one of those rare crafts where the learning curve is genuinely gentle, the materials are inexpensive, and the finished product looks far more impressive than the effort required. Pick up a cord, tie your first gathering knot, and see where it takes you.
References
[1] Macrame Plant Hanger Ideas – https://wonderfuldiy.com/macrame-plant-hanger-ideas/
[2] Diy Macrame Plant Hanger – https://makeandtakes.com/diy-macrame-plant-hanger
[3] Macrame Plant Hangers Sophie Lee Indoor Gardening – https://www.housebeautiful.com/uk/garden/plants/how-to/g113/macrame-plant-hangers-sophie-lee-indoor-gardening/
[4] Macrame Plant Hanger – https://paisleyandsparrow.com/macrame-plant-hanger/
[5] Macrame – https://www.morelikehome.net/2020/03/macrame.html
[6] Howtomakeamacrameplanthanger – https://www.simplyfrayed.com/blog/howtomakeamacrameplanthanger
[7] Diy Macrame Plant Hanger – https://www.handmadeweekly.com/diy-macrame-plant-hanger/
[8] Diy Macrame Plant Hanger Wall Hanging – https://joyfulderivatives.com/diy-macrame-plant-hanger-wall-hanging/
[9] 15 Easy Diy Macrame Plant Hanger Patterns – https://themegamom.com/15-easy-diy-macrame-plant-hanger-patterns/