8 DIY Rustic Vase Projects Using Upcycled Jars, Bottles, and Tin Cans
Every year, the average American household discards hundreds of glass jars, tin cans, and bottles that could be transformed into stunning home decor for nearly zero cost. In 2026, with sustainable living at the forefront of interior design trends, repurposing everyday containers is not just a creative outlet, it is a genuinely smart choice for the environment and your wallet. These 8 DIY rustic vase projects using upcycled jars, bottles, and tin cans prove that beautiful, handcrafted home decor does not require a trip to a specialty store or a large budget. Whether you are a seasoned crafter or picking up a hot glue gun for the first time, the projects in this guide will walk you through everything you need to create pieces that look intentional, warm, and professionally styled.
Disclosure: This post contains affiliate links. As an Amazon Associate, we earn from qualifying purchases, and at no extra cost to you.
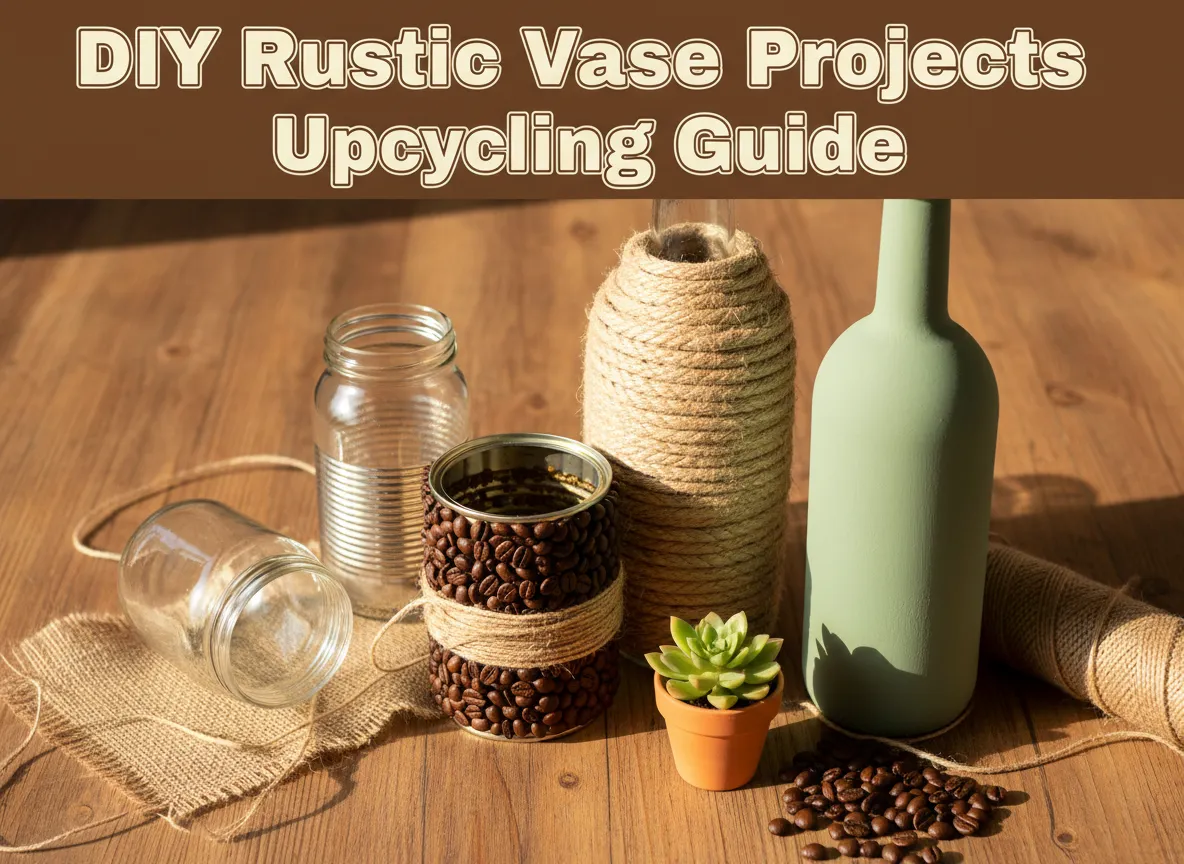
I started experimenting with upcycled vases a few years ago after noticing that my recycling bin was full of wine bottles and pasta sauce jars that had real decorative potential. What began as a weekend experiment turned into a genuine passion for sustainable craft. The results surprised me every time.
Key Takeaways
- Upcycling tin cans, glass jars, and bottles into rustic vases costs very little and reduces household waste significantly.
- Natural materials like twine, burlap, rope, and coffee beans are the most effective tools for achieving an authentic rustic finish.
- Air-drying clay and chalk paint open up more advanced design possibilities, including textured and minimalist Japandi-inspired styles.
- Most of these projects can be completed in under two hours with basic craft supplies.
- Grouping finished vases in clusters of three or five creates a stronger visual impact than displaying them individually.
Why Upcycled Rustic Vases Are Worth Making in 2026
Before diving into the projects themselves, it helps to understand why this craft has gained so much momentum. The rustic aesthetic, characterized by natural textures, earthy tones, and handmade imperfection, fits seamlessly into farmhouse, cottagecore, and Japandi interior styles, all of which remain dominant in 2026 home decor. More importantly, upcycling reduces the demand for mass-produced decor items that carry a significant environmental footprint.
A collection of over 35 creative DIY flower vase tutorials published in 2026 demonstrates just how wide the range of upcycling possibilities is, covering materials from yarn and washi tape to stones and sweaters [8]. The eight projects below focus specifically on the most accessible and visually impactful techniques, using containers most households already have.
What you will need across most projects:
- Clean, dry tin cans, glass jars, or glass bottles
- Hot glue gun and glue sticks
- Natural twine, jute rope, or burlap fabric
- Acrylic or chalk paint in neutral tones
- Scissors and a craft knife
- Optional: air-drying clay, coffee beans, brown packing paper
“The beauty of rustic upcycled vases is that slight imperfections in the wrapping or texture actually enhance the handmade quality rather than detract from it.”
The 8 DIY Rustic Vase Projects Using Upcycled Jars, Bottles, and Tin Cans
1. Coffee Bean and Twine Tin Can Vase
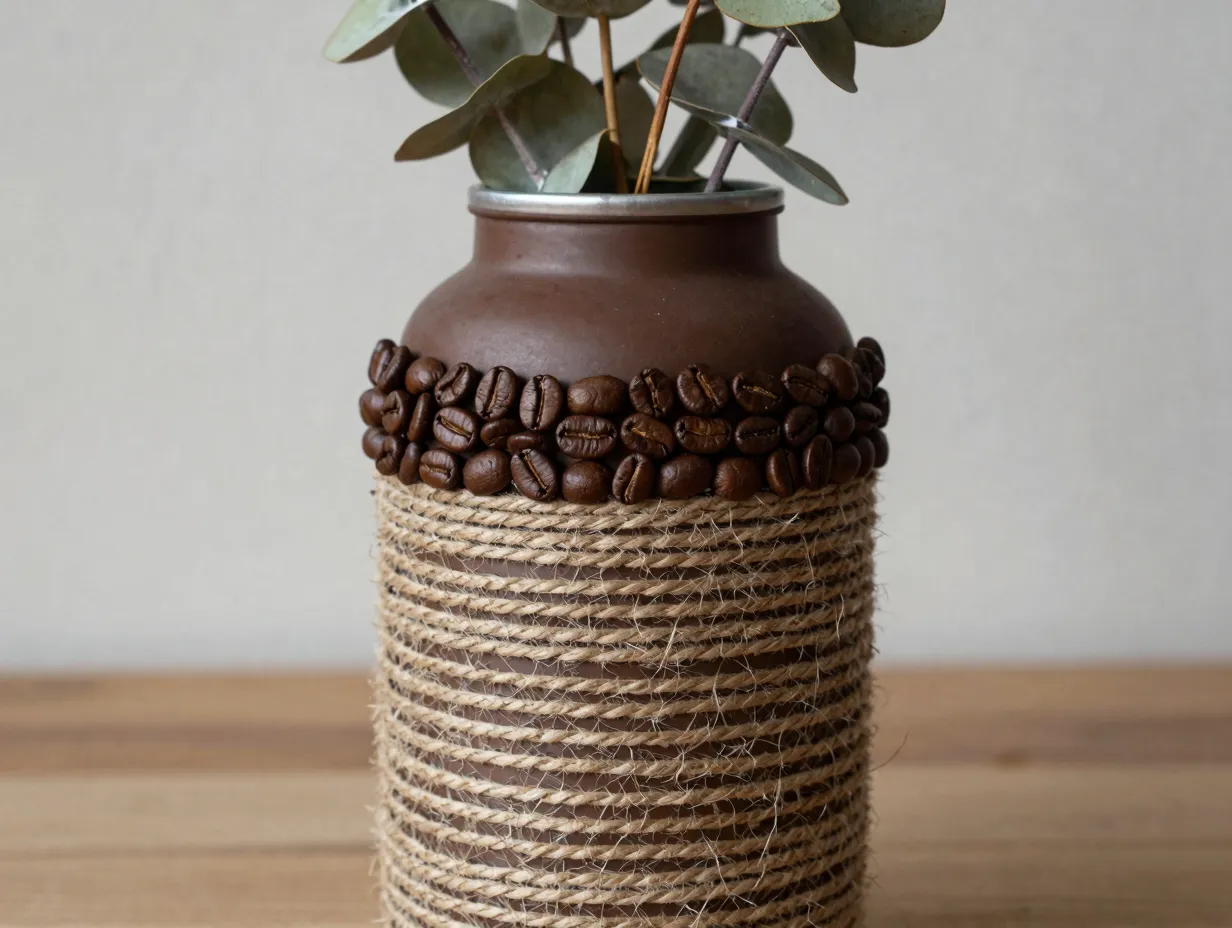
This project is one of the most tactile and aromatic options in the lineup. A standard tin can, the kind that holds tomatoes or chickpeas, becomes a richly textured vase through a combination of paint, twine, and whole coffee beans [1].
Materials needed:
- One clean tin can
- Matte brown or cream acrylic paint
- Natural jute twine
- Whole coffee beans
- Hot glue gun
Steps:
Paint the exterior of the can with two coats of matte brown or cream paint and allow it to dry fully. Starting at the base, apply a thin line of hot glue and press the twine firmly against it, wrapping tightly upward in even rows. When you reach the upper third of the can, switch to gluing individual coffee beans in a band around the circumference. The contrast between the smooth twine and the irregular surface of the beans creates a genuinely striking texture. Finish the top edge with a final row of twine and trim any excess. This vase works beautifully with dried eucalyptus or small sunflowers [1].
Pro tip: Use a slightly lighter shade of paint than the twine color so the base coat is visible in the gaps between wraps, adding depth.
2. Brown Packing Paper Rustic Tin Can Vase
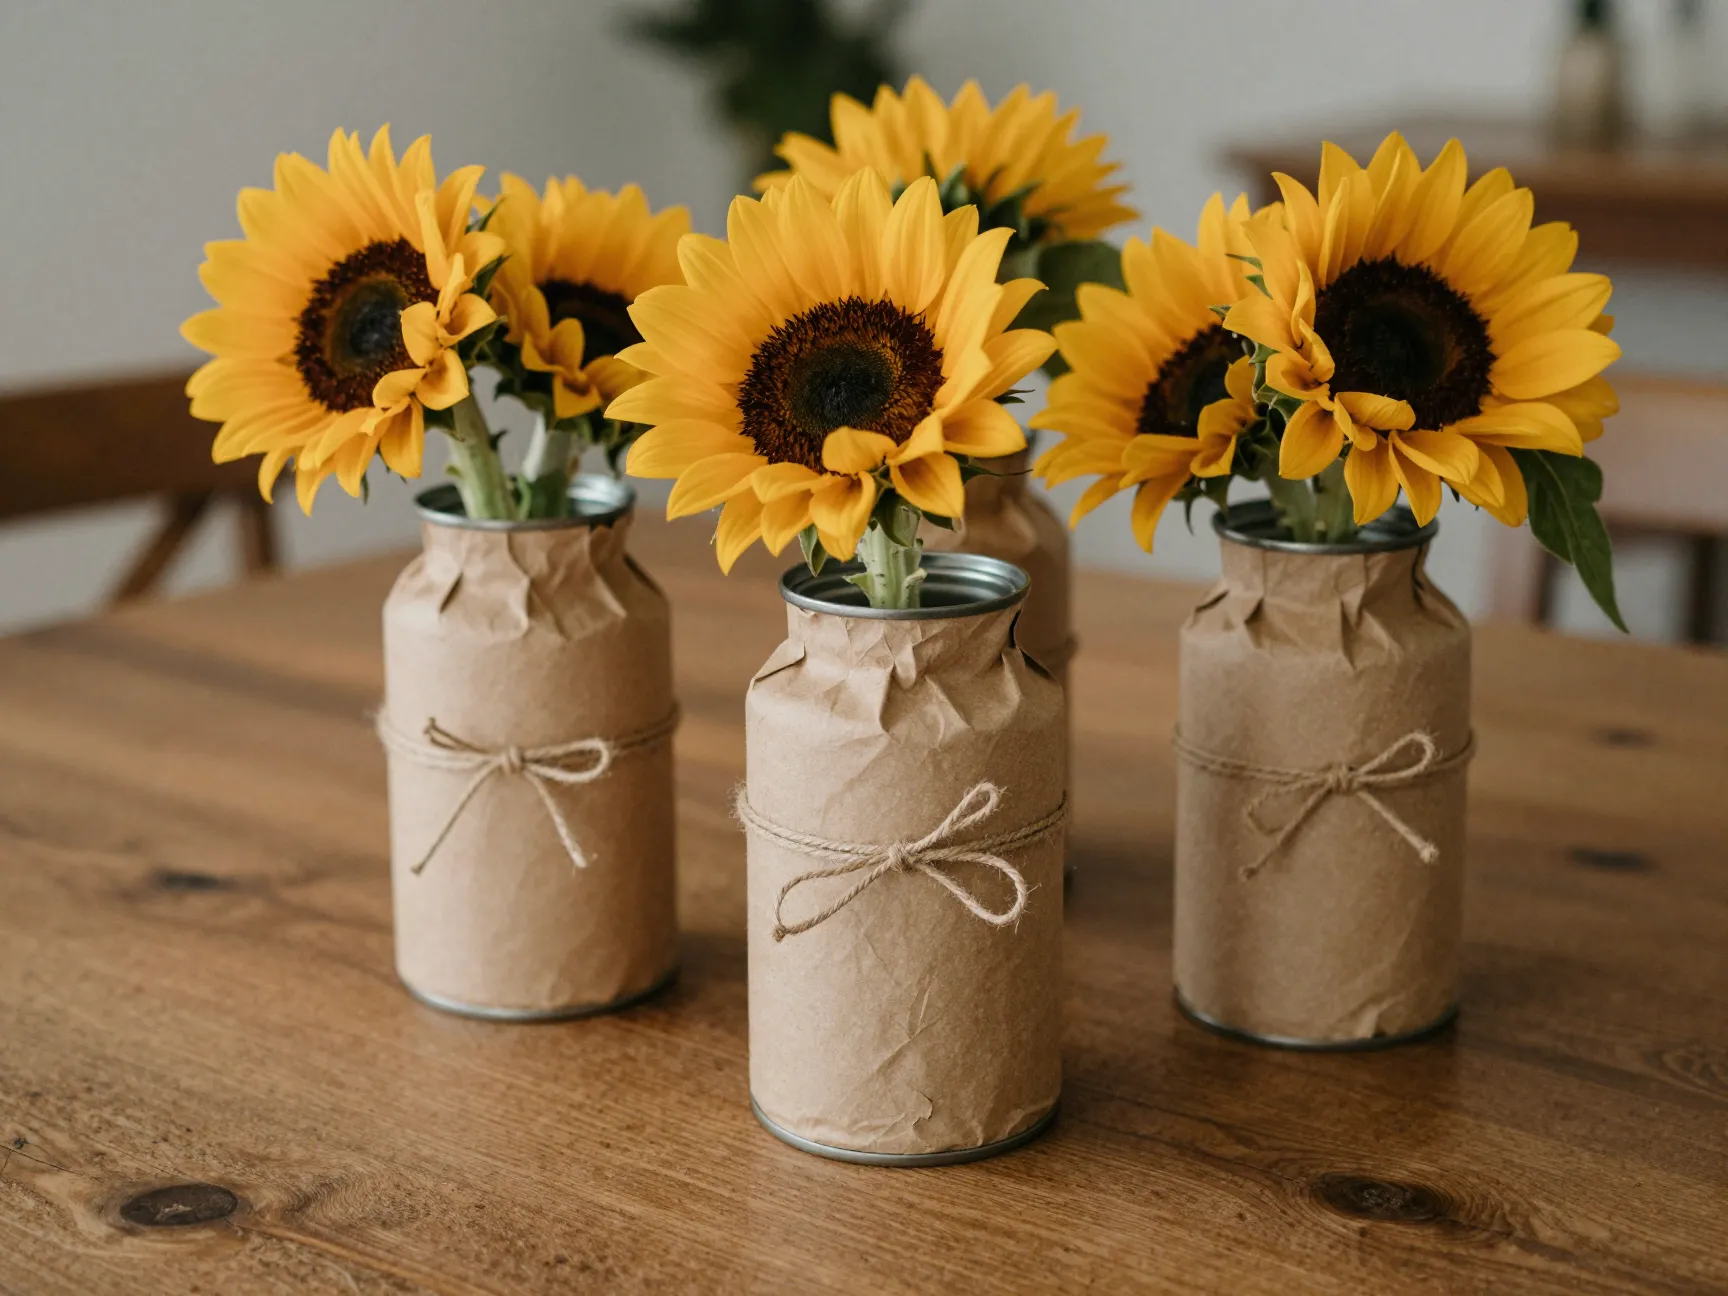
This project is arguably the most budget-friendly of the eight. A YouTube tutorial published in January 2026 shows exactly how effective brown packing paper can be as a wrapping material for tin cans, producing a result that looks intentional and warm rather than improvised [3].
Materials needed:
- One or more tin cans
- Brown kraft packing paper
- Natural twine
- Craft glue or hot glue gun
- Fresh or dried flowers
Steps:
Cut a strip of brown packing paper wide enough to cover the full height of the can with a small overlap at the top and bottom. Crinkle the paper slightly in your hands before applying it, this deliberate wrinkling adds texture and prevents the finished piece from looking flat. Apply craft glue evenly around the can and press the paper firmly, smoothing out any large air pockets while leaving the small wrinkles intact. Fold the excess paper over the top and bottom edges and secure with glue. Wrap a length of twine around the middle of the can two or three times and tie it in a simple knot or bow. Fill with fresh flowers for an immediate cozy effect [3].
This project is ideal for table centerpieces at rustic weddings or dinner parties because it can be made in bulk quickly and inexpensively.
3. Burlap and Twine Glass Jar Centerpiece
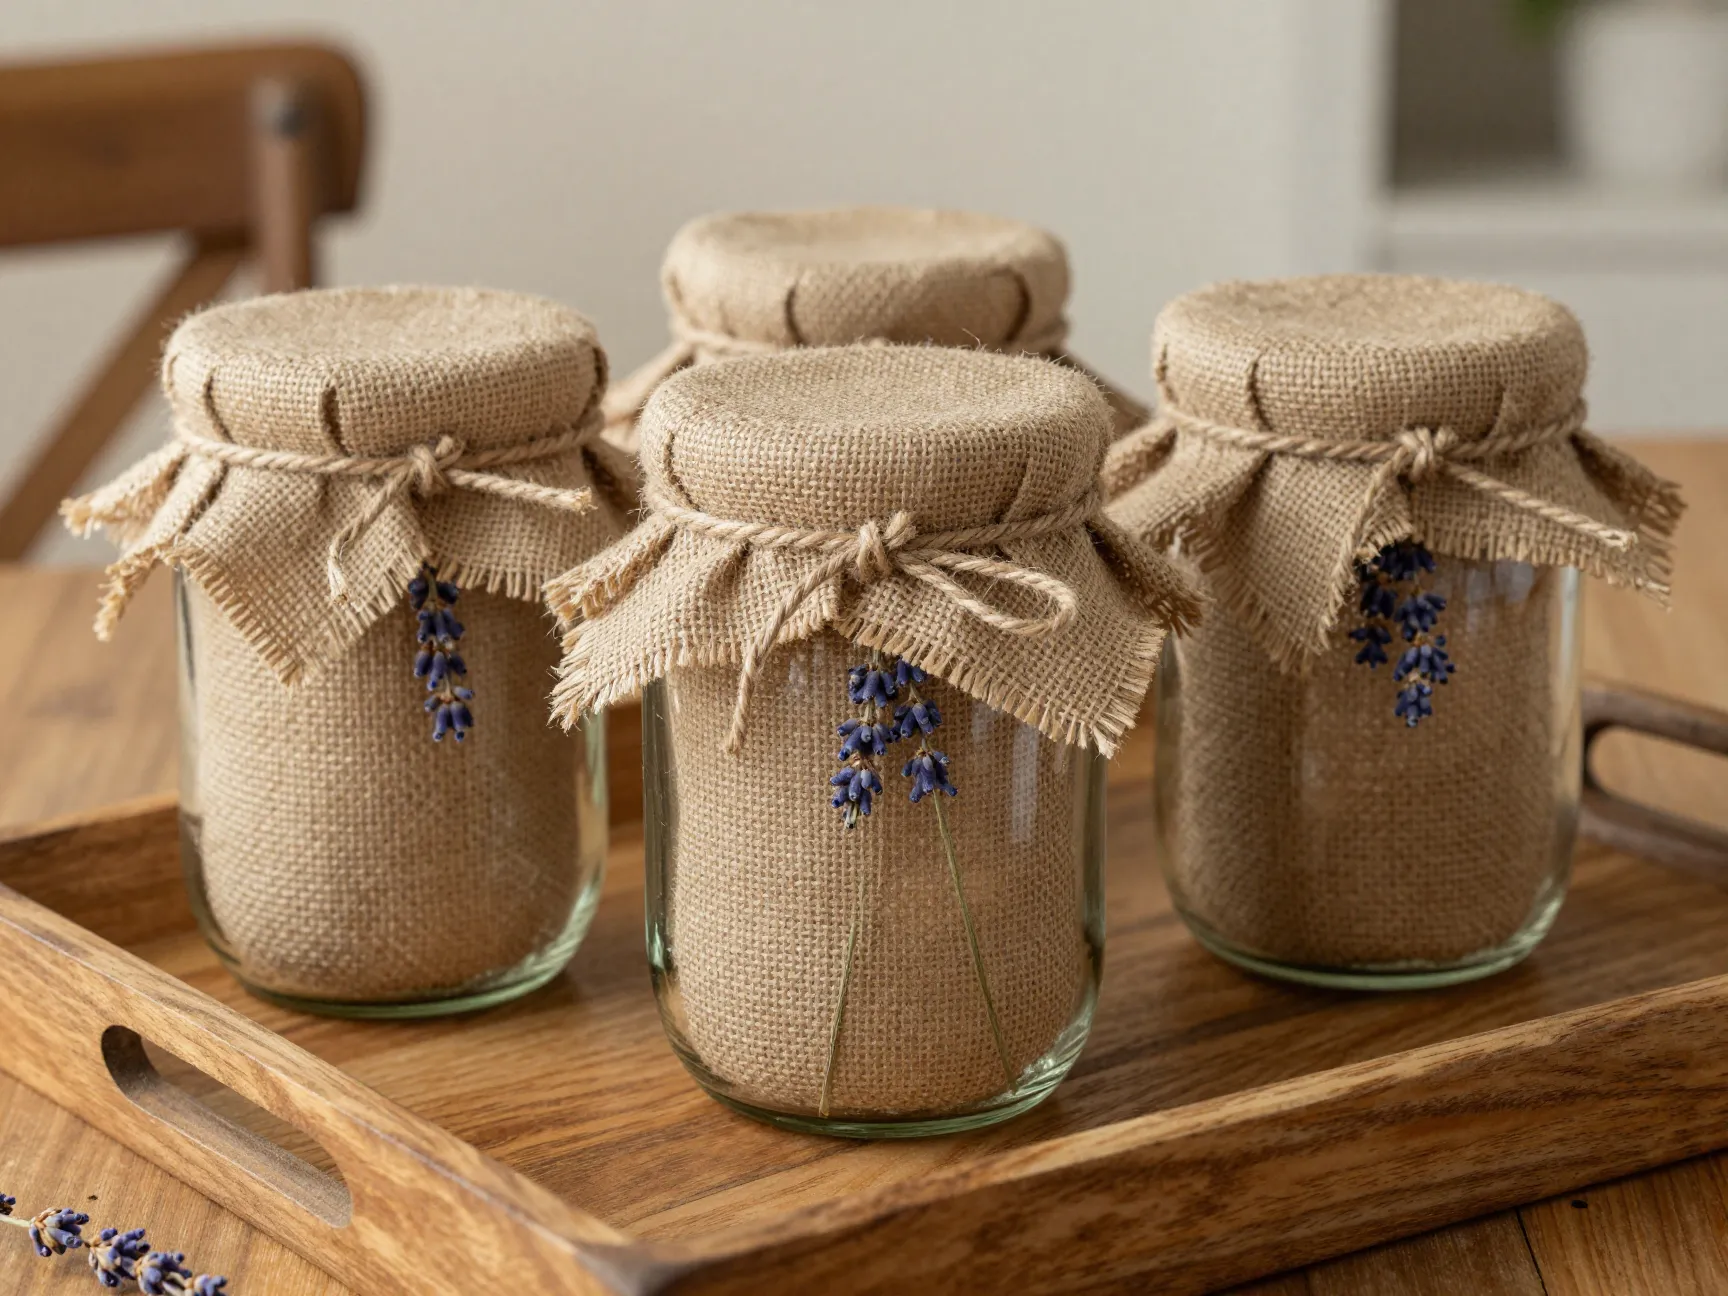
Glass mason jars are among the most versatile containers for rustic vase projects. A project detailed in July 2026 demonstrates how burlap and twine can transform a plain jar into an elegant centerpiece that works equally well with fresh lavender or dried wildflowers [4].
Materials needed:
- Wide-mouth glass mason jars
- Burlap fabric
- Natural jute twine
- Hot glue gun
- Fresh lavender or dried botanicals
Steps:
Cut a rectangle of burlap large enough to wrap around the jar with a half-inch overlap. Apply a line of hot glue along one vertical edge of the jar and press the burlap against it, wrapping smoothly around the circumference. Fold the top edge of the burlap inward by about half an inch and glue it down to create a clean finished rim. Wrap twine around the jar three to five times at varying heights and tie off each wrap with a small knot. Tuck a sprig of dried lavender under one of the twine wraps for an added botanical detail [4].
Display tip: Group three jars of different heights together on a wooden tray for a cohesive farmhouse centerpiece. The varying heights create visual rhythm without requiring any additional decoration.
4. Frosted Chalk Paint Japandi Glass Bottle Vase
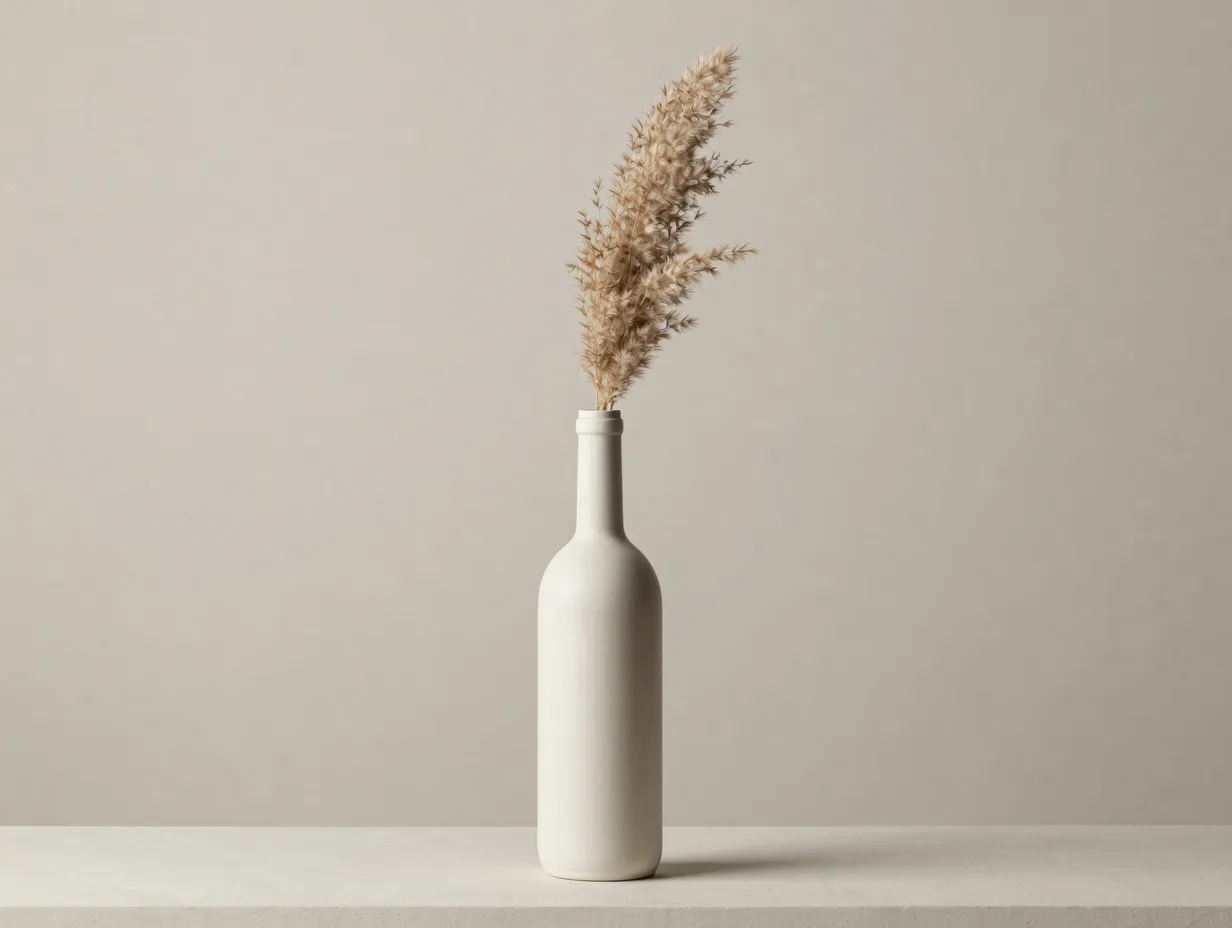
Not every rustic vase needs to lean into the heavily textured, layered aesthetic. The Japandi design movement, a fusion of Japanese minimalism and Scandinavian warmth, calls for clean lines, muted tones, and understated elegance. A 2026 tutorial shows how repurposed glass bottles painted in chalk or frosted paint achieve this look with minimal effort [2].
Materials needed:
- Glass wine bottles or sauce bottles
- Chalk paint in warm white, sage green, or dusty clay
- A small foam roller or wide brush
- Matte sealant spray
Steps:
Clean and dry the bottle thoroughly, removing any labels with warm soapy water and a little rubbing alcohol for stubborn adhesive residue. Apply the first coat of chalk paint using a foam roller for the smoothest possible finish. Allow it to dry for at least 30 minutes before applying a second coat. The beauty of chalk paint is that it adheres to glass without a primer and dries to a soft, almost powdery matte finish that mimics the look of ceramic [2]. Once fully dry, seal the surface with a light matte sealant spray to protect the paint from moisture.
This vase style pairs best with single-stem dried pampas grass, cotton stems, or bare branches rather than colorful fresh flowers, keeping the overall look calm and intentional.
5. Air-Drying Clay Textured Bottle Vase
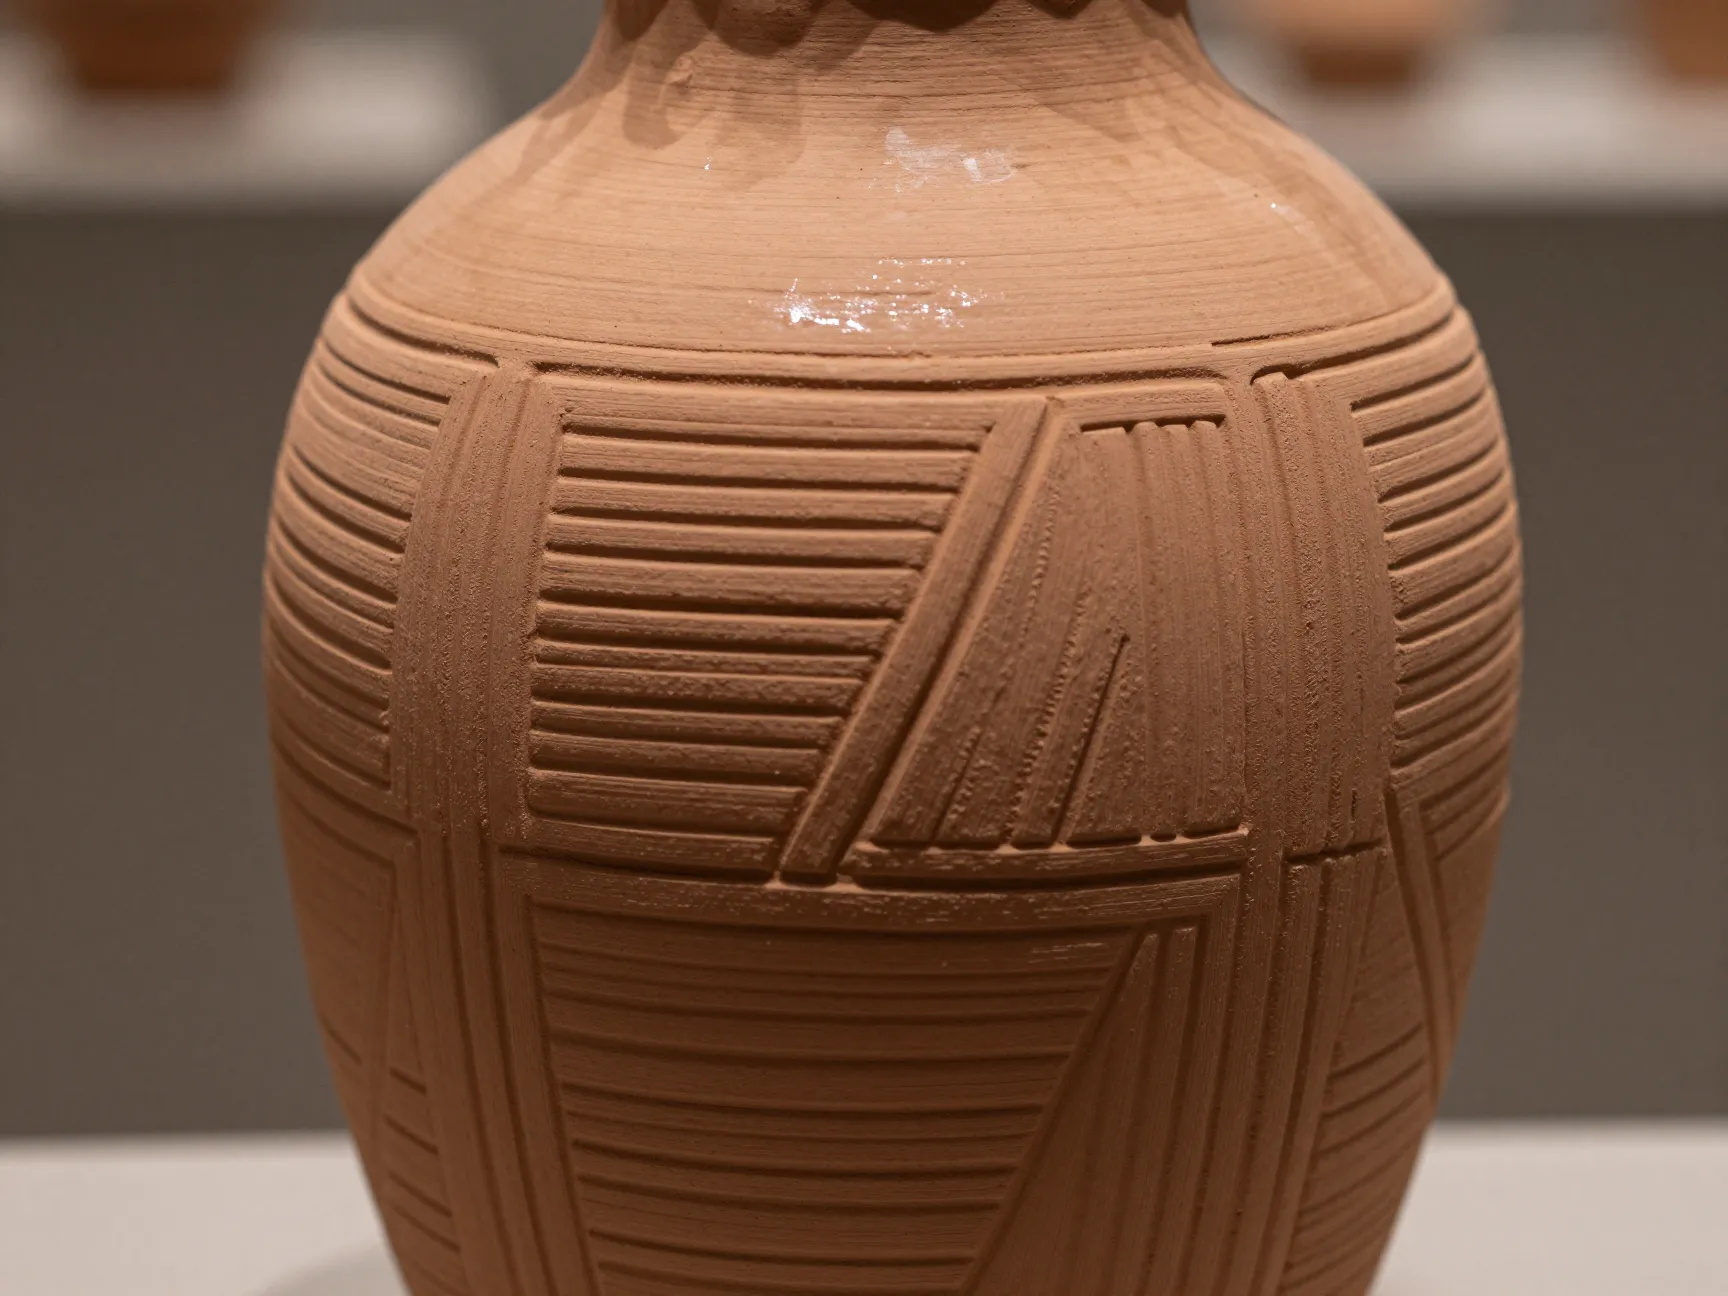
This project requires slightly more time and patience than the others, but the results are genuinely impressive. Covering a glass bottle with air-drying clay allows you to sculpt custom textures, patterns, and shapes directly onto an otherwise plain container [5].
Materials needed:
- A glass bottle (wine or olive oil bottles work well)
- Air-drying clay
- Water and a small sponge
- Sculpting tools or a toothpick
- Acrylic paint and matte sealant
Steps:
Roll the clay out to an even thickness of about a quarter inch. Wrap sections of the clay around the bottle, pressing firmly and smoothing the seams with a damp sponge. Work in sections rather than trying to cover the entire bottle at once, as this prevents cracking. Once the bottle is fully covered, use sculpting tools or a toothpick to carve patterns into the surface, simple geometric lines, leaf impressions, or abstract textures all work well [5]. Allow the clay to dry completely, which typically takes 24 to 48 hours depending on thickness and humidity. Once dry, paint the surface in a single earthy tone and seal it.
Important note: Do not fill this vase with water directly, as sustained moisture can soften air-drying clay. Use a small plastic insert or a sealed inner liner if you want to use fresh flowers.
6. Rope-Wrapped Rustic Glass Bottle Vase
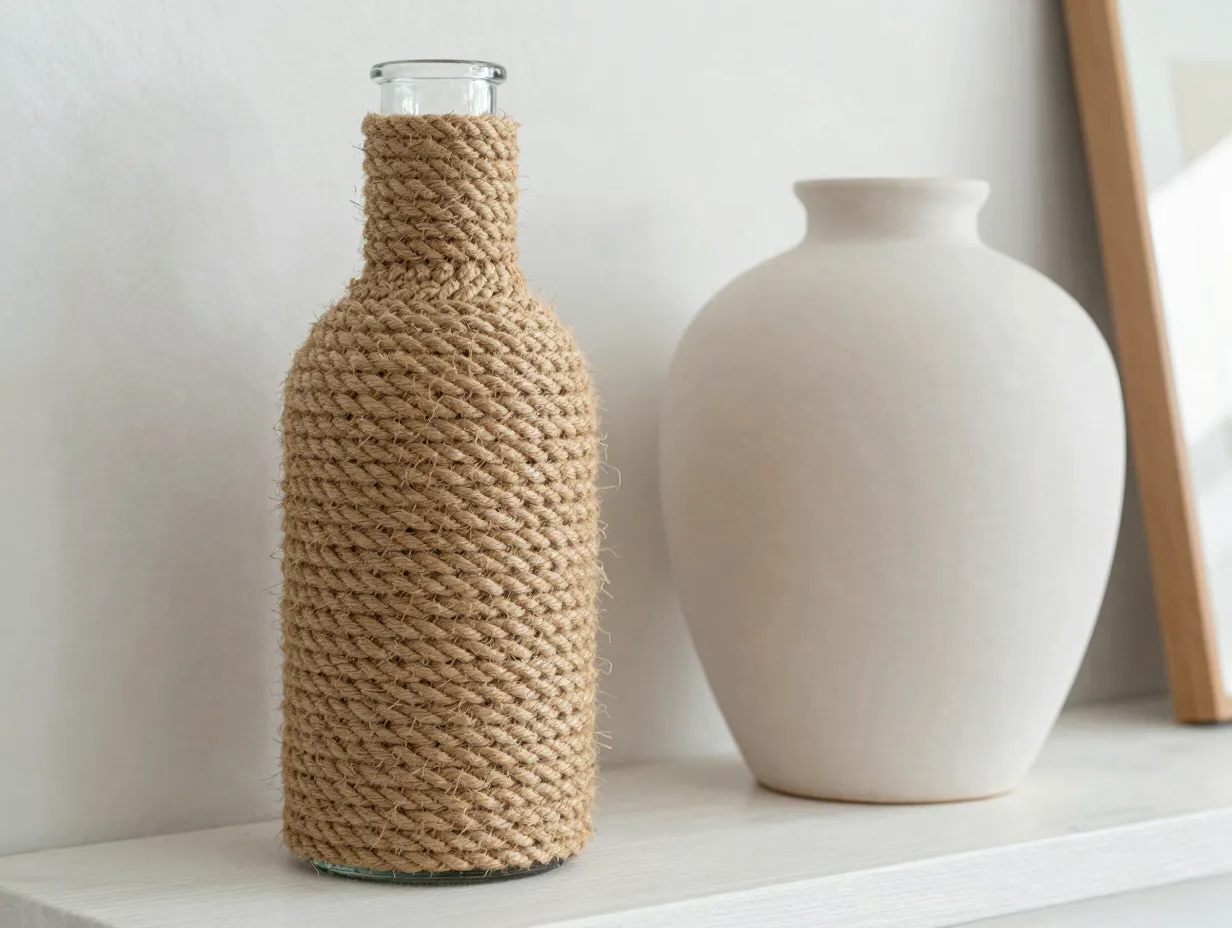
Thick natural rope gives a vase a nautical-meets-farmhouse character that works particularly well in coastal or cabin-style interiors. A detailed tutorial from August 2024 walks through the process of wrapping a glass bottle with thin rope or twine from base to neck, producing a fully covered, richly textured piece [6].
Materials needed:
- A glass bottle
- Natural sisal or manila rope (approximately 3-5mm thickness)
- Hot glue gun
- Scissors
Steps:
Begin at the very base of the bottle. Apply a small dot of hot glue and press the end of the rope firmly against it. Continue wrapping the rope in tight, even coils upward, applying a thin bead of hot glue every two to three rows to keep everything secure [6]. Work slowly and press each row tightly against the previous one to avoid gaps. When you reach the neck of the bottle, the rope will naturally need to be wrapped at a slightly different angle to accommodate the narrowing shape, take your time here and use more glue to maintain contact. Trim the rope end cleanly and glue it flat against the surface.
The finished piece has a satisfying weight and a completely natural appearance. It looks particularly striking when displayed alongside smooth ceramic pieces, as the textural contrast is dramatic.
7. Tin Can Mug Vase with Wire Handle
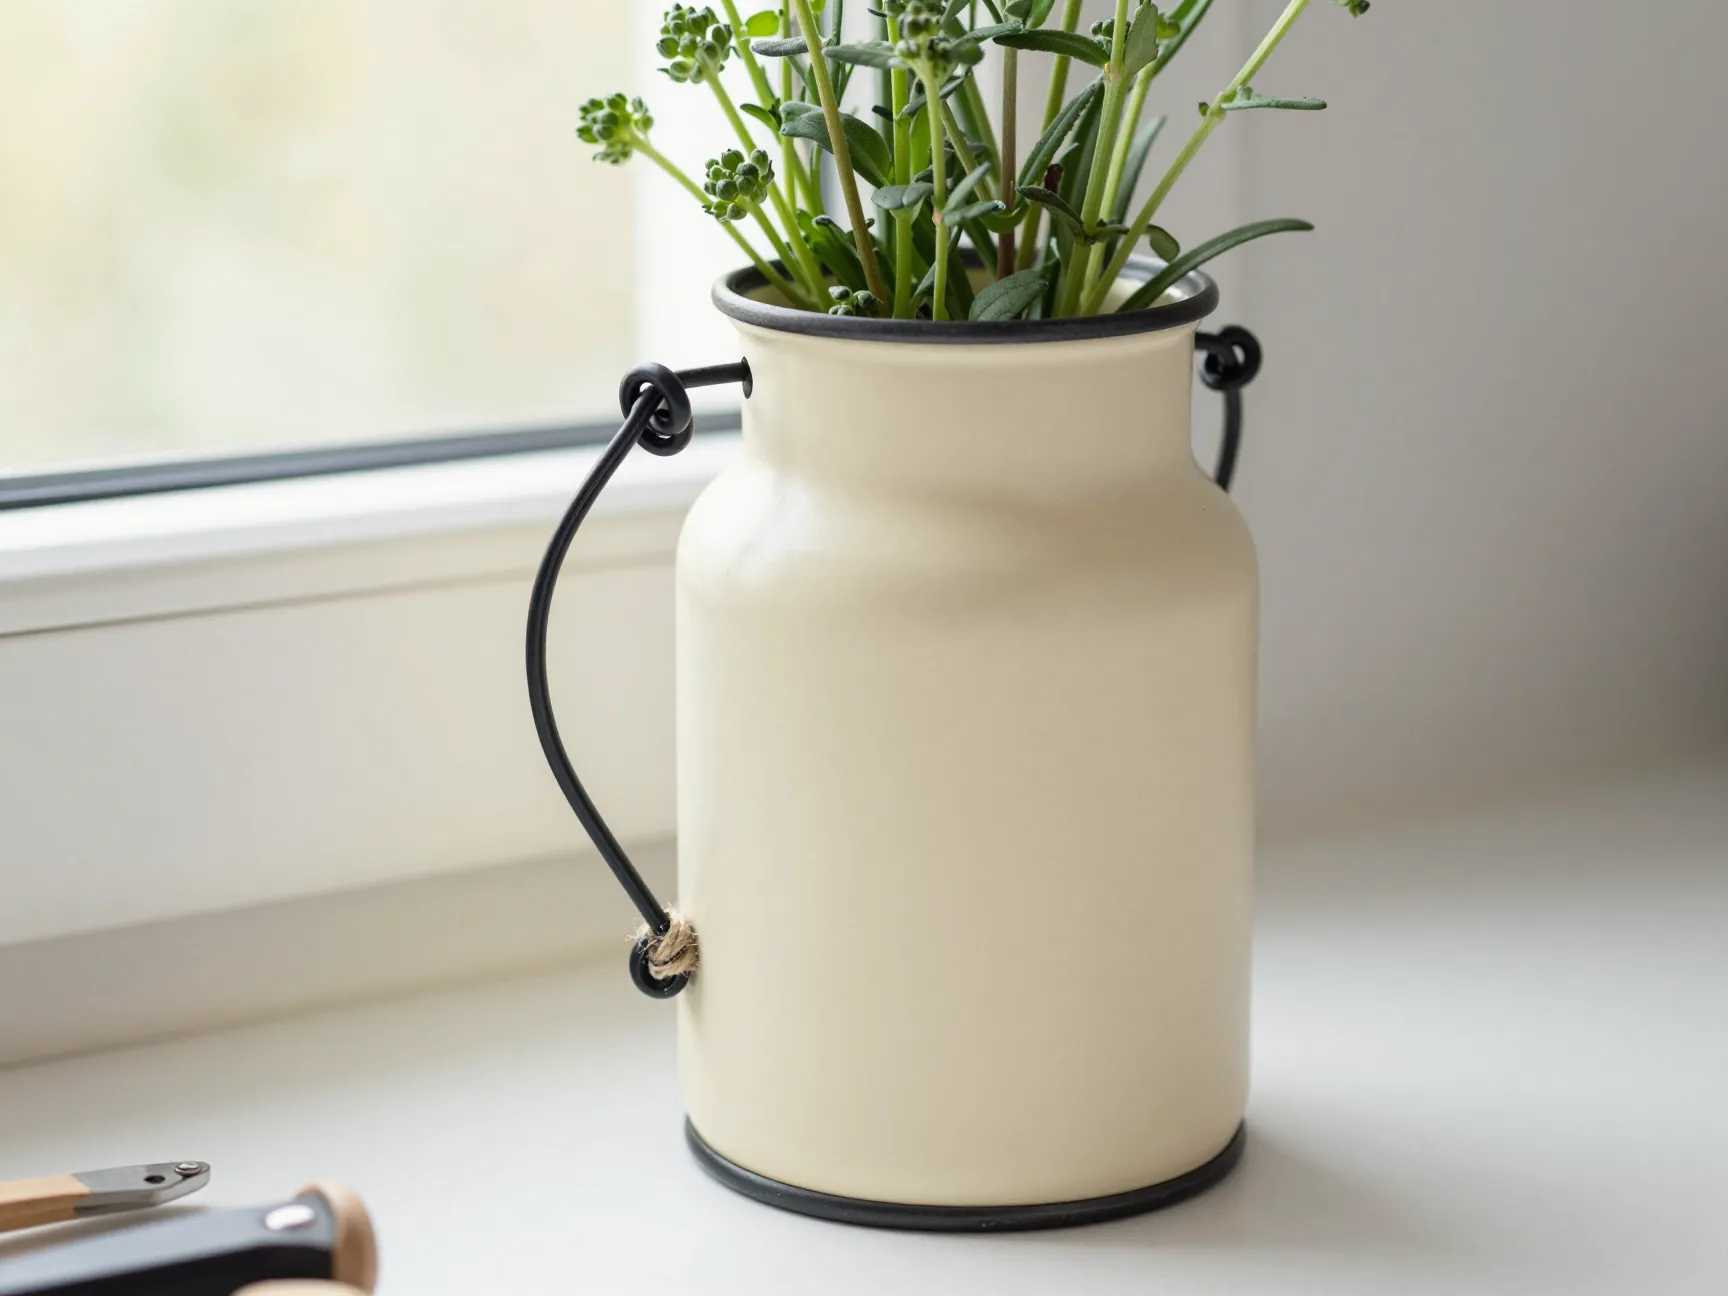
This project adds a playful, functional twist to the standard tin can vase by transforming the container into a mug-shaped piece complete with a wire handle [7]. It is an excellent project for displaying small herbs on a kitchen windowsill or holding pencils and craft tools on a desk.
Materials needed:
- One clean tin can
- Thick craft wire (18-gauge works well)
- Wire cutters and needle-nose pliers
- Acrylic paint and a small brush
- Optional: twine or ribbon for decoration
Steps:
Use a nail and hammer to carefully punch two small holes on opposite sides of the can near the rim. Cut a length of craft wire approximately 12 inches long. Thread each end through one of the holes and use needle-nose pliers to curl the wire ends into tight loops on the inside of the can, securing the handle firmly [7]. Paint the exterior of the can in any color that suits your decor, matte black, cream, or a deep forest green all work well for a rustic look. Once dry, wrap a length of twine around the base of the handle where it meets the can for an extra decorative detail.
Safety note: After punching holes, check the interior rim of the can for sharp metal edges and flatten them carefully with pliers before using the vase.
8. Yarn and Mixed-Material Upcycled Jar Vase
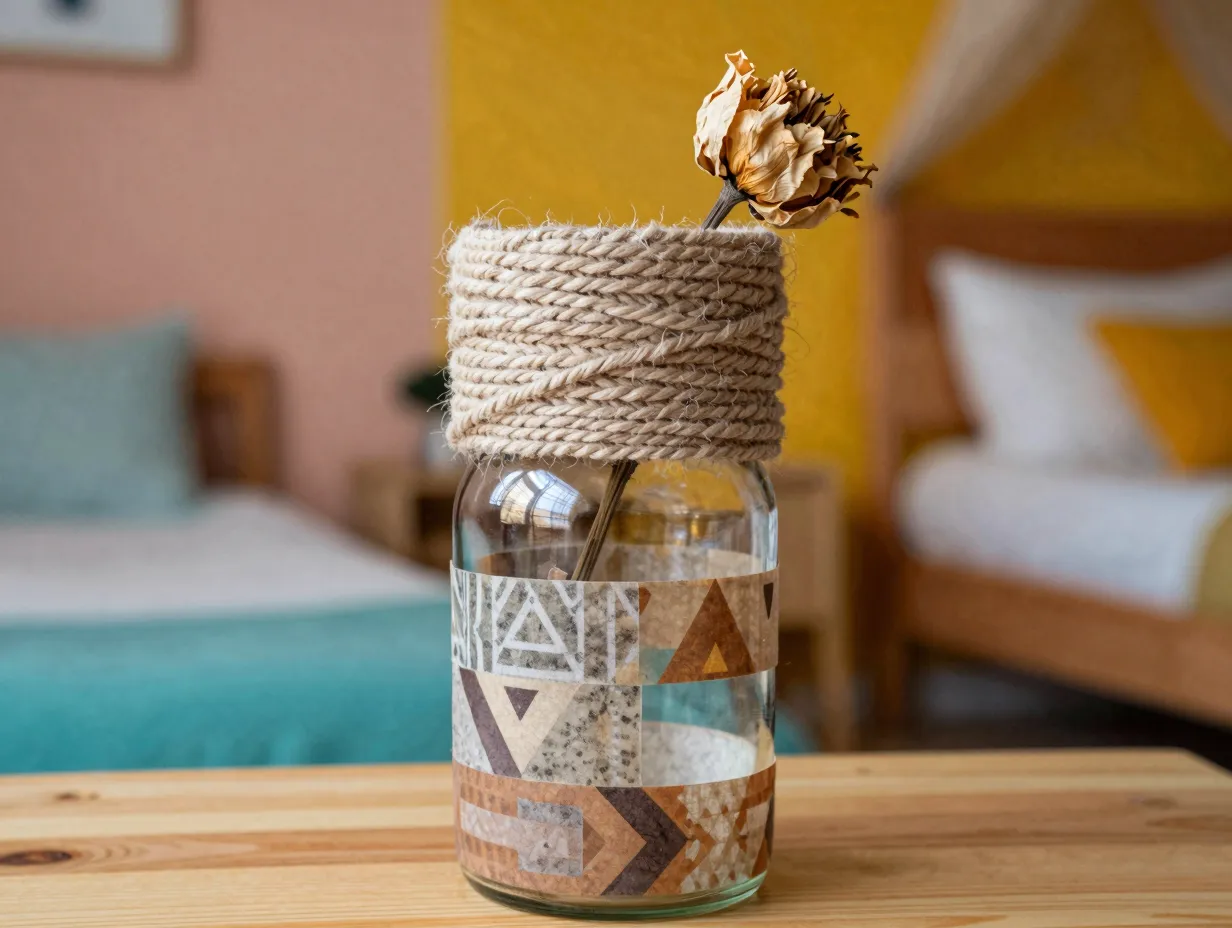
The final project in this collection of 8 DIY rustic vase projects using upcycled jars, bottles, and tin cans takes a more eclectic approach, combining yarn, washi tape, and other mixed materials to create a vase that is colorful yet still grounded in a natural, handmade aesthetic [8].
Materials needed:
- A glass jar or bottle
- Chunky natural or neutral-toned yarn
- Washi tape in earthy patterns
- Hot glue gun
- Optional: small dried flowers or feathers
Steps:
Begin by applying strips of washi tape in geometric patterns around the lower half of the jar. This creates a base layer of visual interest before the yarn wrapping begins. Starting just above the washi tape section, apply a thin line of hot glue and begin wrapping chunky yarn in tight rows upward toward the rim [8]. Vary the tension slightly as you wrap, tighter rows create a denser, more uniform texture, while looser rows show more of the yarn’s natural twist. Finish the top edge with a final tight row and trim cleanly. Tuck a small dried flower or a single feather under the last row of yarn for a finishing touch.
This project is particularly well-suited to children’s rooms or bohemian-style spaces where a mix of color and texture is welcome.
Tips for Displaying Your Upcycled Rustic Vases
Creating the vases is only half the work. How you display them determines whether they look like intentional decor or a collection of craft projects sitting on a shelf.
Grouping and arrangement:
| Display Style | Best Vase Combination | Ideal Setting |
|---|---|---|
| Cluster of three | Varying heights, same material palette | Dining table centerpiece |
| Windowsill row | Uniform size, different textures | Kitchen or bathroom |
| Shelf vignette | Mixed sizes with books and candles | Living room bookshelf |
| Mantel arrangement | Tall rope bottles flanking shorter jars | Fireplace mantel |
Botanical pairings: Dried botanicals, pampas grass, cotton stems, dried lavender, eucalyptus, require no water and last for months, making them the most practical choice for upcycled vases that may not be fully waterproof. For projects like the burlap jar or the rope bottle, a small glass of water placed inside the vase allows fresh flowers to be used without damaging the exterior materials.
Seasonal updates: One of the greatest advantages of these vases is that the containers stay the same while the botanical contents can change with the seasons. Swap dried sunflowers for bare winter branches in December, or replace cotton stems with fresh wildflowers in spring.
Common Mistakes to Avoid
Even straightforward craft projects have pitfalls. Here are the most frequent issues I have encountered and how to avoid them.
1. Skipping surface preparation. Labels left on jars create uneven surfaces that prevent twine and burlap from adhering smoothly. Always remove labels completely and clean the surface with rubbing alcohol before starting.
2. Using too much hot glue. Excess glue creates visible strings and blobs that are difficult to hide under wrapping materials. Apply glue in thin, controlled beads and work in small sections.
3. Rushing the paint drying time. Wrapping twine or rope over paint that has not fully dried causes the paint to peel away from the surface. Allow at least 30 minutes between coats and a full hour before wrapping.
4. Ignoring sharp edges on tin cans. The cut rim of a tin can is genuinely sharp. Always run a finger along the interior rim before handling and flatten any sharp points with pliers.
5. Choosing overly colorful materials. Bright yarn or patterned fabric can undermine the rustic aesthetic. Stick to natural tones, cream, tan, brown, sage, terracotta, and muted grey, for the most cohesive results.
Conclusion
These 8 DIY rustic vase projects using upcycled jars, bottles, and tin cans demonstrate that sustainable home decor does not require a large budget, specialized skills, or a trip to a craft store. With materials most households already have on hand, empty cans, glass bottles, leftover twine, and basic paint, it is entirely possible to create pieces that look genuinely beautiful and intentional.
Your actionable next steps:
Start with Project 1 (the coffee bean and twine tin can vase) if you are new to upcycled crafts. It requires the fewest materials and produces a result that is immediately gratifying. Once you are comfortable with the hot glue technique, move on to the rope-wrapped bottle (Project 6) or the air-drying clay vase (Project 5) for a more advanced challenge.
If you are planning a specific event like a wedding, dinner party, or seasonal gathering, the burlap jar centerpiece (Project 3) and the packing paper tin can vase (Project 2) are the most scalable options because they can be produced quickly in large numbers.
Finally, consider displaying your finished pieces as a curated collection rather than scattering them around your home. A grouping of three to five vases in complementary textures and tones will always make a stronger visual statement than individual pieces placed in isolation. The investment of a single afternoon can produce decor that genuinely elevates a room, and that story of transformation from discarded container to handcrafted centerpiece is one worth telling.
References
[1] Upcycled Tin Can Vase – https://www.diyncrafts.com/132848/decor/upcycled-tin-can-vase?utm_source=openai
[2] Diy Japandi Vases – https://erylin.com/diy-japandi-vases/?utm_source=openai
[3] Watch – https://www.youtube.com/watch?v=LOpr2pEEbzs&utm_source=openai
[4] Diy Centrepiece Ideas Glass Jars Decorated With Burlap – https://www.cutoutandkeep.net/projects/diy-centrepiece-ideas-glass-jars-decorated-with-burlap.amp?utm_source=openai
[5] Diy Bottle Vase – https://craftsyhacks.com/diy-bottle-vase/?utm_source=openai
[6] Diy Rustic Rope Vase – https://www.diyncrafts.com/54066/decor/diy-rustic-rope-vase?utm_source=openai
[7] Upcycled Tin Can Mug Vase – https://www.diyncrafts.com/web-stories/upcycled-tin-can-mug-vase?utm_source=openai
[8] Diy Flower Vases Creative Tutorials – https://www.craftionary.net/diy-flower-vases-creative-tutorials/?utm_source=openai