8 DIY Outdoor Garden Decor Projects to Personalize Your Yard on a Budget
A 2023 survey by the National Gardening Association found that Americans spent over $6.1 billion on lawn and garden products in a single year, yet the most memorable yards on any street rarely belong to the biggest spenders. They belong to the most creative ones. If you have been staring at your outdoor space and wishing it felt more like yours, the good news is that a handful of well-chosen DIY projects can transform a plain yard into something genuinely personal without draining your bank account.
Disclosure: This post contains affiliate links. As an Amazon Associate, we earn from qualifying purchases, and at no extra cost to you.
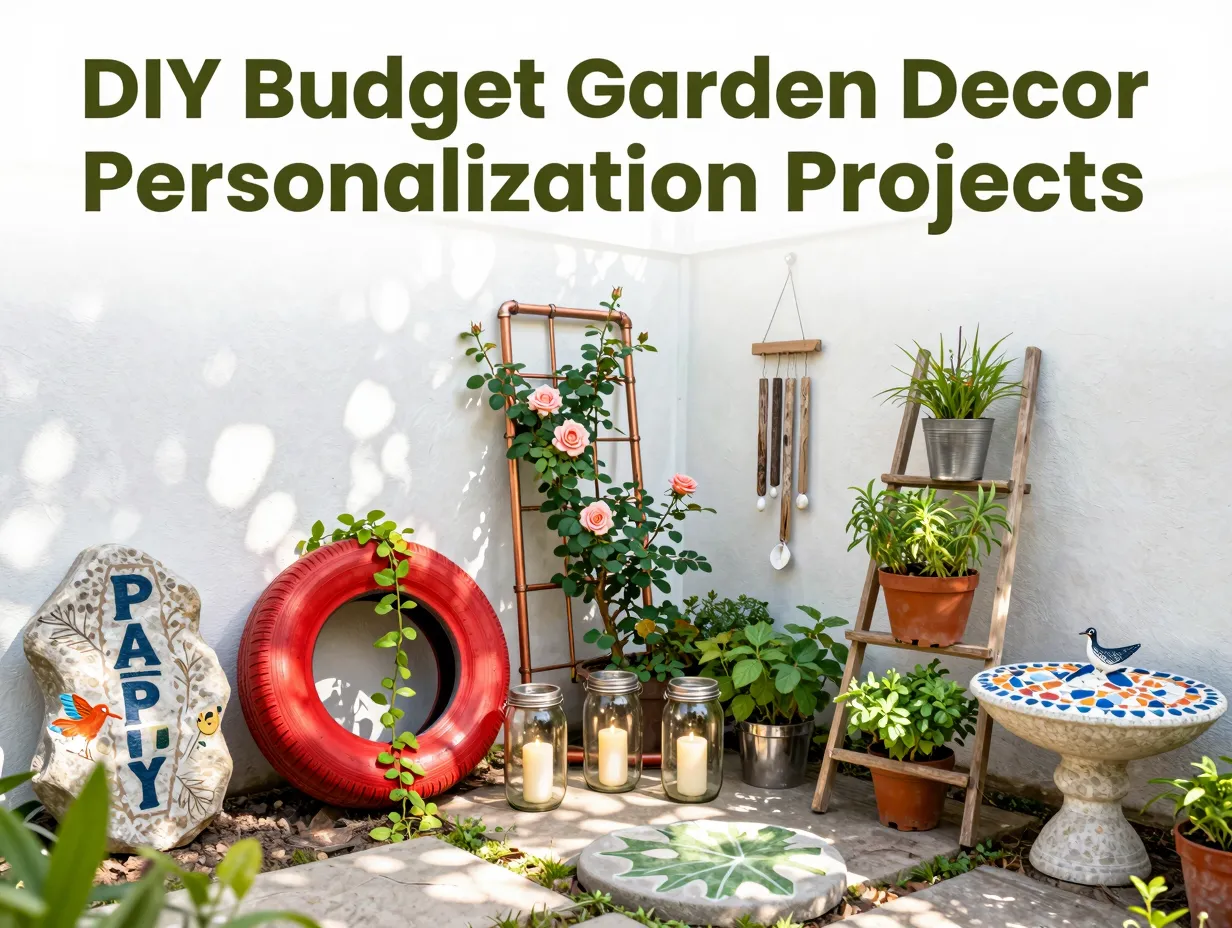
This guide walks you through 8 DIY outdoor garden decor projects to personalize your yard on a budget. Each project is approachable for beginners, uses affordable or repurposed materials, and delivers a visual payoff that far exceeds its cost. Whether you have a sprawling backyard or a modest patio, these ideas will help you build an outdoor space that reflects your personality and invites people to linger.
Key Takeaways
- You do not need a large budget to create a beautiful, personalized outdoor space, most of these projects cost under $30.
- Repurposed and upcycled materials are among the most powerful tools in budget DIY garden decor.
- Consistent color palettes and repeating design elements tie a yard together and make it look intentional.
- Even a single well-executed DIY project can dramatically improve the curb appeal and atmosphere of your outdoor space.
- Planning your projects around a central theme or style prevents a cluttered look and maximizes visual impact.
Why DIY Garden Decor Beats Store-Bought Every Time
Walk through any big-box garden center and you will find rows of identical concrete statues, mass-produced wind spinners, and generic stepping stones. They are fine. But they will not make your yard look like yours. DIY garden decor, by contrast, is inherently unique. It carries your choices, your colors, and sometimes your imperfections, and those imperfections are often what give a garden its soul.
I learned this firsthand a few years ago when I replaced a row of store-bought plastic planters with hand-painted terracotta pots I had picked up at a garage sale for fifty cents each. Neighbors who had never commented on my yard before started stopping to ask about them. The cost was almost nothing. The impact was significant.
Beyond aesthetics, DIY projects give you control over scale, material, and placement in a way that off-the-shelf products simply cannot match. You can build a planter exactly the right size for your fence, or paint a sign in the exact shade of blue that matches your front door. That level of customization is the real value of doing it yourself.
The core principle behind all 8 DIY outdoor garden decor projects to personalize your yard on a budget is this: creativity, not cash, is the primary resource.
8 DIY Outdoor Garden Decor Projects to Personalize Your Yard on a Budget
The following projects are organized to build on each other in complexity, starting with the simplest and moving toward projects that require a bit more time or skill. Each one includes material suggestions, a rough cost estimate, and practical tips to help you succeed on the first try.
1. Painted Rock Garden Markers
Estimated cost: $0 to $5
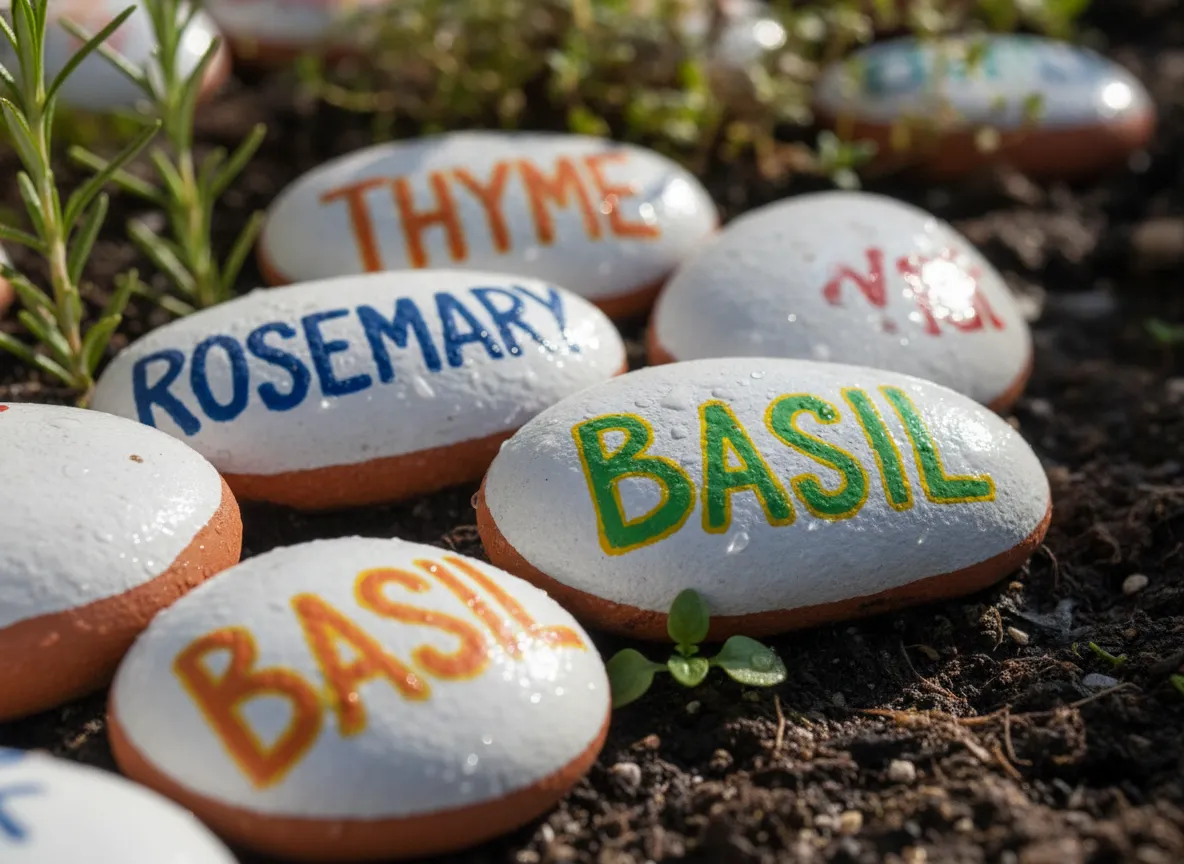
Painted rocks are one of the most accessible entry points into DIY garden decor. Collect smooth, flat stones from a riverbed, a garden supply store, or even a home improvement retailer’s landscaping section. Clean them thoroughly, let them dry, and then use acrylic paint or outdoor paint pens to write the names of your herbs, vegetables, or flowers.
To make them last through rain and sun, seal each finished rock with a coat of clear outdoor Mod Podge or a spray-on acrylic sealer. This step is often skipped by beginners and leads to disappointment when the first rainstorm washes the design away.
Pro tip: Use a white base coat first. It makes your colors pop dramatically, especially on dark stones. You can also go beyond text, small botanical illustrations, geometric patterns, or even tiny portraits of your pets turn these simple markers into genuine art pieces.
A consistent color palette across your rock markers, say, white lettering on terracotta-painted stones, creates a cohesive look that feels designed rather than random.
2. Upcycled Tire Planters
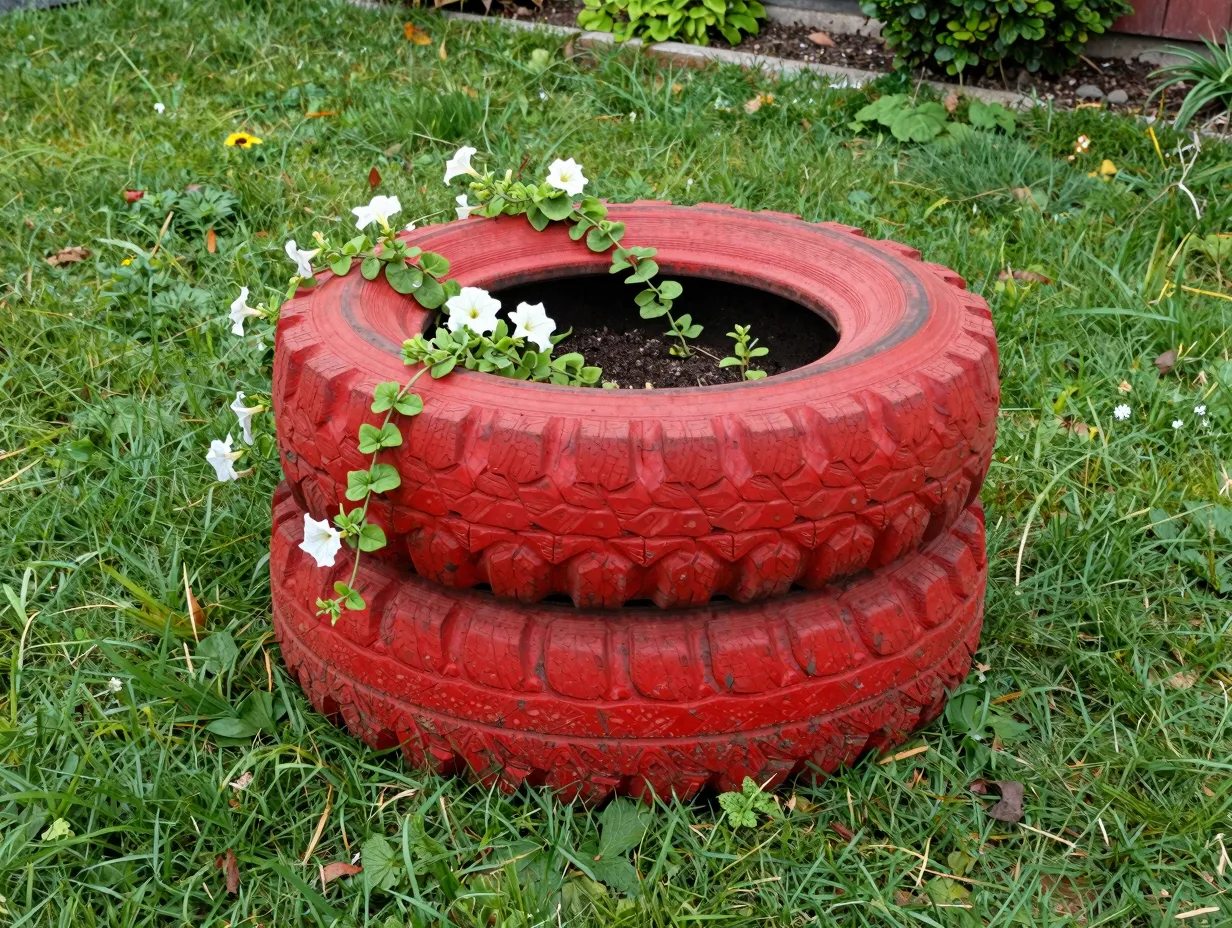
Estimated cost: $0 to $15
Old tires are one of the most underused resources in DIY garden decor. They are durable, weather-resistant, and free if you ask at a local tire shop or auto garage. Most shops are happy to give them away since disposal costs money.
To create a planter, clean the tire, paint it with exterior spray paint in the color of your choice, and fill it with a mixture of potting soil and compost. You can stack two tires for a raised planter effect, or cut the sidewall of a tire and flip it inside out to create a flower-shaped planter, a technique that requires a sharp utility knife and some patience but produces a striking result.
Important safety note: Some research suggests that tire rubber can leach chemicals into soil over time. For this reason, tire planters are best used for ornamental plants rather than edible crops. Use them for petunias, marigolds, succulents, or ornamental grasses.
A single bright-red tire planter filled with trailing vines can anchor a corner of your yard and draw the eye in a way that a standard terracotta pot simply cannot.
3. Mason Jar Lanterns
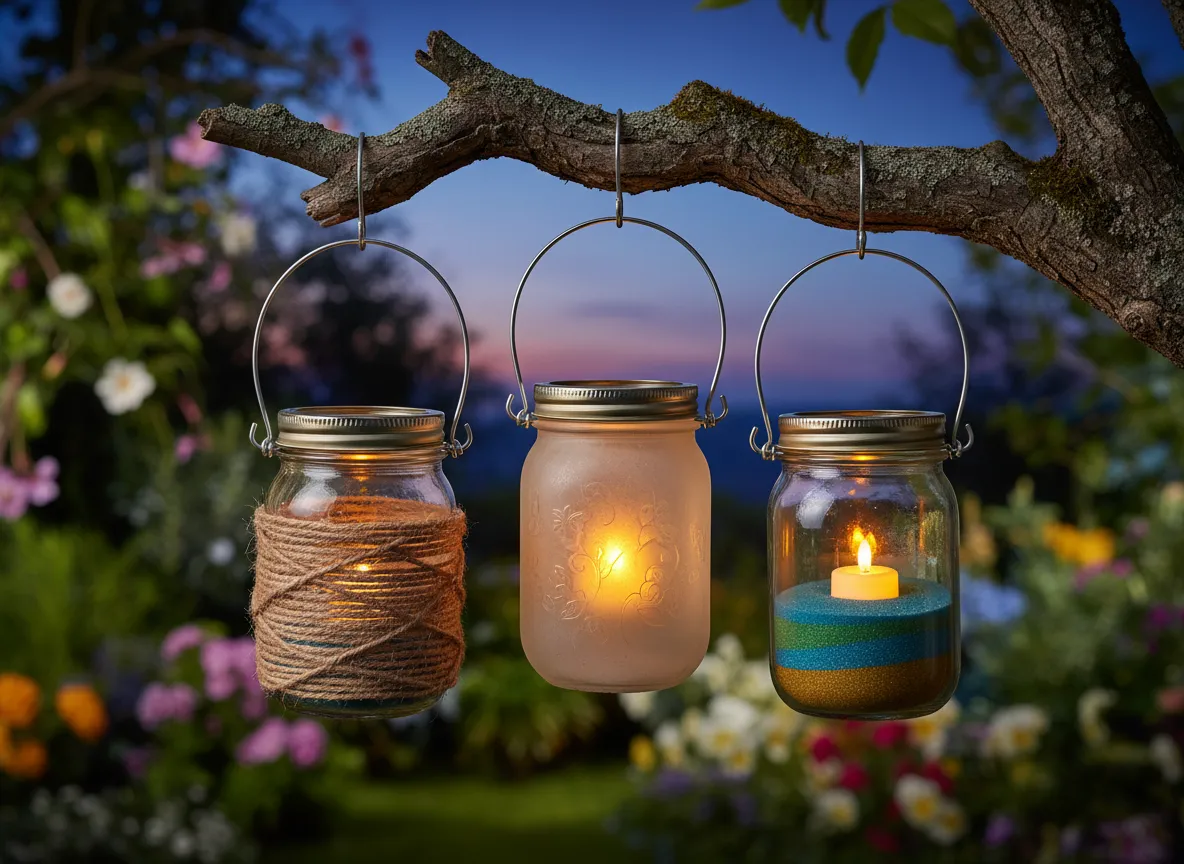
Estimated cost: $5 to $20
Mason jar lanterns are a classic for a reason: they are inexpensive, endlessly customizable, and genuinely beautiful at dusk. You can hang them from tree branches, line them along a fence, or cluster them on an outdoor table.
The simplest version involves placing a tea light or a battery-operated LED candle inside a clean mason jar. But with a few extra steps, you can elevate this project considerably:
- Wrap the outside of the jar with twine, lace, or copper wire for texture.
- Paint the glass with frosted glass paint for a soft, diffused glow.
- Fill the bottom of the jar with colored sand, small pebbles, or dried lavender before adding the light.
- Use a hole punch on a strip of sheet metal to create a decorative collar around the jar’s neck.
For a cohesive look, use jars of the same size but vary the finishes, some frosted, some wrapped in twine, some plain. Group them in odd numbers (three or five) for a more natural arrangement.
Hanging tip: Use galvanized wire threaded through the jar’s screw band to create a sturdy hanging loop. This holds far better than twine alone in wind or rain.
4. Driftwood Wind Chimes
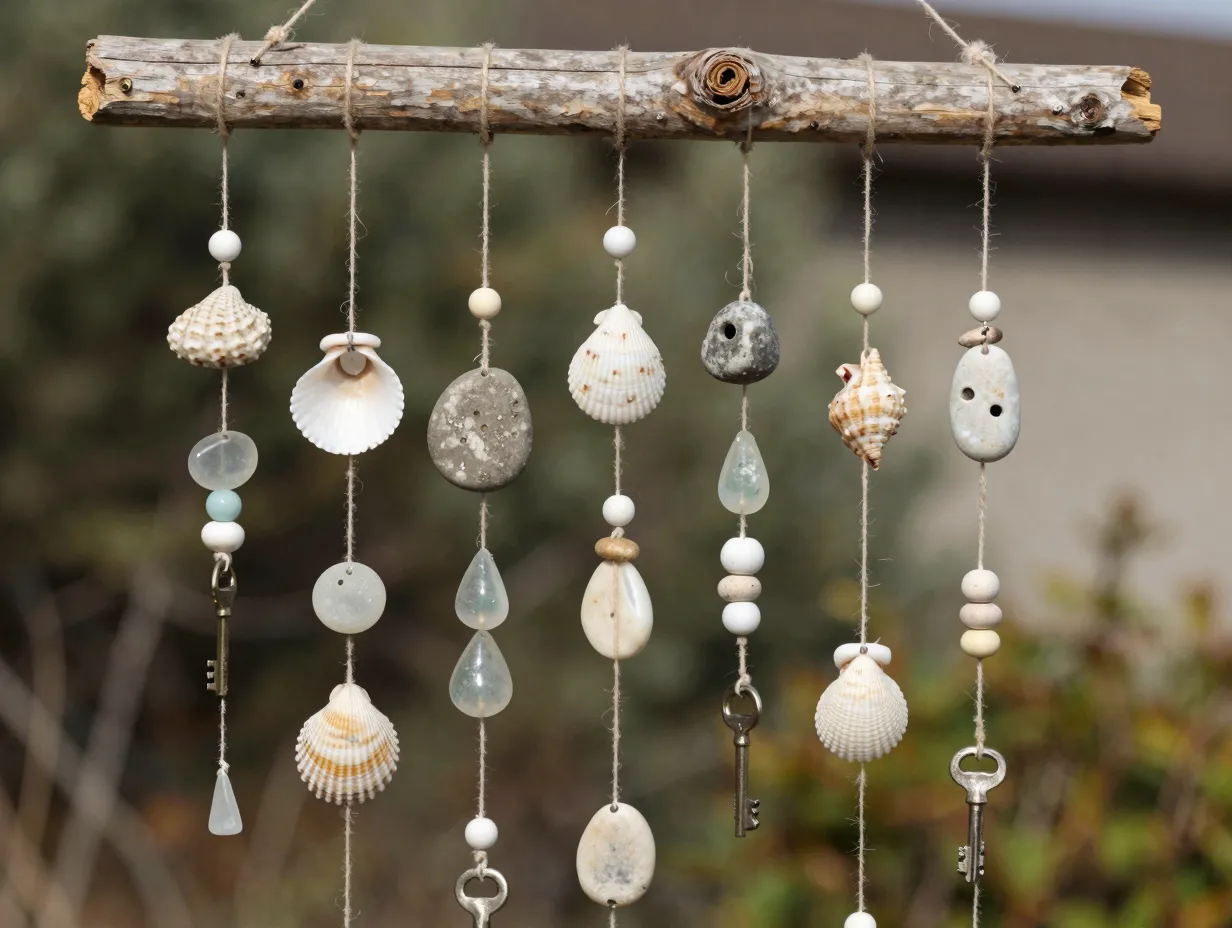
Estimated cost: $5 to $25
Wind chimes add a sensory dimension to a garden that visual decor alone cannot provide. Store-bought versions are often expensive and generic. A handmade driftwood wind chime, by contrast, has a rustic, organic quality that suits almost any garden style.
Collect a straight piece of driftwood or a thick branch as your top bar. From it, hang a series of elements using fishing line or thin twine: shells, smooth river stones with drilled holes, pieces of sea glass, old keys, or small clay beads. The key to a good wind chime is varying the lengths of the hanging elements so they move independently and strike each other at different times.
Drilling holes through shells and stones requires a small drill bit designed for masonry or tile, available at any hardware store for a few dollars. Take your time and use a slow drill speed to avoid cracking.
Design tip: Limit yourself to two or three materials per chime to avoid a cluttered look. Shells and sea glass together, for example, create a coastal feel. Stones and old keys together suggest a more rustic, woodland aesthetic.
5. Repurposed Ladder Plant Stand
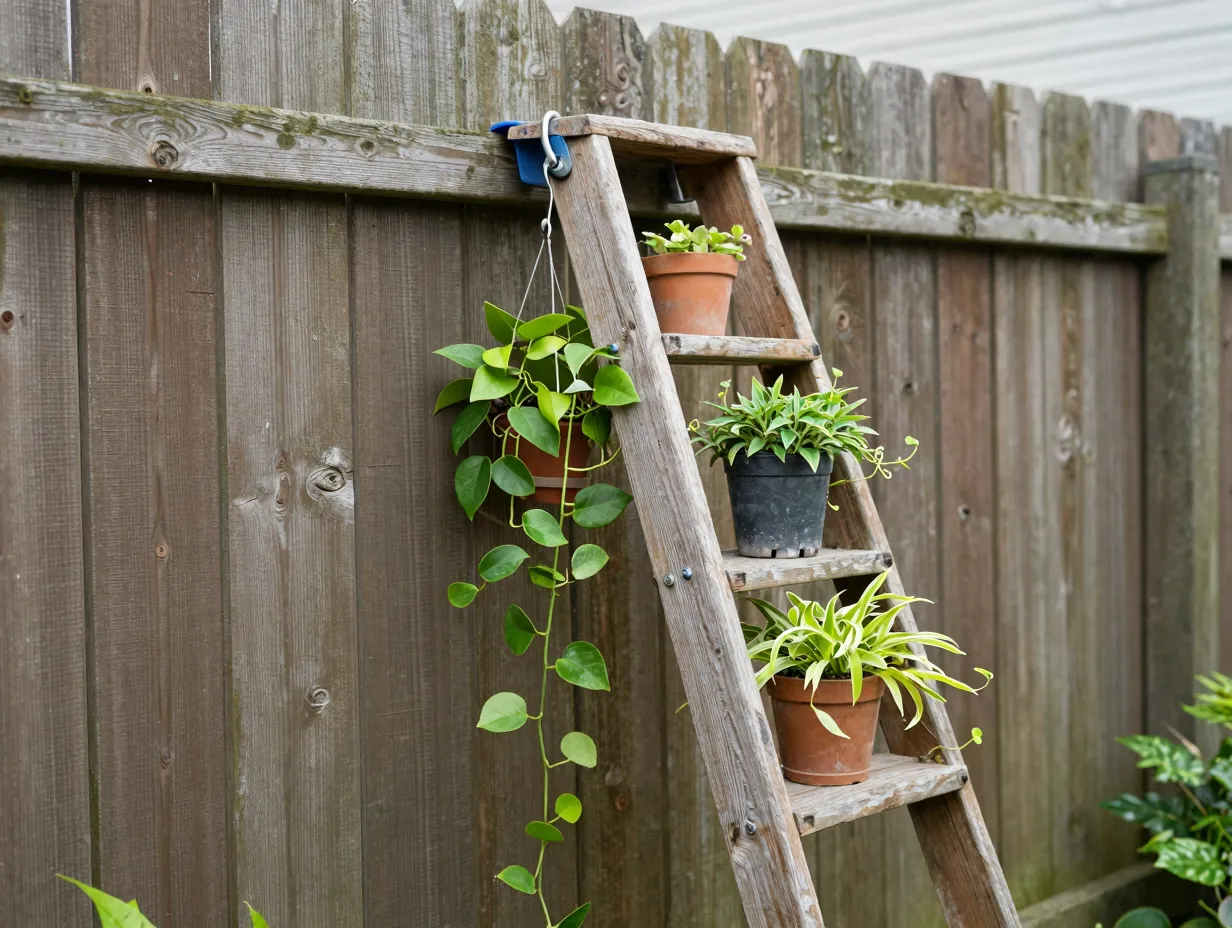
Estimated cost: $0 to $20
An old wooden ladder, the kind you might find at a thrift store, estate sale, or in a neighbor’s trash pile, makes an exceptional plant stand. Lean it against a fence or wall, sand it lightly, and paint or stain it to match your outdoor color scheme.
Each rung becomes a shelf for a potted plant. Vary the pot sizes and plant heights to create a layered, dynamic display. Trailing plants like pothos or sweet potato vine draped over the lower rungs add a lush, overgrown quality that looks intentional and beautiful.
A leaning ladder plant stand works especially well in small spaces because it uses vertical real estate rather than spreading across the ground. If you have a narrow side yard, a balcony, or a small patio, this project can transform what felt like a limitation into a feature.
Stability tip: Anchor the top of the ladder to the fence or wall with a simple hook-and-eye latch to prevent it from tipping in wind.
6. Concrete Leaf Stepping Stones
Estimated cost: $10 to $30
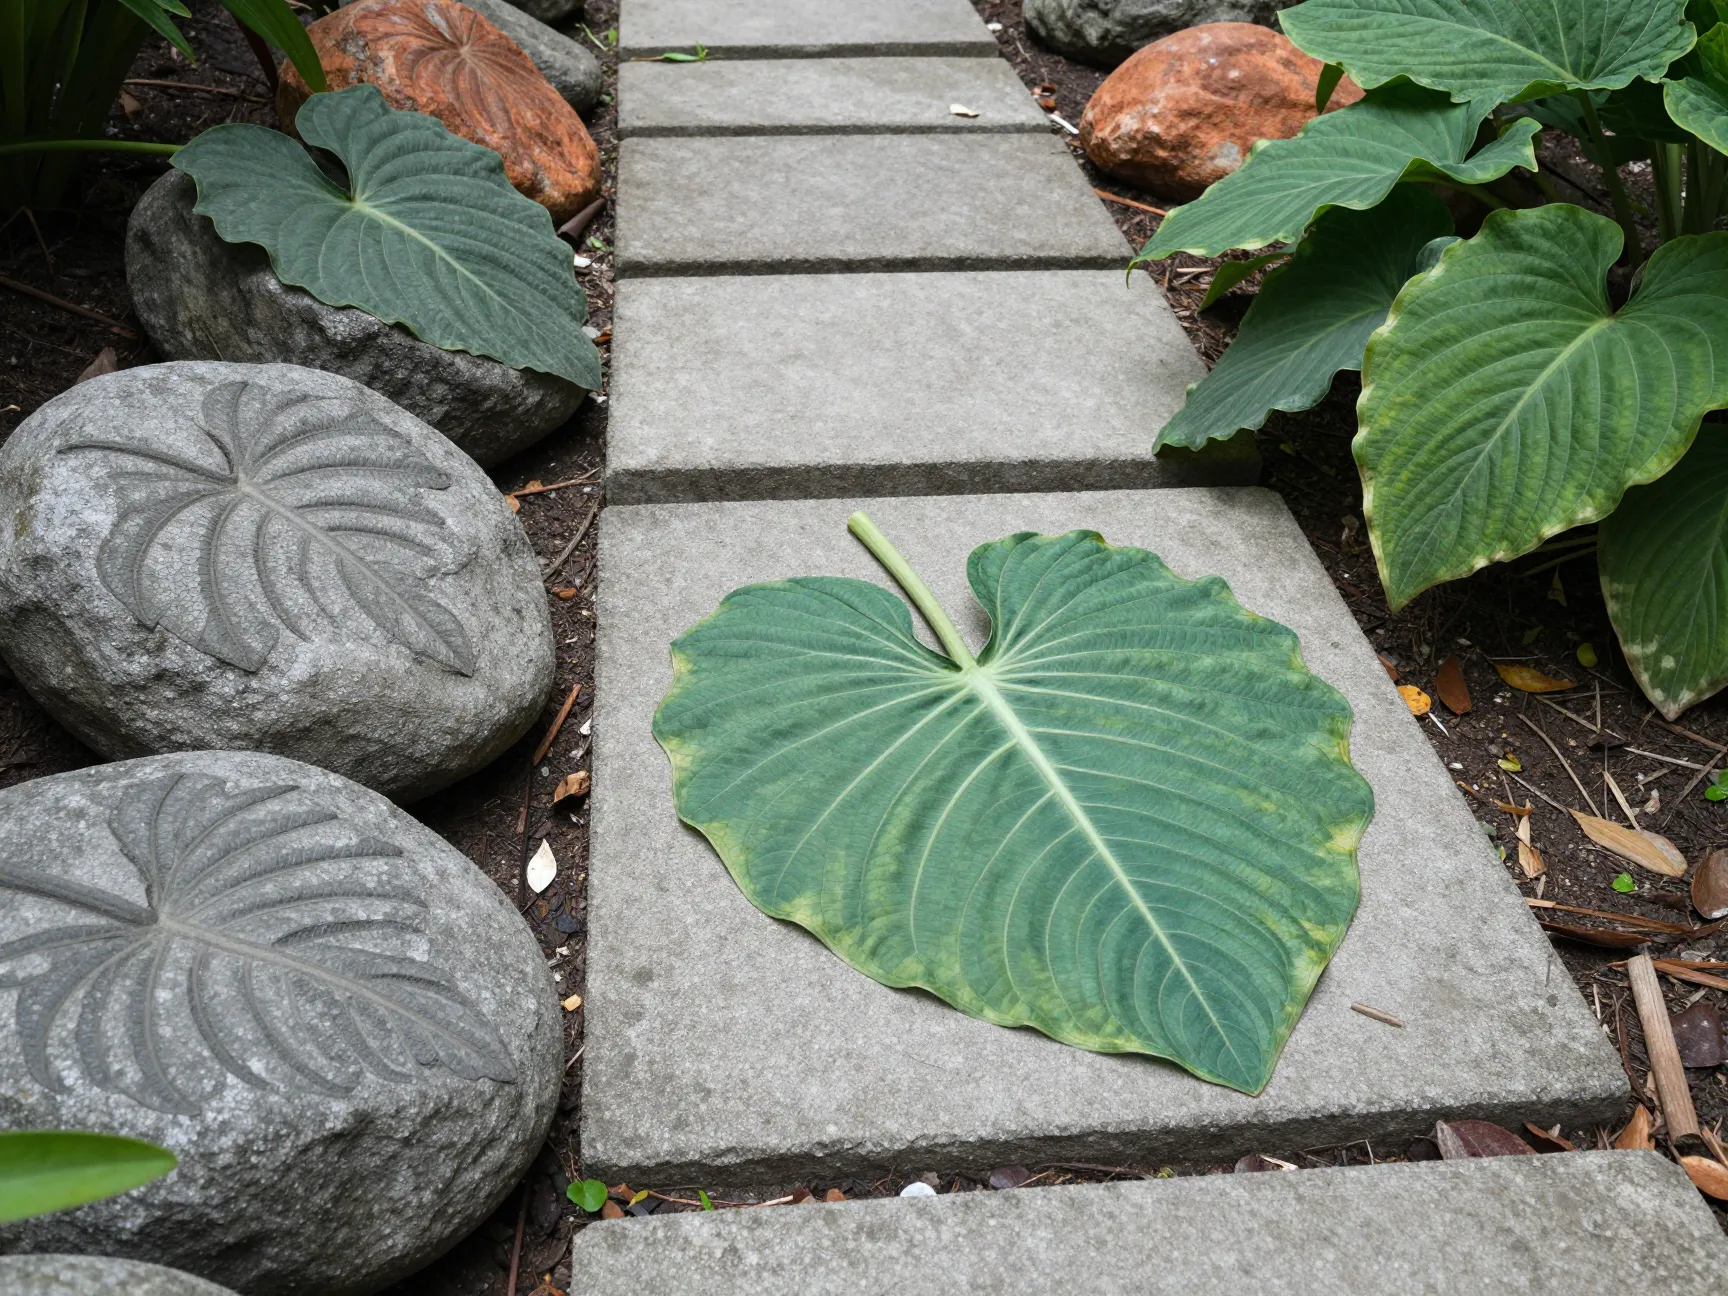
This project produces results that genuinely look professional, even for first-timers. The process is straightforward: find a large leaf with prominent veins (rhubarb, hosta, and elephant ear leaves all work beautifully), press it vein-side up into a mound of wet concrete, and let it cure.
Here is a more detailed breakdown of the process:
- Mix ready-mix concrete according to package directions until it reaches a thick, peanut-butter-like consistency.
- Shape the concrete into a mound on a flat surface covered with plastic sheeting.
- Press the leaf vein-side down into the concrete, smoothing the edges.
- Let it cure for 24 to 48 hours, then carefully peel away the leaf.
- Optionally, paint the finished stone with concrete paint or a wash of diluted acrylic in green, gray, or terracotta.
The result is a stepping stone that captures every detail of the leaf’s structure in permanent form. A path of these stones through a garden bed is one of the most visually striking things you can create for under thirty dollars.
7. Copper Pipe Trellis
Estimated cost: $15 to $40
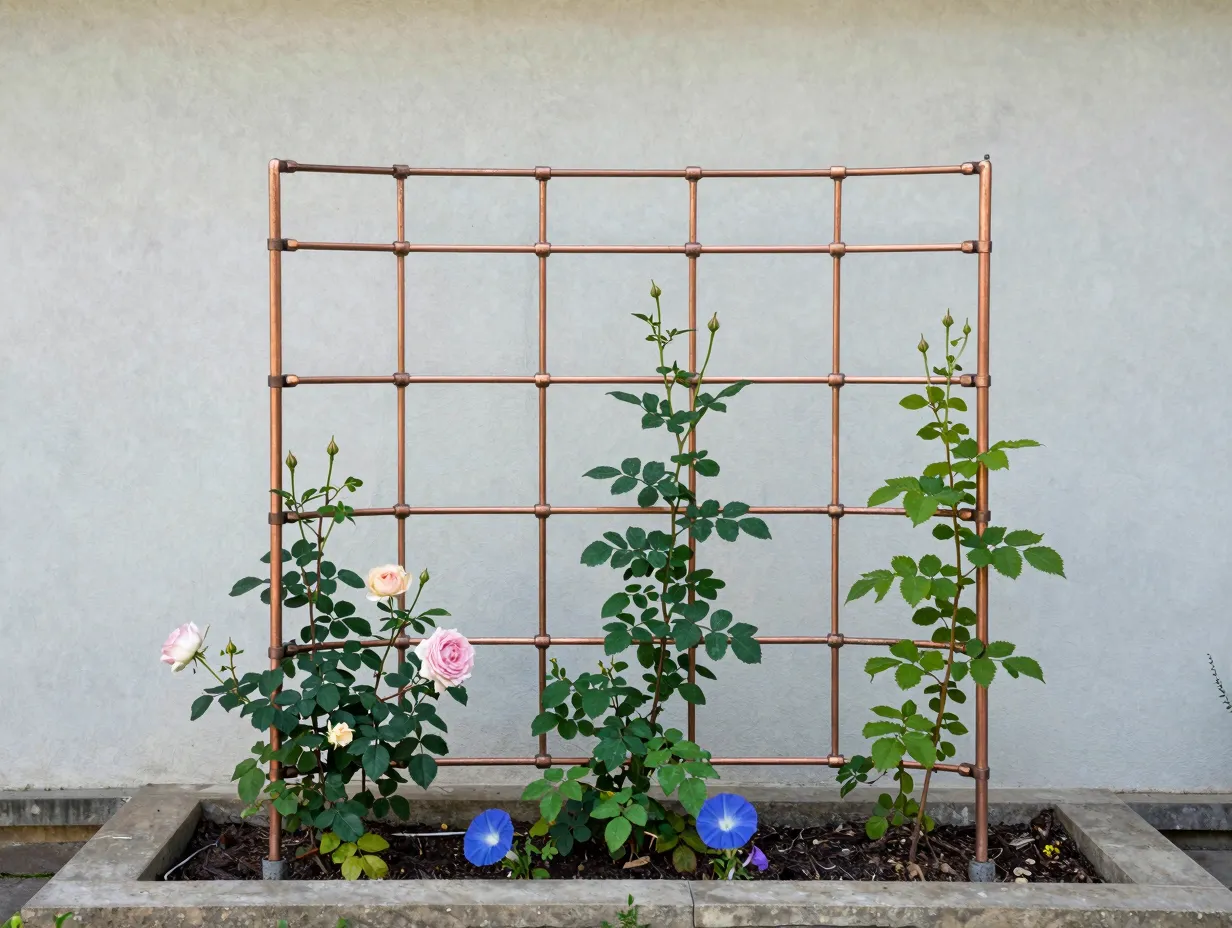
A trellis is one of the most functional pieces of garden decor you can build. It supports climbing plants, adds vertical structure, and creates a sense of depth in a flat garden bed. Most store-bought trellises are either flimsy plastic or expensive wrought iron. A copper pipe trellis splits the difference: it is affordable, durable, and genuinely beautiful.
Copper pipe and fittings are available at any hardware store. You do not need to solder, simple push-fit connectors or even strong waterproof adhesive will hold the structure together for outdoor use. Design a simple grid or geometric pattern, cut the pipes to length with a pipe cutter (a $10 to $15 tool), and assemble.
Over time, copper develops a green patina that many gardeners find even more attractive than the original bright metal. Plant a climbing rose, clematis, or morning glory at its base and within a season you will have a feature that looks like it came from a high-end garden catalog.
Sizing tip: Build your trellis at least 18 inches wide and 48 inches tall to give climbing plants enough room to spread naturally.
8. Mosaic Birdbath
Estimated cost: $15 to $45
A mosaic birdbath is the most involved project on this list, but it is also the most rewarding. It becomes a true centerpiece, the kind of thing visitors photograph and ask about.
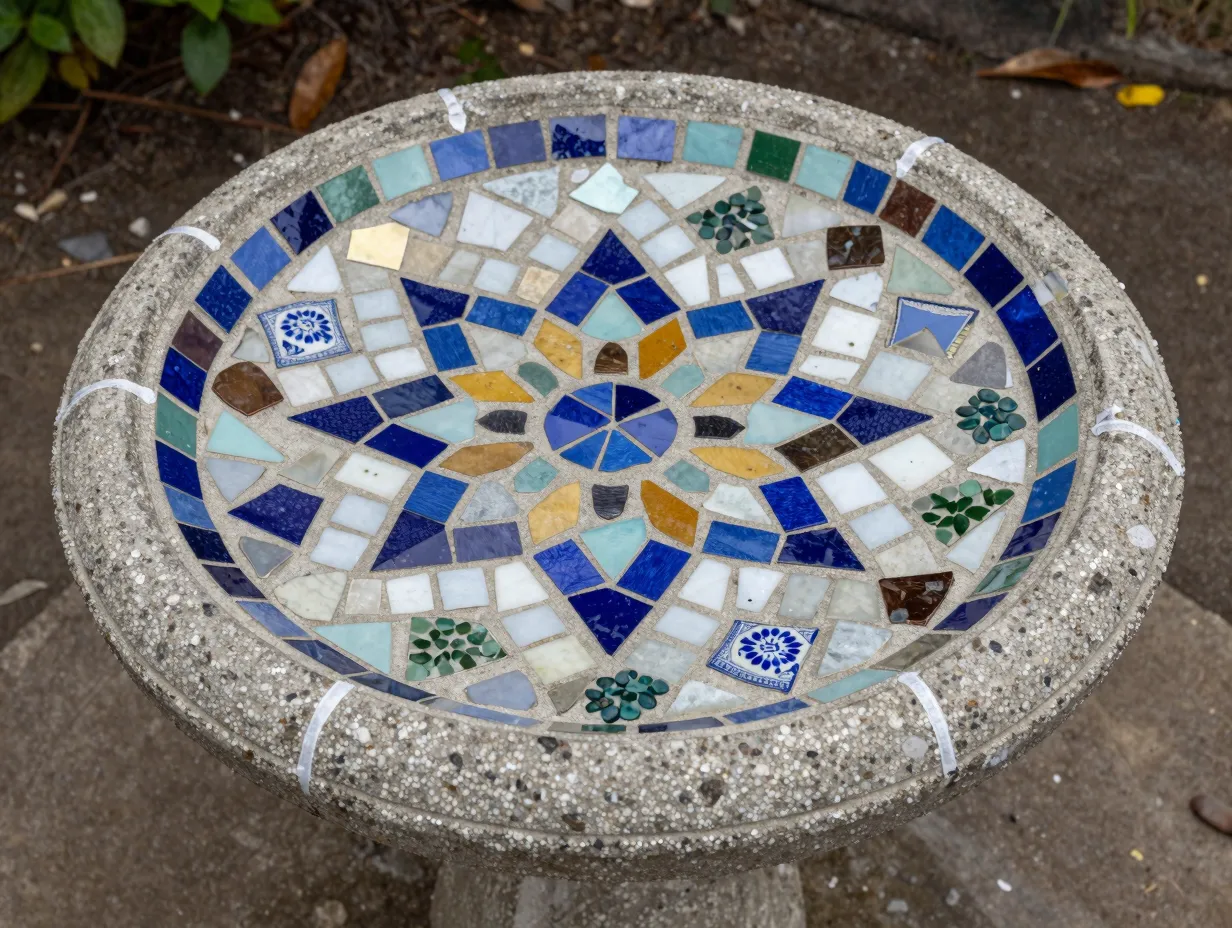
Start with an inexpensive plain concrete birdbath from a garden center or thrift store. Collect broken tiles, old china, sea glass, or mirror pieces. Use tile adhesive to arrange your mosaic design on the basin of the birdbath, then grout the finished surface with waterproof tile grout.
A few design principles that make mosaic work look polished:
- Choose a limited color palette (two or three colors plus a neutral grout).
- Use a focal element, a central flower, a sun, a geometric star, and build outward from it.
- Keep your grout lines consistent in width for a professional finish.
- Seal the finished mosaic with a tile sealer to protect it from freeze-thaw cycles.
The process takes a weekend, but the result is a one-of-a-kind garden feature that will last for years. Birds do not care about aesthetics, but your guests certainly will.
How to Make These Projects Work Together
Executing individual projects well is one thing. Making them feel like a cohesive, designed space is another. Here are the principles I use to tie multiple DIY garden decor projects together into a unified yard aesthetic.
Choose a palette and stick to it. Pick two or three colors that appear across your projects, on your painted rocks, your tire planters, your mason jar lanterns. This repetition creates visual harmony even when the projects themselves are very different.
Repeat materials. If you use copper pipe for your trellis, add a few copper wire details to your mason jar lanterns. If you use driftwood for your wind chime, incorporate a driftwood element into your plant stand. These small echoes make a yard feel thoughtfully designed.
Use odd numbers. Groups of three or five almost always look better than groups of two or four. This applies to planters, stepping stones, lanterns, and almost any other garden element.
Let plants do the heavy lifting. The best garden decor is a backdrop for plants, not a replacement for them. Make sure each of your DIY projects is surrounded by, filled with, or framing living plants. The combination of handmade objects and growing things is what makes a garden feel truly alive.
Budget Planning for Your DIY Garden Decor Projects
One of the most common mistakes in DIY garden projects is underestimating costs. Here is a realistic budget overview for all 8 projects covered in this guide.
| Project | Low-End Cost | High-End Cost | Best Material Source |
|---|---|---|---|
| Painted Rock Markers | $0 | $5 | Riverbed, garden store |
| Tire Planters | $0 | $15 | Auto shop (free) |
| Mason Jar Lanterns | $5 | $20 | Dollar store, thrift store |
| Driftwood Wind Chimes | $5 | $25 | Beach, craft store |
| Ladder Plant Stand | $0 | $20 | Thrift store, estate sale |
| Concrete Leaf Stones | $10 | $30 | Hardware store |
| Copper Pipe Trellis | $15 | $40 | Hardware store |
| Mosaic Birdbath | $15 | $45 | Thrift store, tile shop |
Total range for all 8 projects: $50 to $200, a fraction of what comparable store-bought decor would cost.
Common Mistakes to Avoid
Even simple DIY projects can go wrong without a little foresight. Here are the most common errors I see in outdoor garden decor projects, and how to avoid them.
Skipping weatherproofing. Outdoor decor faces sun, rain, frost, and humidity. Any paint, wood, or paper element that is not sealed for outdoor use will deteriorate quickly. Always use exterior-grade paint, outdoor sealers, and waterproof adhesives.
Overcrowding the space. More is not always more in garden design. A yard filled with too many competing projects looks chaotic rather than creative. Choose three to five projects for a given space and give each one room to breathe.
Ignoring scale. A tiny wind chime hung in a large open yard will disappear visually. A massive tire planter on a small patio will overwhelm it. Match the scale of your projects to the scale of your space.
Using indoor materials outdoors. Regular craft paint, standard wood glue, and interior varnish will all fail outdoors within a season. Check every product label before you buy.
Conclusion
The 8 DIY outdoor garden decor projects to personalize your yard on a budget covered in this guide prove that a beautiful, distinctive outdoor space is well within reach for anyone willing to invest a weekend and a modest amount of money. From the simplicity of painted rock markers to the craftsmanship of a mosaic birdbath, each project offers a meaningful return on a small investment.
Here are your actionable next steps:
- Walk through your yard today and identify one area that feels bare, generic, or underused.
- Choose one project from this list that fits your skill level and budget, start with painted rock markers or mason jar lanterns if you are new to DIY.
- Gather your materials from thrift stores, hardware stores, or your own recycling bin before buying anything new.
- Complete that first project, then step back and assess how it changes the feel of the space.
- Build from there, keeping your color palette and material choices consistent across projects.
In 2026, the most compelling outdoor spaces are not the most expensive ones. They are the ones that feel lived-in, intentional, and genuinely personal. Start with one project this weekend. Your yard, and everyone who visits it, will thank you.
References
- National Gardening Association. (2023). National Gardening Survey. National Gardening Association.
- Rhoades, H. (2022). DIY garden art: Making your garden unique. Gardening Know How.
- Walliser, J. (2020). Attracting beneficial bugs to your garden: A natural approach to pest control. Storey Publishing.
- Bartholomew, M. (2013). All new square foot gardening. Cool Springs Press.